In Mosaic, a template shapes how content is displayed on a website. It works within a Master which surrounds the content of the template. Each template is also assigned a specific type, determining its role and where it appears in response to user requests, for example, homepage, blog archive, or post. Templates can be customized with unique conditions. For instance, certain templates might only be visible to users who are logged in.
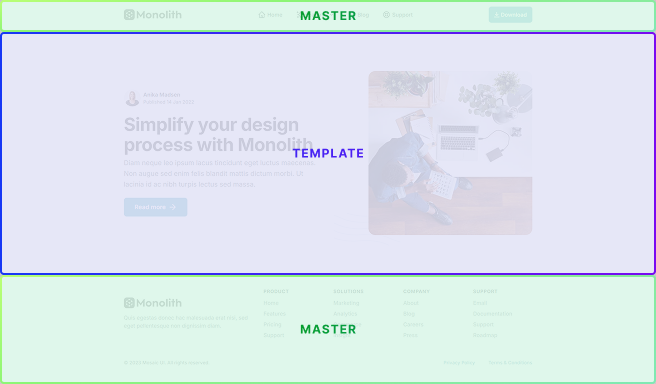
Template ↔ Master
A Master functions as a reusable parent layout, providing a consistent structure for multiple templates. This means that a Template cannot exist without a Master. This inheritance model ensures uniformity and coherence in the overall design, aligning with the design principle of consistency. You can also recognize when you are editing a Template by the blue highlight color used for its scope.
Assignment to pages and posts
Assignment determines how templates are applied—either to individual pages and posts, or automatically across multiple pieces of content.
Manual assignment
Templates in Mosaic can be manually assigned to specific pages. This is the most common approach when you want to create a unique page design, such as an About page or a Home page. You can assign the template to a page during its creation.
Alternatively, you can assign a template to a specific page, post, or custom post directly from the WordPress Pages or Posts screens. This template will only be used for that page/post, allowing full customization without affecting other content on the site.

So in this case you can think of templates as pages. Have a separate template for every page you have.
Automatic assignment
Templates can also be automatically assigned. For example, a Single post template is used to display all blog posts with dynamic content. Automatic templates are applied to multiple pages or posts based on their type and matching conditions.
Template type
In Mosaic, each template is assigned a specific type. This template type is used to serve user requests when the template is automatically assigned. It is also the context that determines what Variables are available in the Editor.
For example, if the post type is Single post, you will have access to Single post variables, like the post Title, Excerpt, and so on.
The following is a list of available template types.
Post
- Single Post: This template is used to display a single blog post or article.
- Homepage – Post Archive: This template displays a collection of recent posts in an archive format. This option only appears if the “WordPress Settings → Reading → Your homepage displays” is set to “Your latest posts”. Otherwise, if it is set to a custom page, you will need to make a template for that page.
- Categories Archive: This template organizes posts based on their assigned categories. It creates a page where users can explore content specific to a particular category.
- Tags Archive: Similar to the categories archive, the tags archive template organizes posts based on assigned tags.
- Formats Archive: The formats archive template organizes posts based on their assigned formats.
- Author Archive: This template displays a collection of posts authored by a specific individual. It serves as an author profile page, showcasing their contributions.
Page
- Single page: This is similar to the single post template but is designed for individual pages rather than blog posts.
Media
- Single media: If your site includes media items like images, videos, or audio files, this template is used to display a single media item with relevant details.
Other
- Search result: When users perform a search on your website, the search result template displays a list of relevant posts or pages based on the search query.
- 404 Not found: This template is shown when a user tries to access a page that doesn’t exist. It usually provides a user-friendly message indicating that the requested content could not be found.
Fallback
- Inactive – Homepage fallback: If your homepage is set to display a static page and that page becomes inactive or is deleted, this fallback template may be used to show an alternative homepage or a default message.
- Single fallback: Similar to the 404 template, but is used for individual posts or pages that are no longer available or have been deleted.
- Archive fallback: If an archive page (like categories or tags) has no content to display, this template may show a fallback message or default content.
- Empty: A generic template, used for cases where there is no content to display, often accompanied by a message indicating the absence of content.
Managing templates
To create or edit templates, first open Mosaic and then locate Templates in the Left menu.
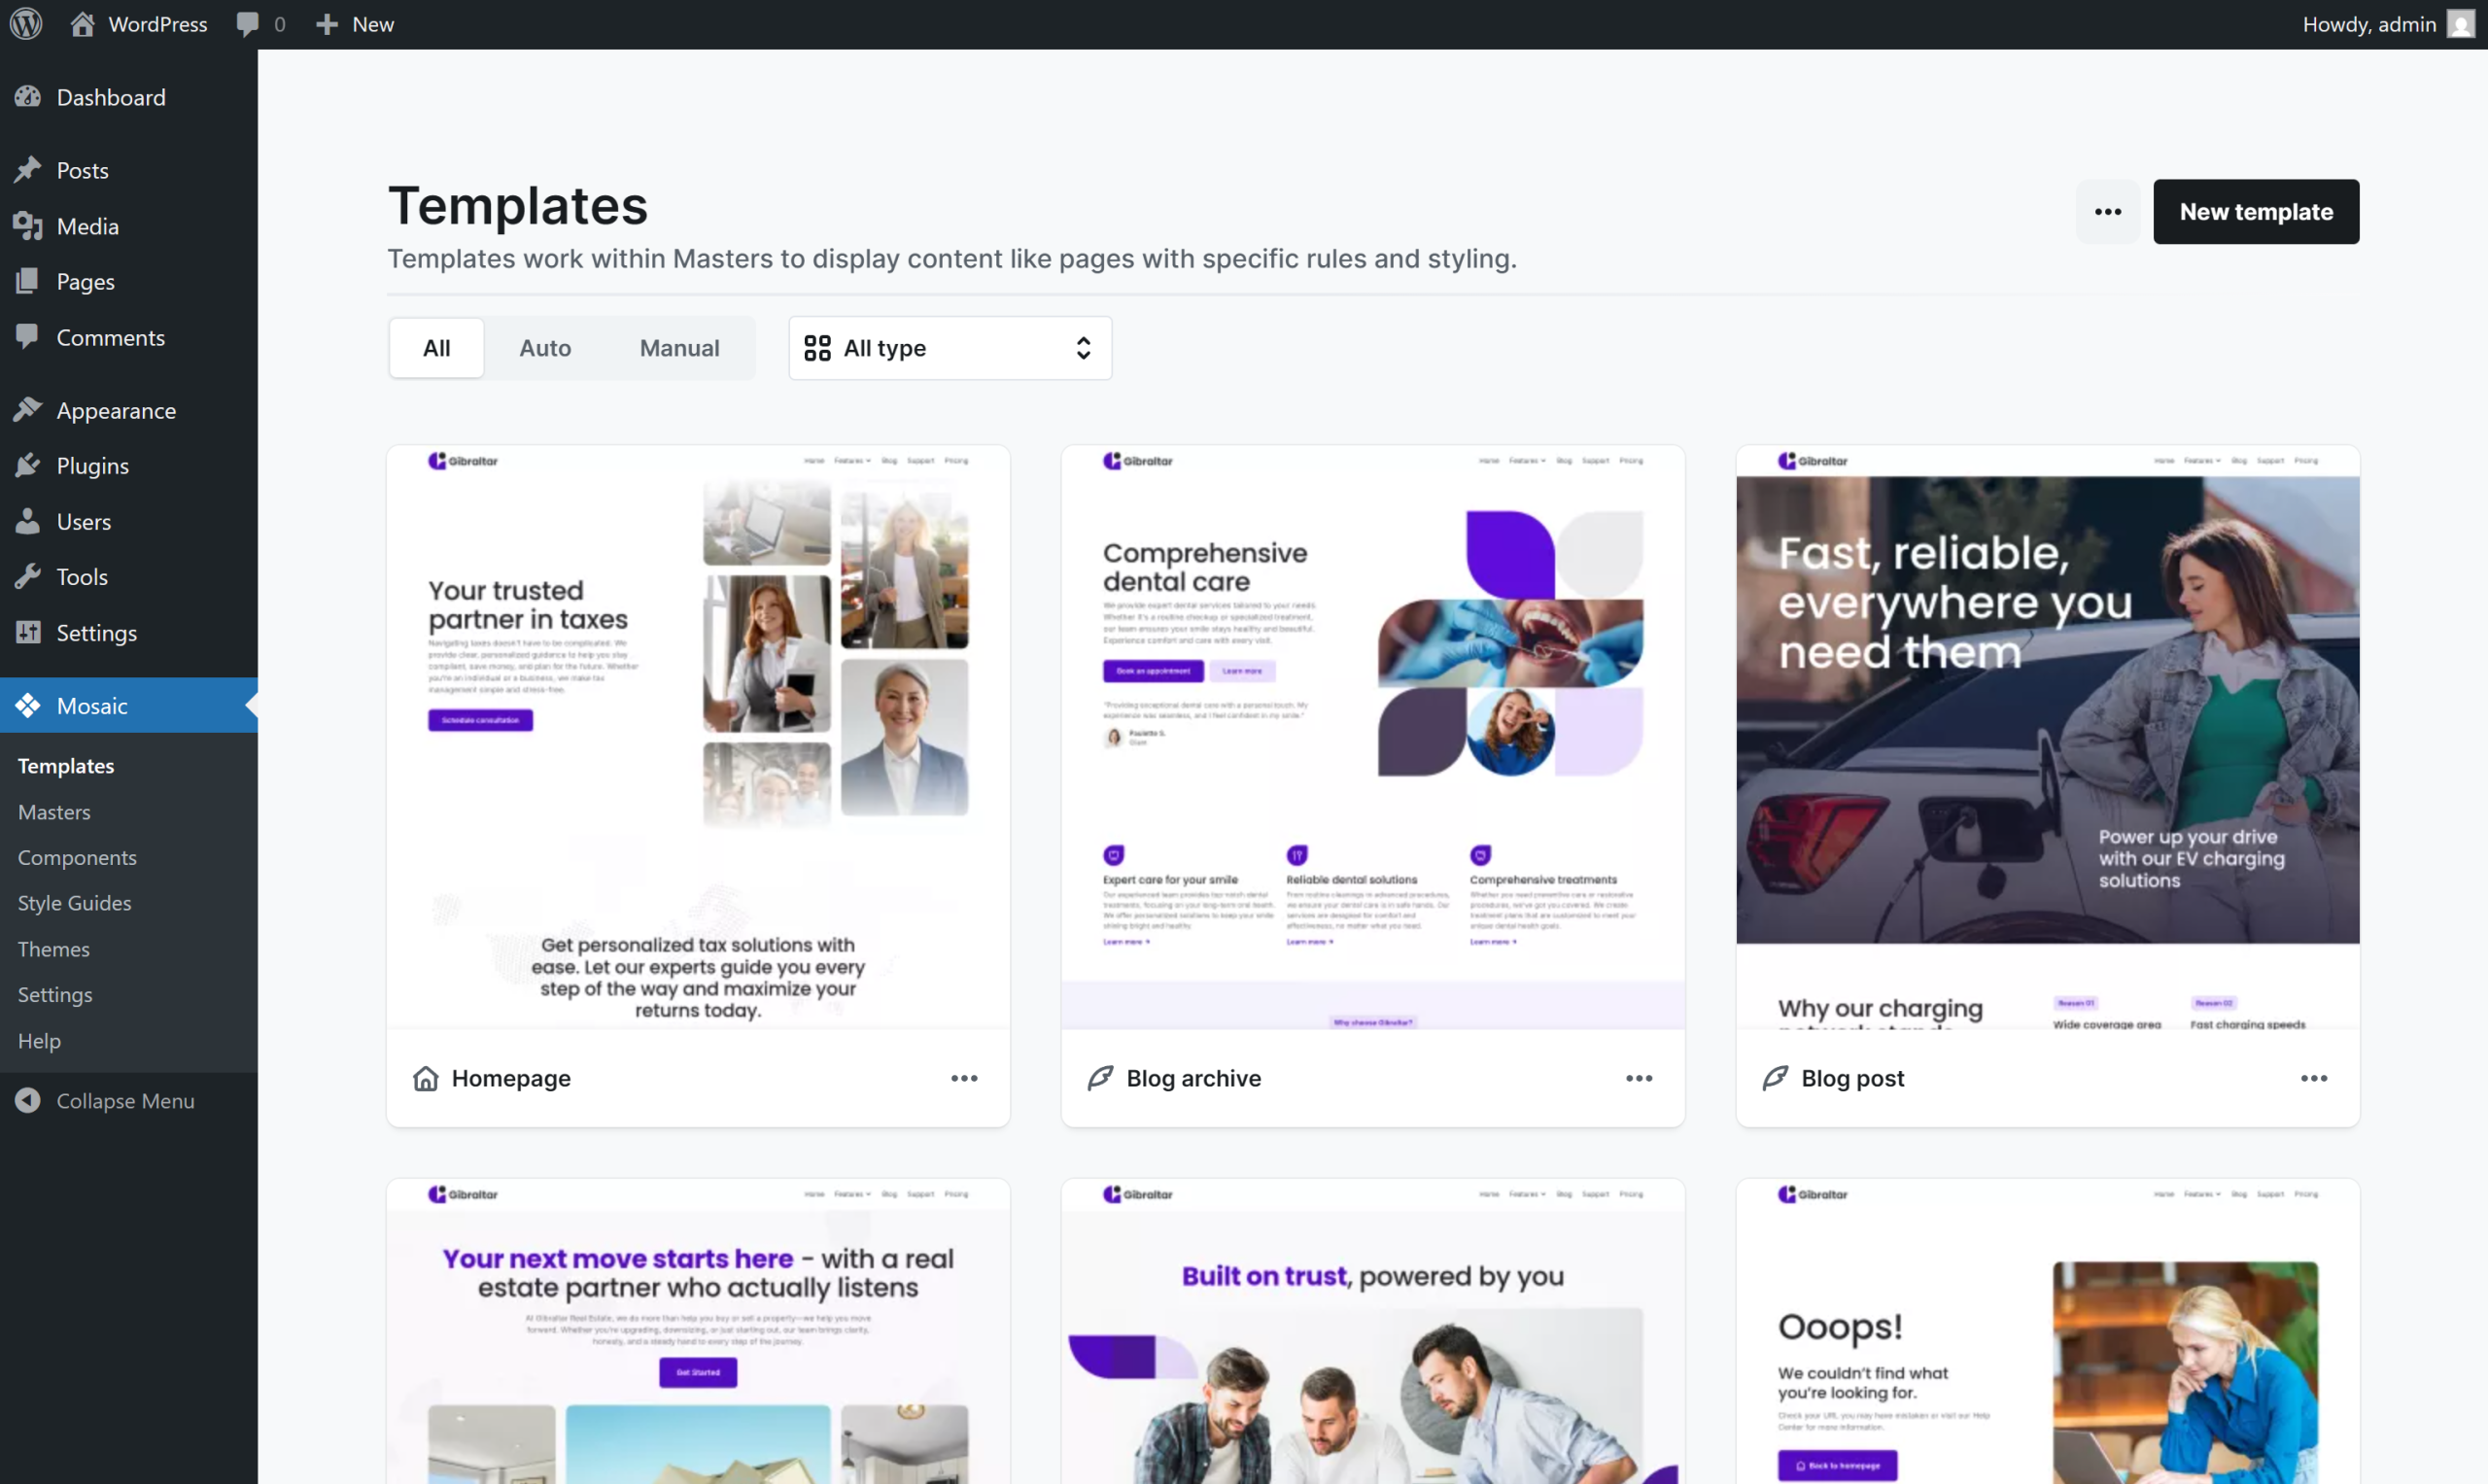
In this interface, you’ll see a list of your Templates. You can create new templates here or edit the settings of the existing templates. By selecting a template, you will be directed to its Editing interface.
For more options, use the Context menu accessible via the three dots on each Template. This menu allows for various actions:
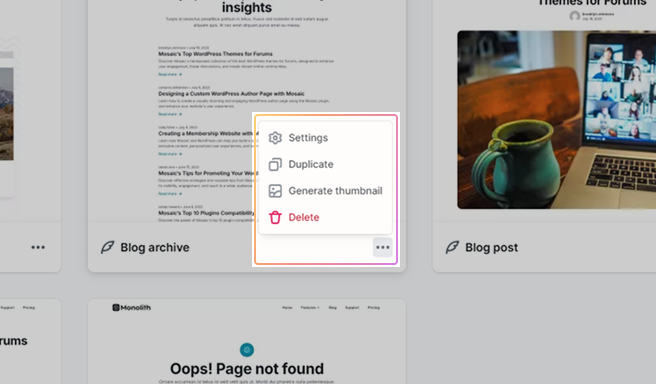
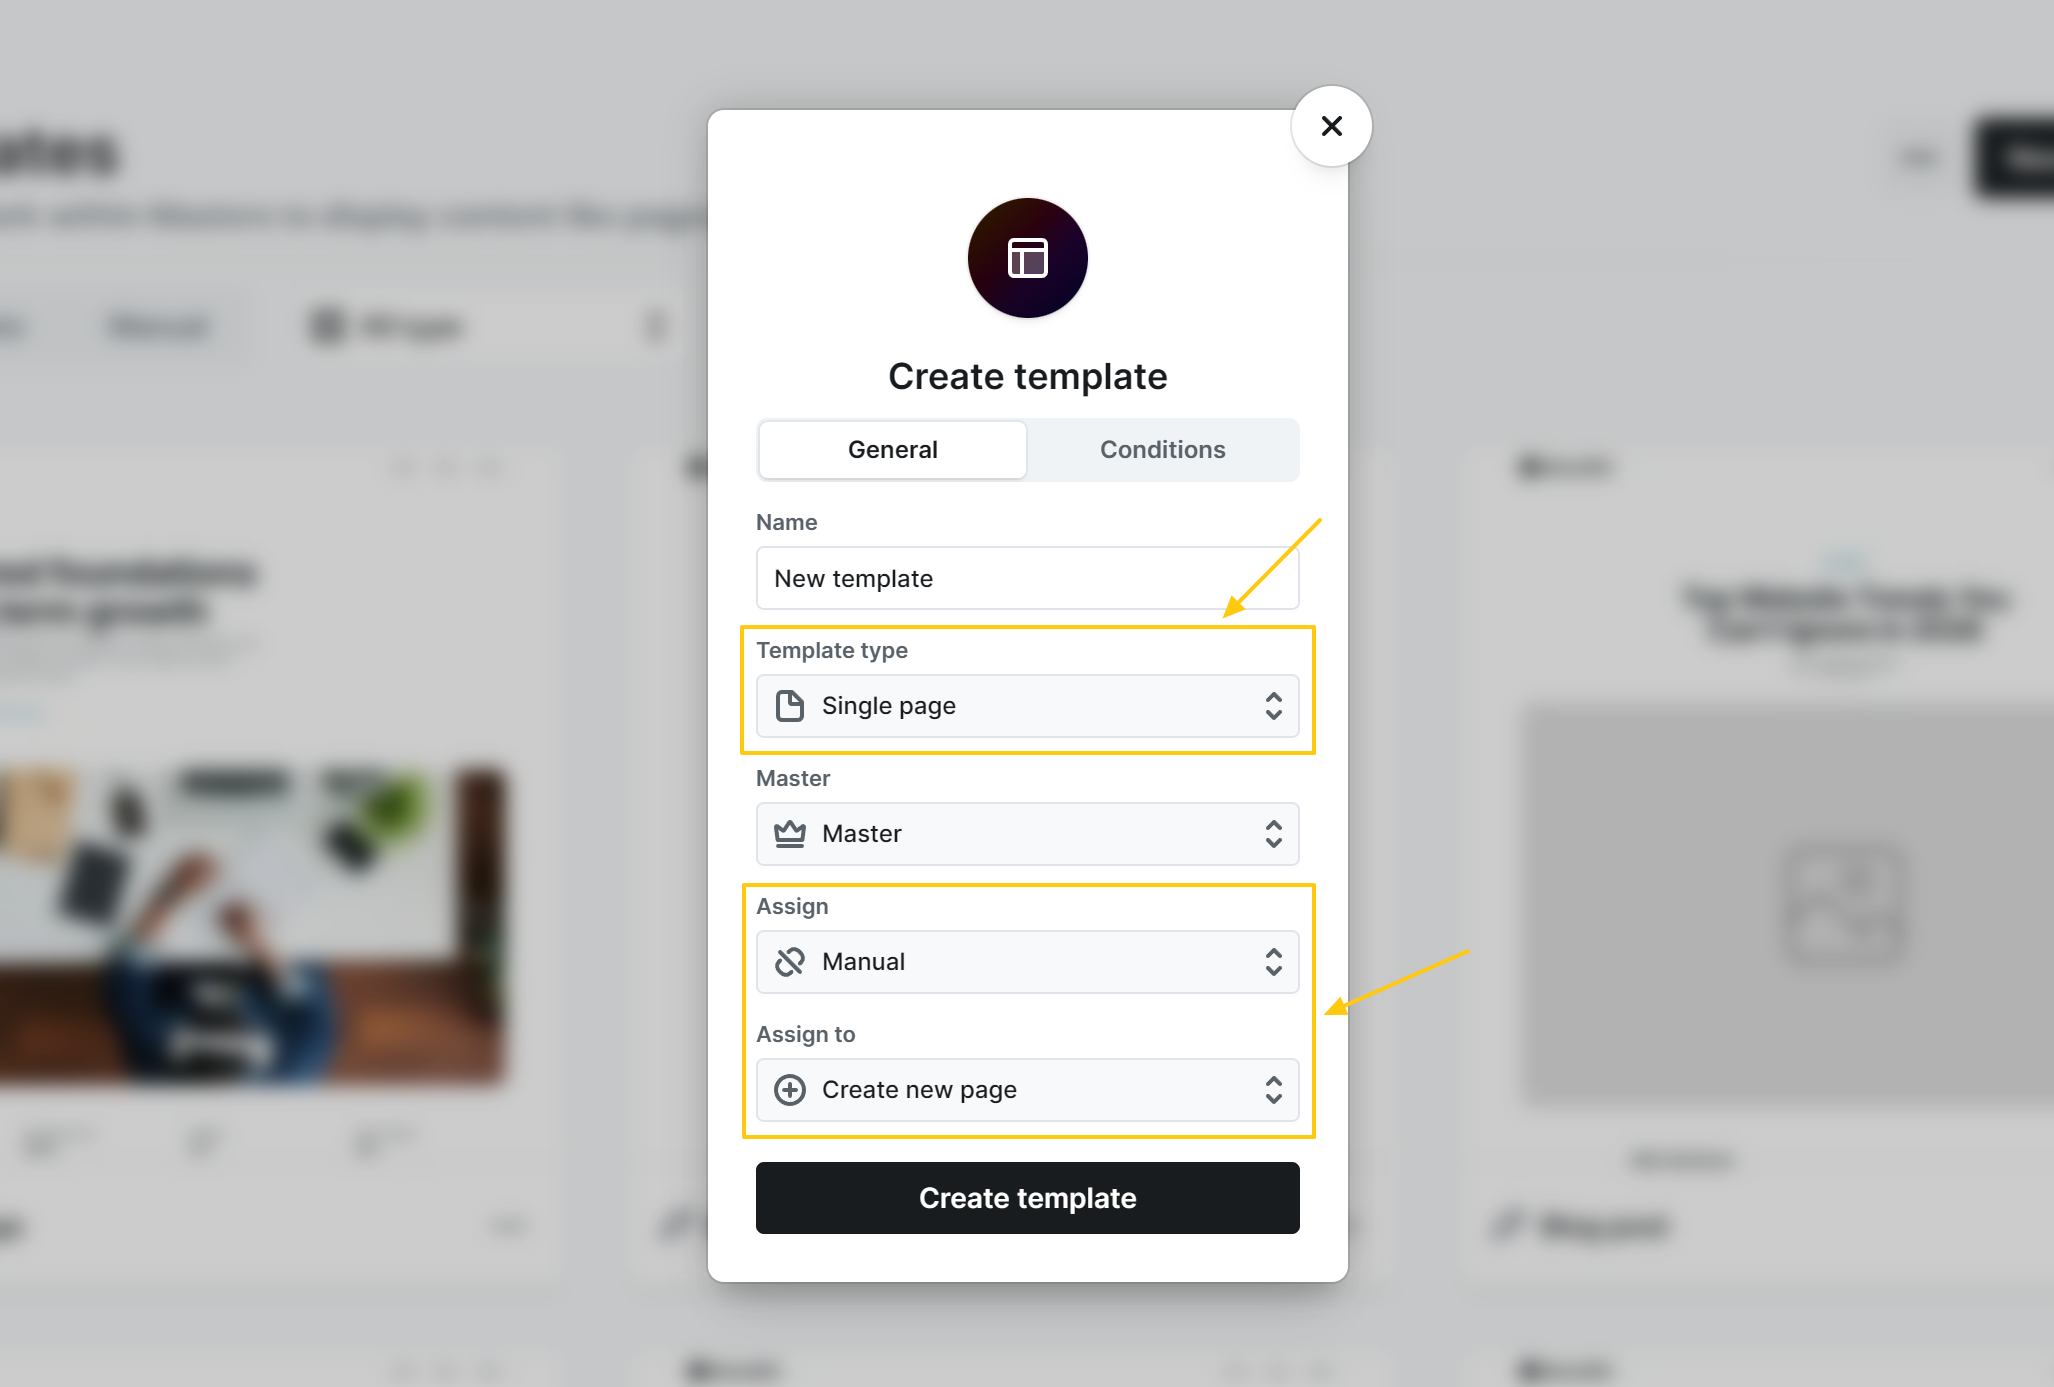
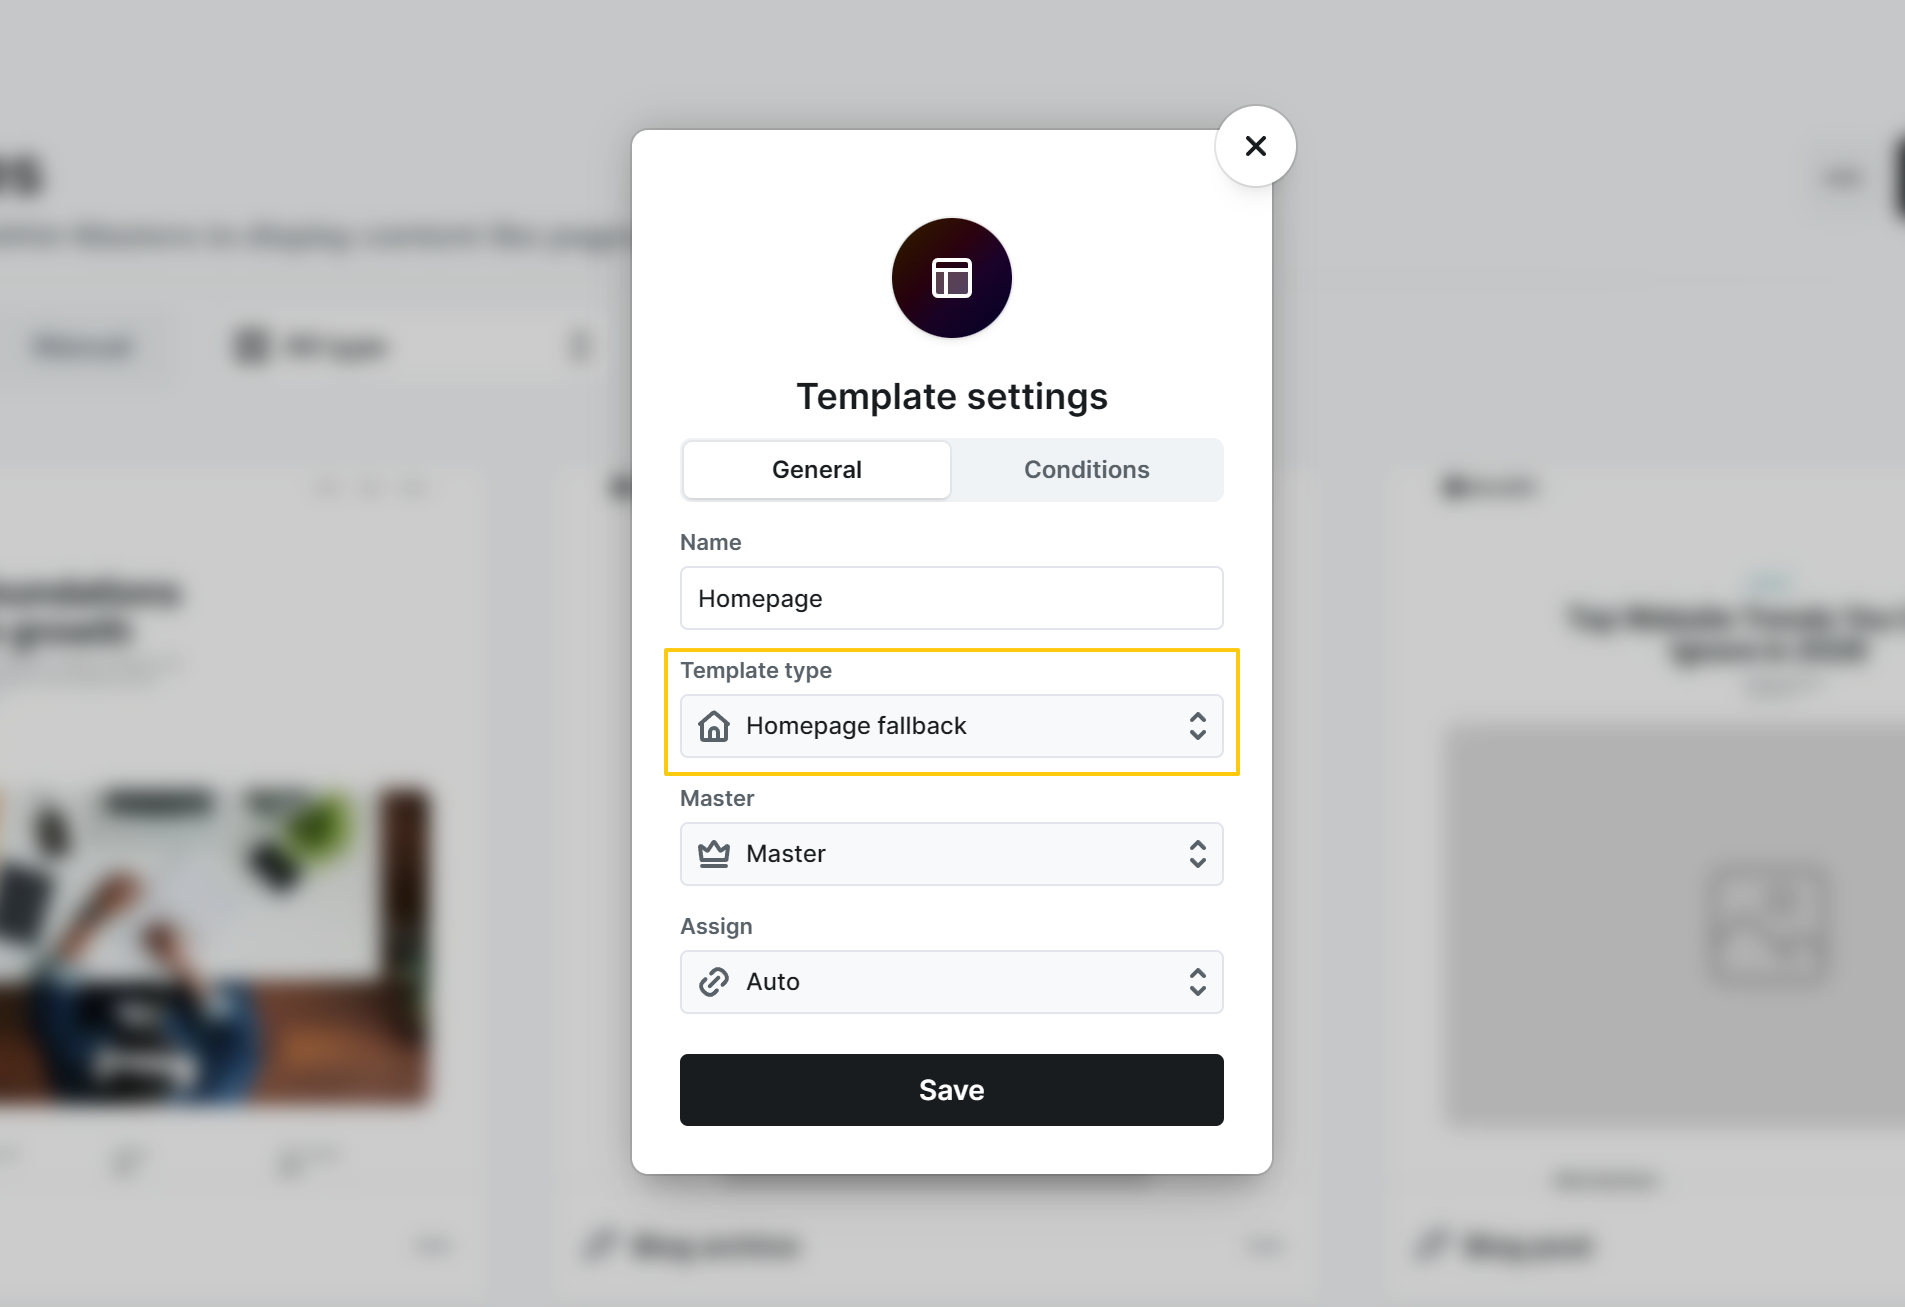
- Settings: In the settings, you can customize the template name, assignment, and template type, choose a Master, and add conditions as needed.
- Duplicate: Use this to create a copy of an existing Template.
- Generate thumbnail: You can generate a small sneak peek of what is going on inside the Template, allowing you to view its content without the need to open it. Helpful when managing many or similarly named ones.
- Delete: Permanently delete a Template. Use this option with caution as deletion is irreversible.
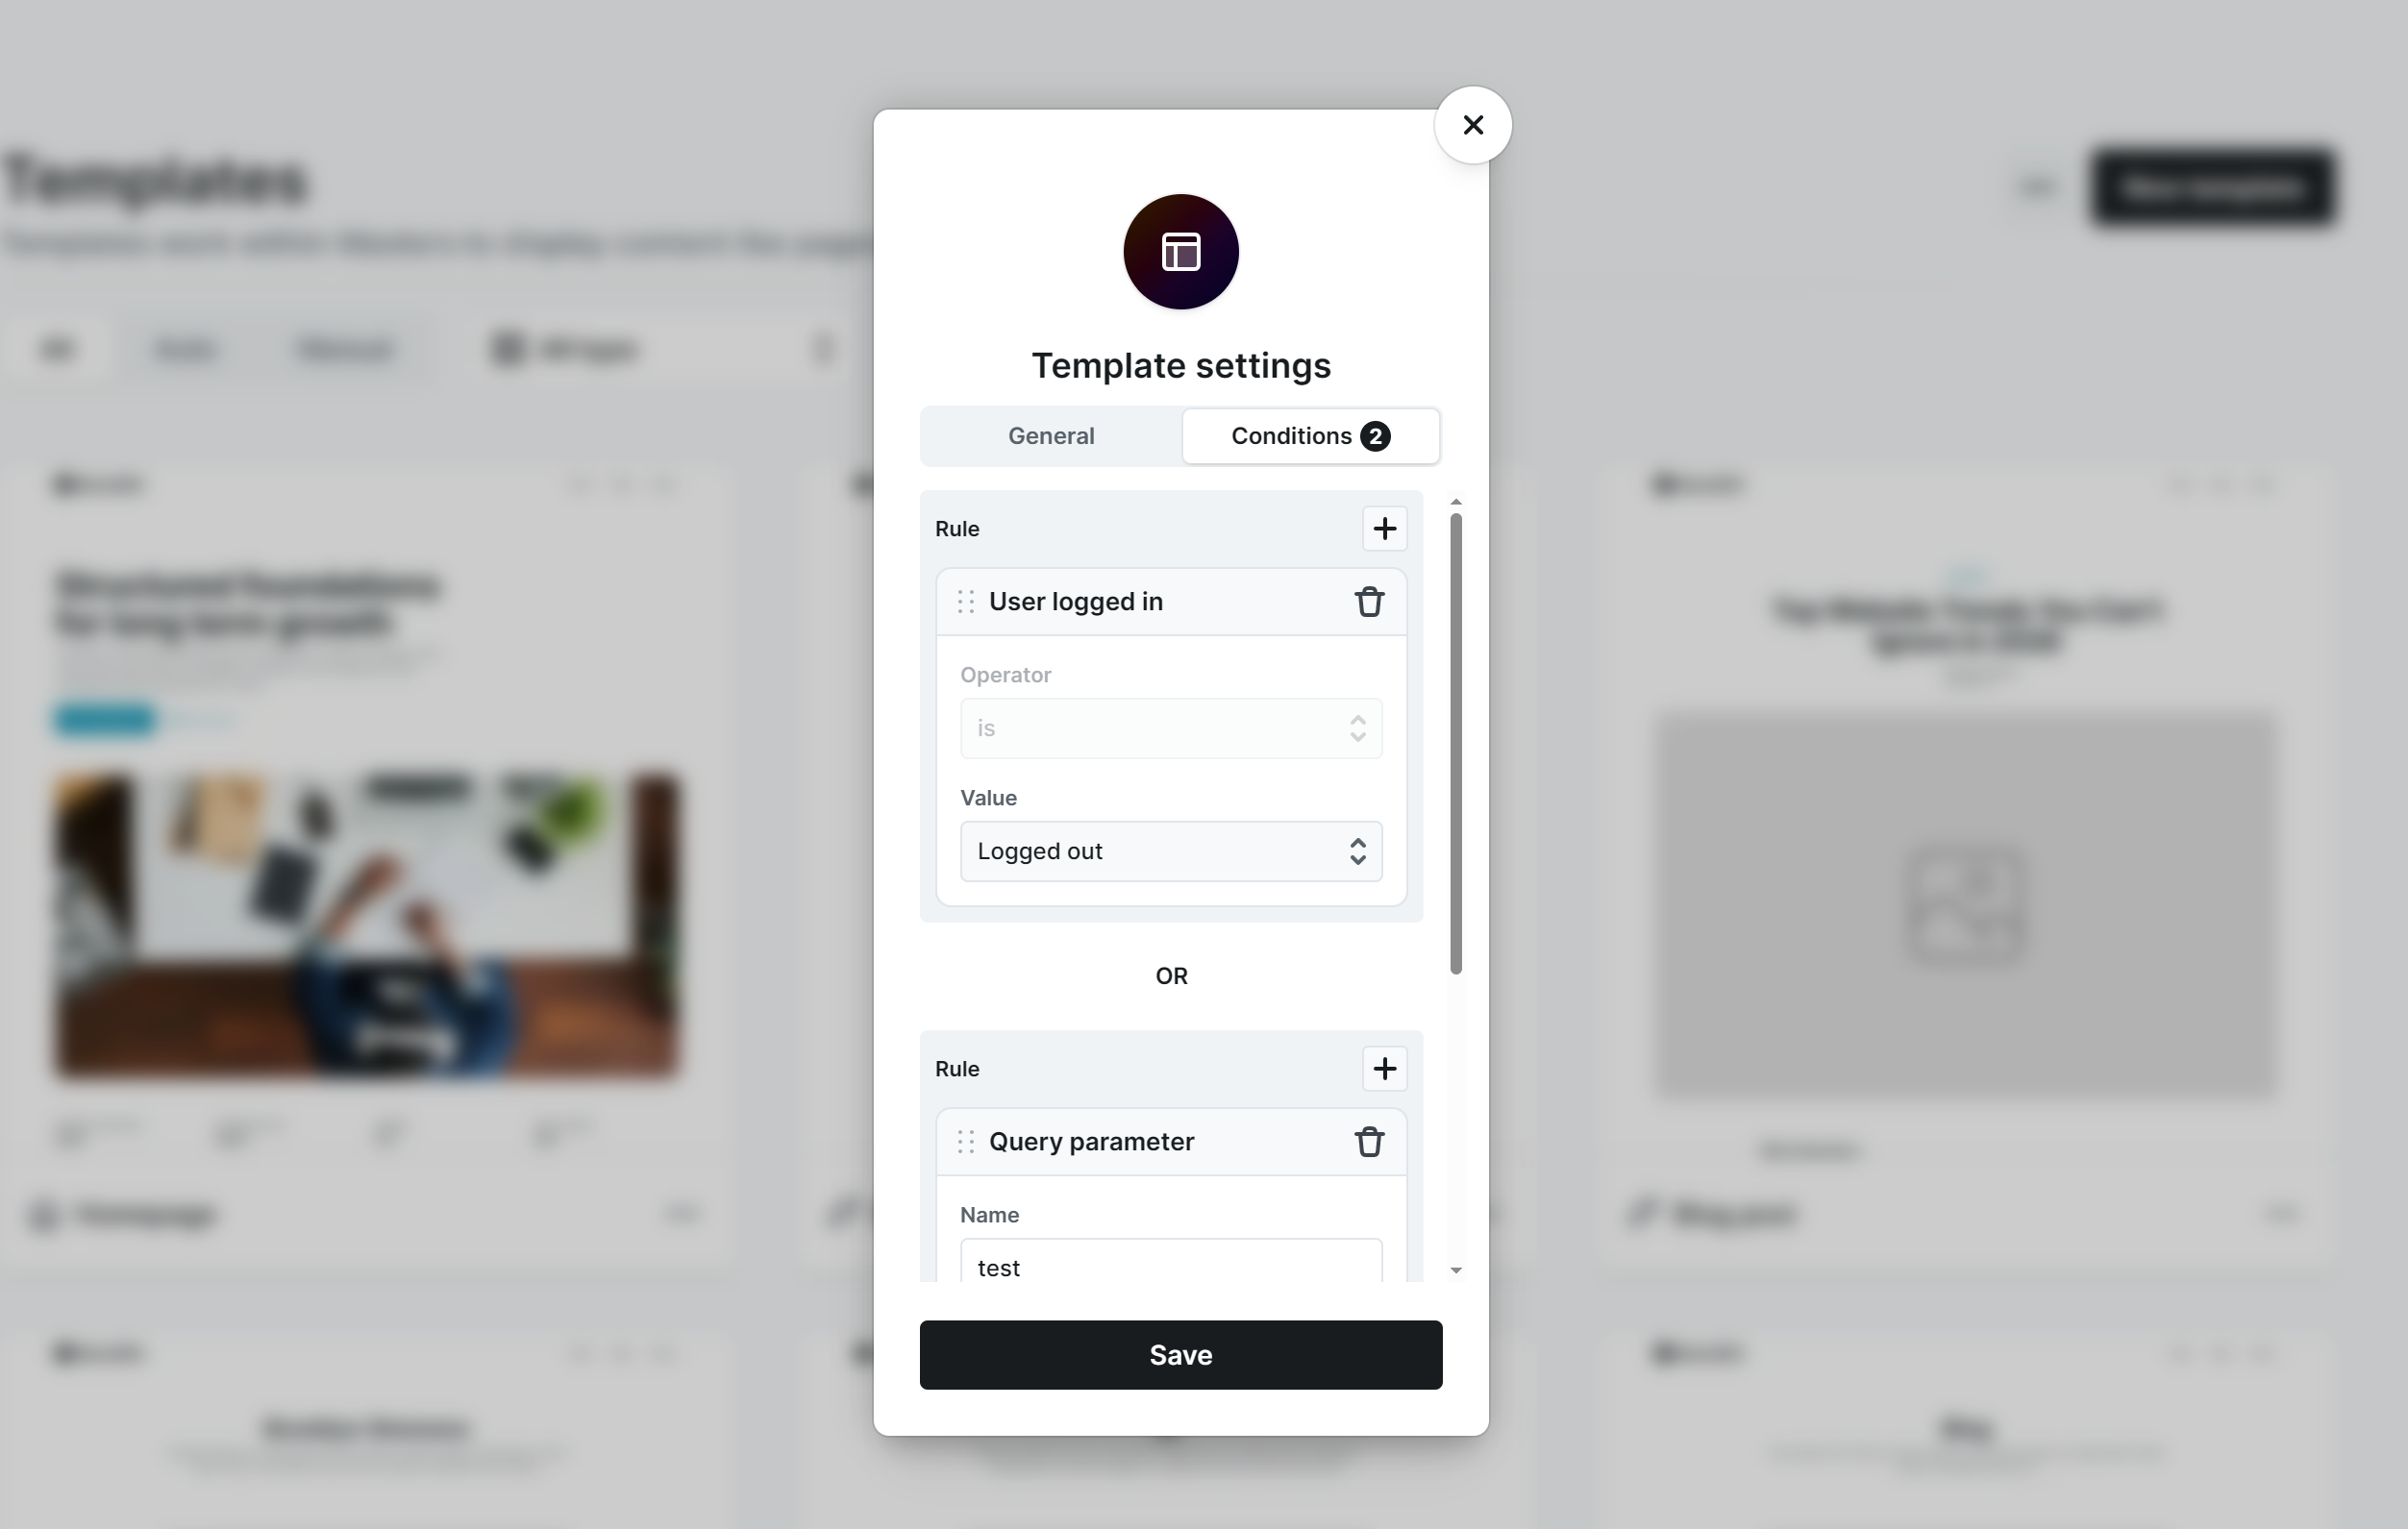
Template settings
In the settings, you can customize the template by renaming it, selecting an assignment mode and the template type, choosing a Master, or adding conditions as needed.
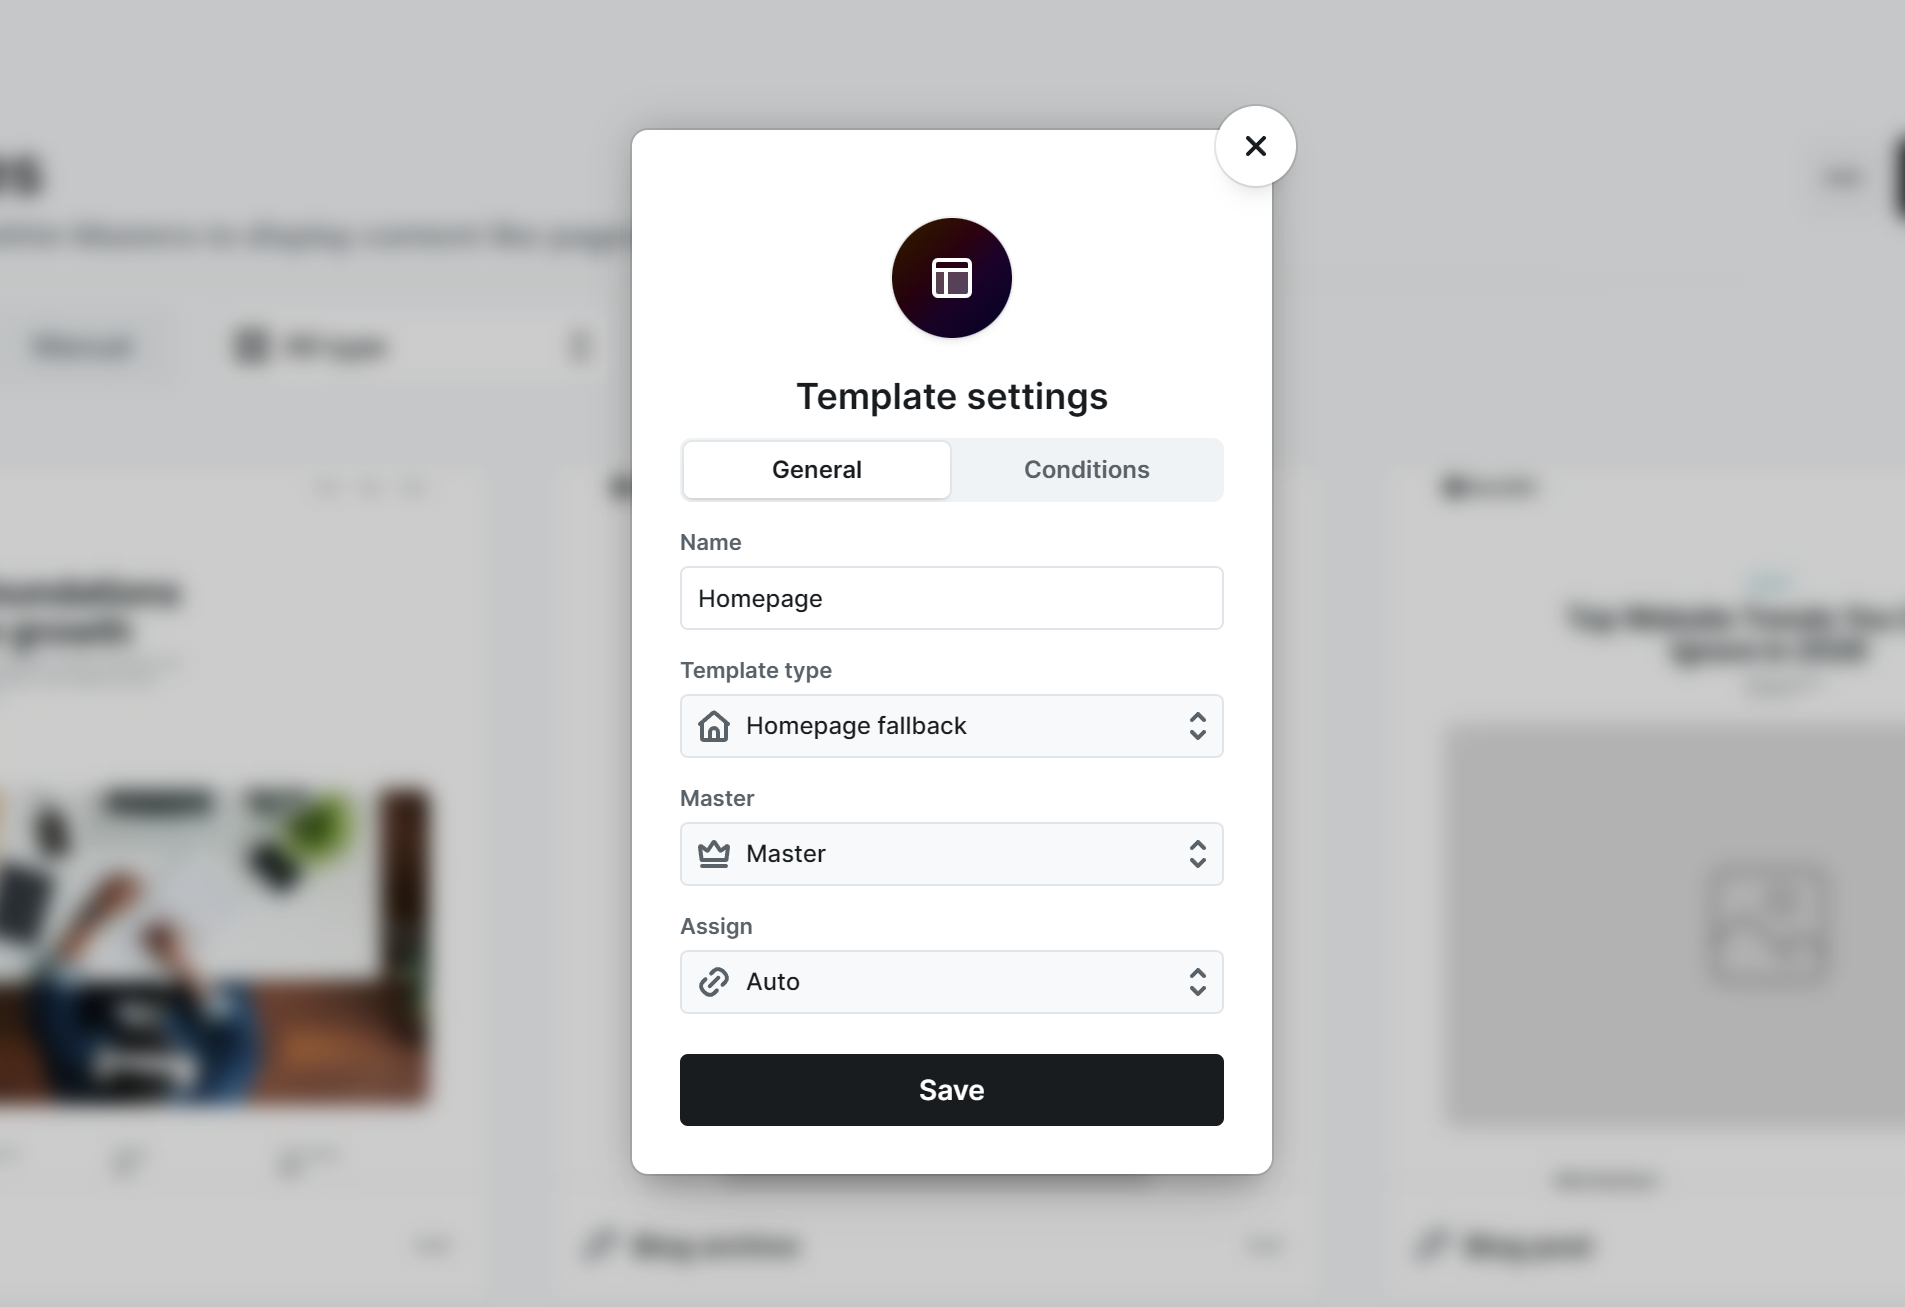
Template conditions are a powerful feature that allows you to control when a specific template file is used. These conditions are based on various rules. For example, you may want to apply the template only when the user on your website is logged out or apply the template to only those posts that have a certain category. Refer to Template conditions for a direct example.
Post & Page assign
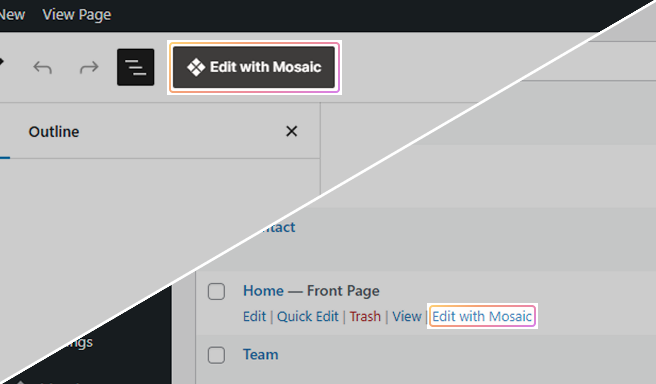
Edit with Mosaic
In the WordPress interface, there are several places where you can find the Edit with Mosaic button and link. For example, in the pages view or in the Gutenberg page editor.
Depending on whether the page has a local template assignment, it will perform different actions:
- No assignment: Shows the modal to set Template assignment for this page.
- Has assignment: Takes you to the Template editor.
Template assignment
You can select what type of template you would like to use for the chosen page.
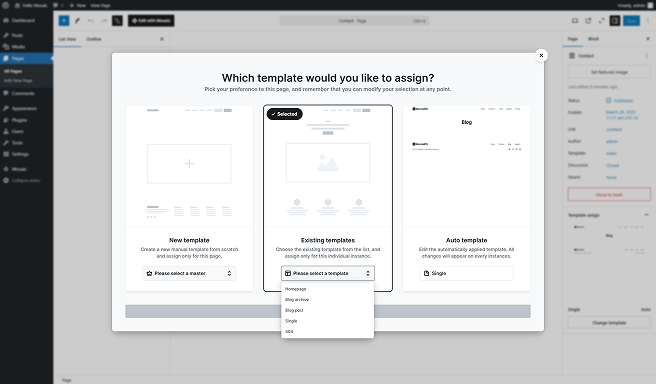
New template
This option lets you swiftly create a new template directly from the page. It’s a manual process where you define which Master the template will be assigned to. Mosaic will also manually assign the template to this specific page.
Existing templates
You can also choose to apply an existing template to this specific page. This method is similar to creating a new template but involves using an already-created template for this individual page instance. In this case, the template is manually assigned to this instance as well.
Auto template
Alternatively, you can assign a template that is automatically applied to every instance of this page type. By adjusting the order and applying specific conditions, you can control which template is automatically assigned.
As an example, imagine that you have a Service page template that automatically applies to all new service pages that you create. This ensures that all new service pages follow the same design and structure. You can also set conditions to further customize which template is applied to specific types of pages.
Additionally, if an automatically assigned single-page template does not exist, Mosaic will just create it for you.

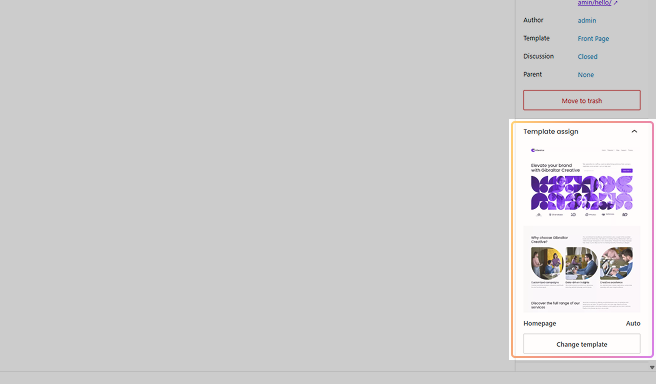
Change template
If a page already has a template assigned, it will open in the Editor with that template applied. To switch to a different template, use the Change template button. You can also reassign a template from the Gutenberg right sidebar.
This will start the same flow as Edit with Mosaic.
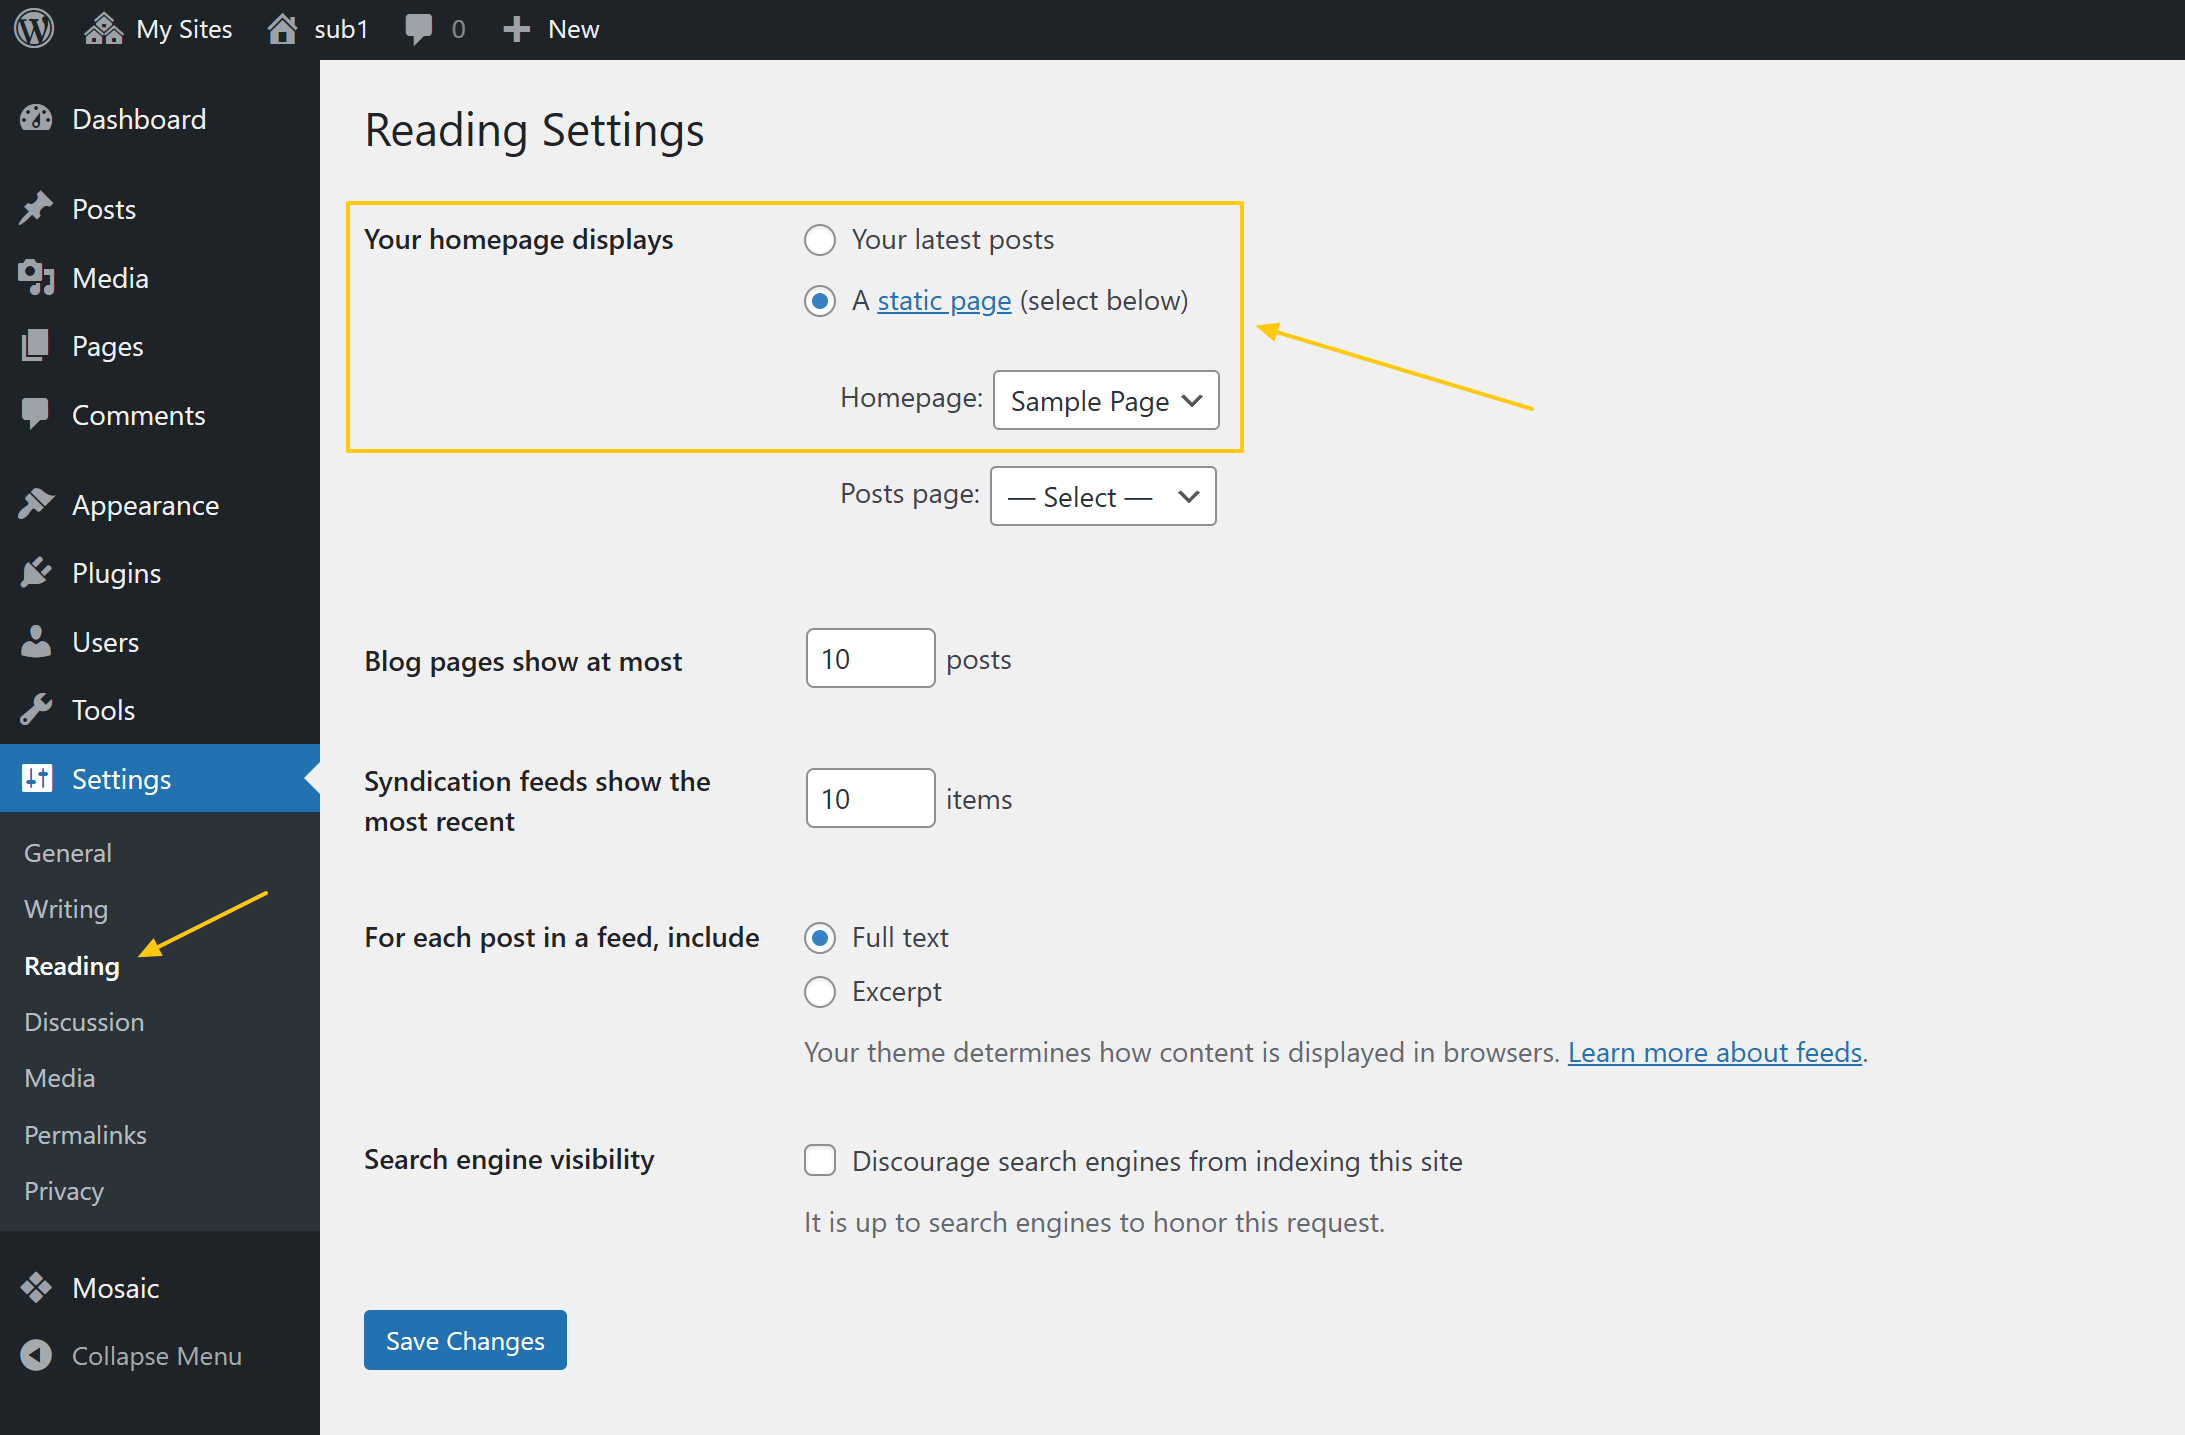
Homepage
The homepage of your website is being configured at the WordPress left admin menu’s Settings -> Reading -> at the “Your homepage displays” section. That is where you could modify what shows up as your homepage.
Prioritize templates
The order of the templates for a given Template type is crucial for automatically assigned templates. If you have multiple templates with the same template type and different conditions, you need to prioritize the template with the more specific condition. You can change the order of the templates by simply dragging and dropping them into the desired sequence.
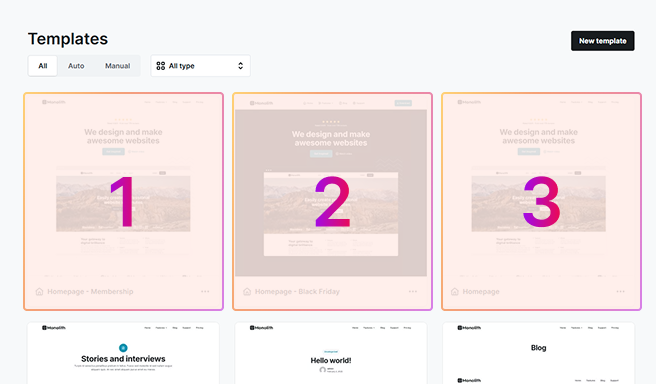
As an example, imagine you have two different templates for your posts, both of which are automatically applied, but one of them has a condition that it should only be applied when the post belongs to a specific category. If your template with the condition is placed after the first template without any conditions, it will never be evaluated, as the other gets applied immediately. To resolve this, you should prioritize the template with the condition before everything else.
Template conditions
To set custom conditions for when a template should be applied, click on the Conditions tab in the template creation settings. Here you can setup specific rules about when/where the template should appear.
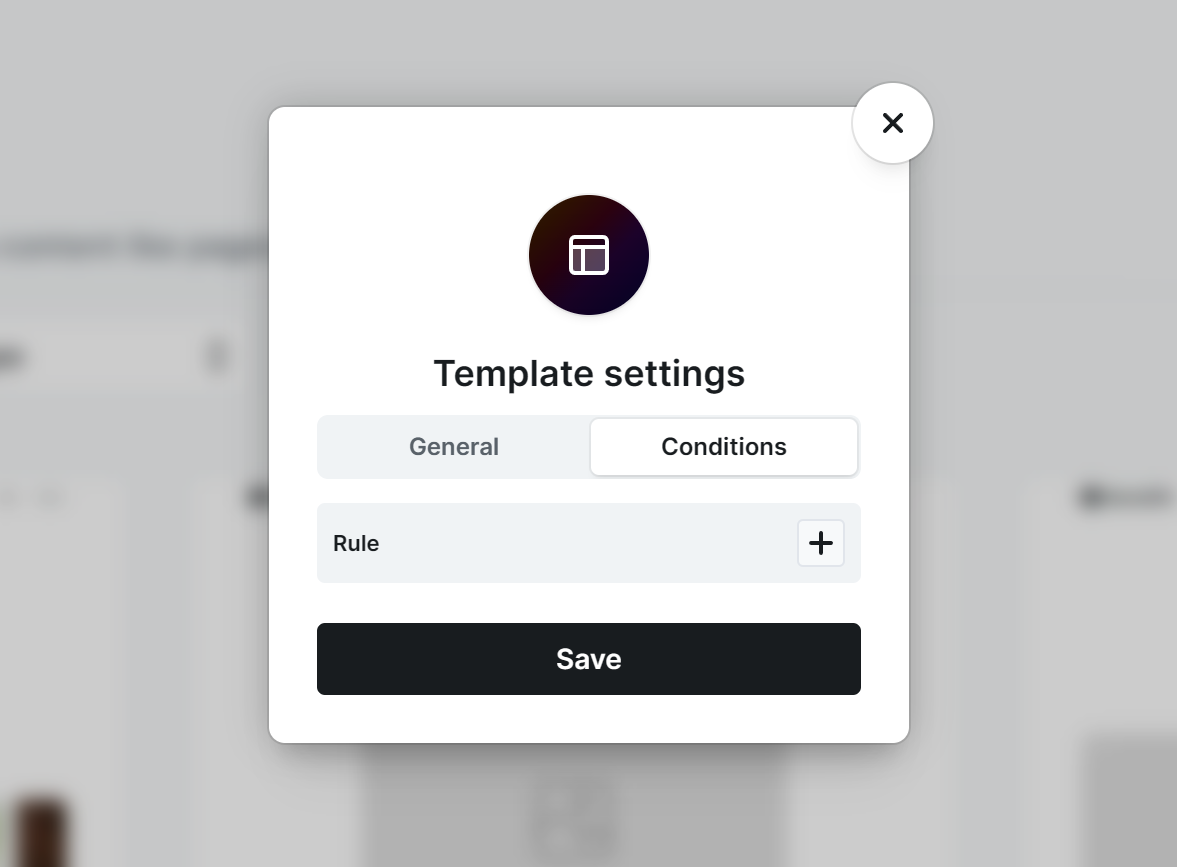
You can choose rules based on user logged in state, query parameter, category match, etc….
As mentioned previously, it’s important to note that the order of the templates matters for these conditions to work correctly. For instance, the membership version of the Homepage template must be positioned before the regular Homepage template to ensure that the condition can be evaluated properly. Drag and drop templates, to modify their order.