In this tutorial, we’ll create a simple page loading animation in Mosaic Builder using a fixed overlay element and page load interactions.

This type of loading screen is useful when you want to provide a smoother user experience while the page content is loading. The loading overlay will appear above the entire page, display a custom animation, then automatically fade out once the page has finished loading.
The design itself can be fully customized, so you can use your own branding, logo, animation, or colors.
Step 1 – Create the fullpage overlay
Open your theme’s Master and add a new Div element right under the Body element, before all other elements.
This Div will act as the loading overlay that covers the entire page while the website is loading.
Apply the following Style settings to the Div:
- Position: Fixed
- Z-index: 100
- Top: 0px
- Right: 0px
- Bottom: 0px
- Left: 0px
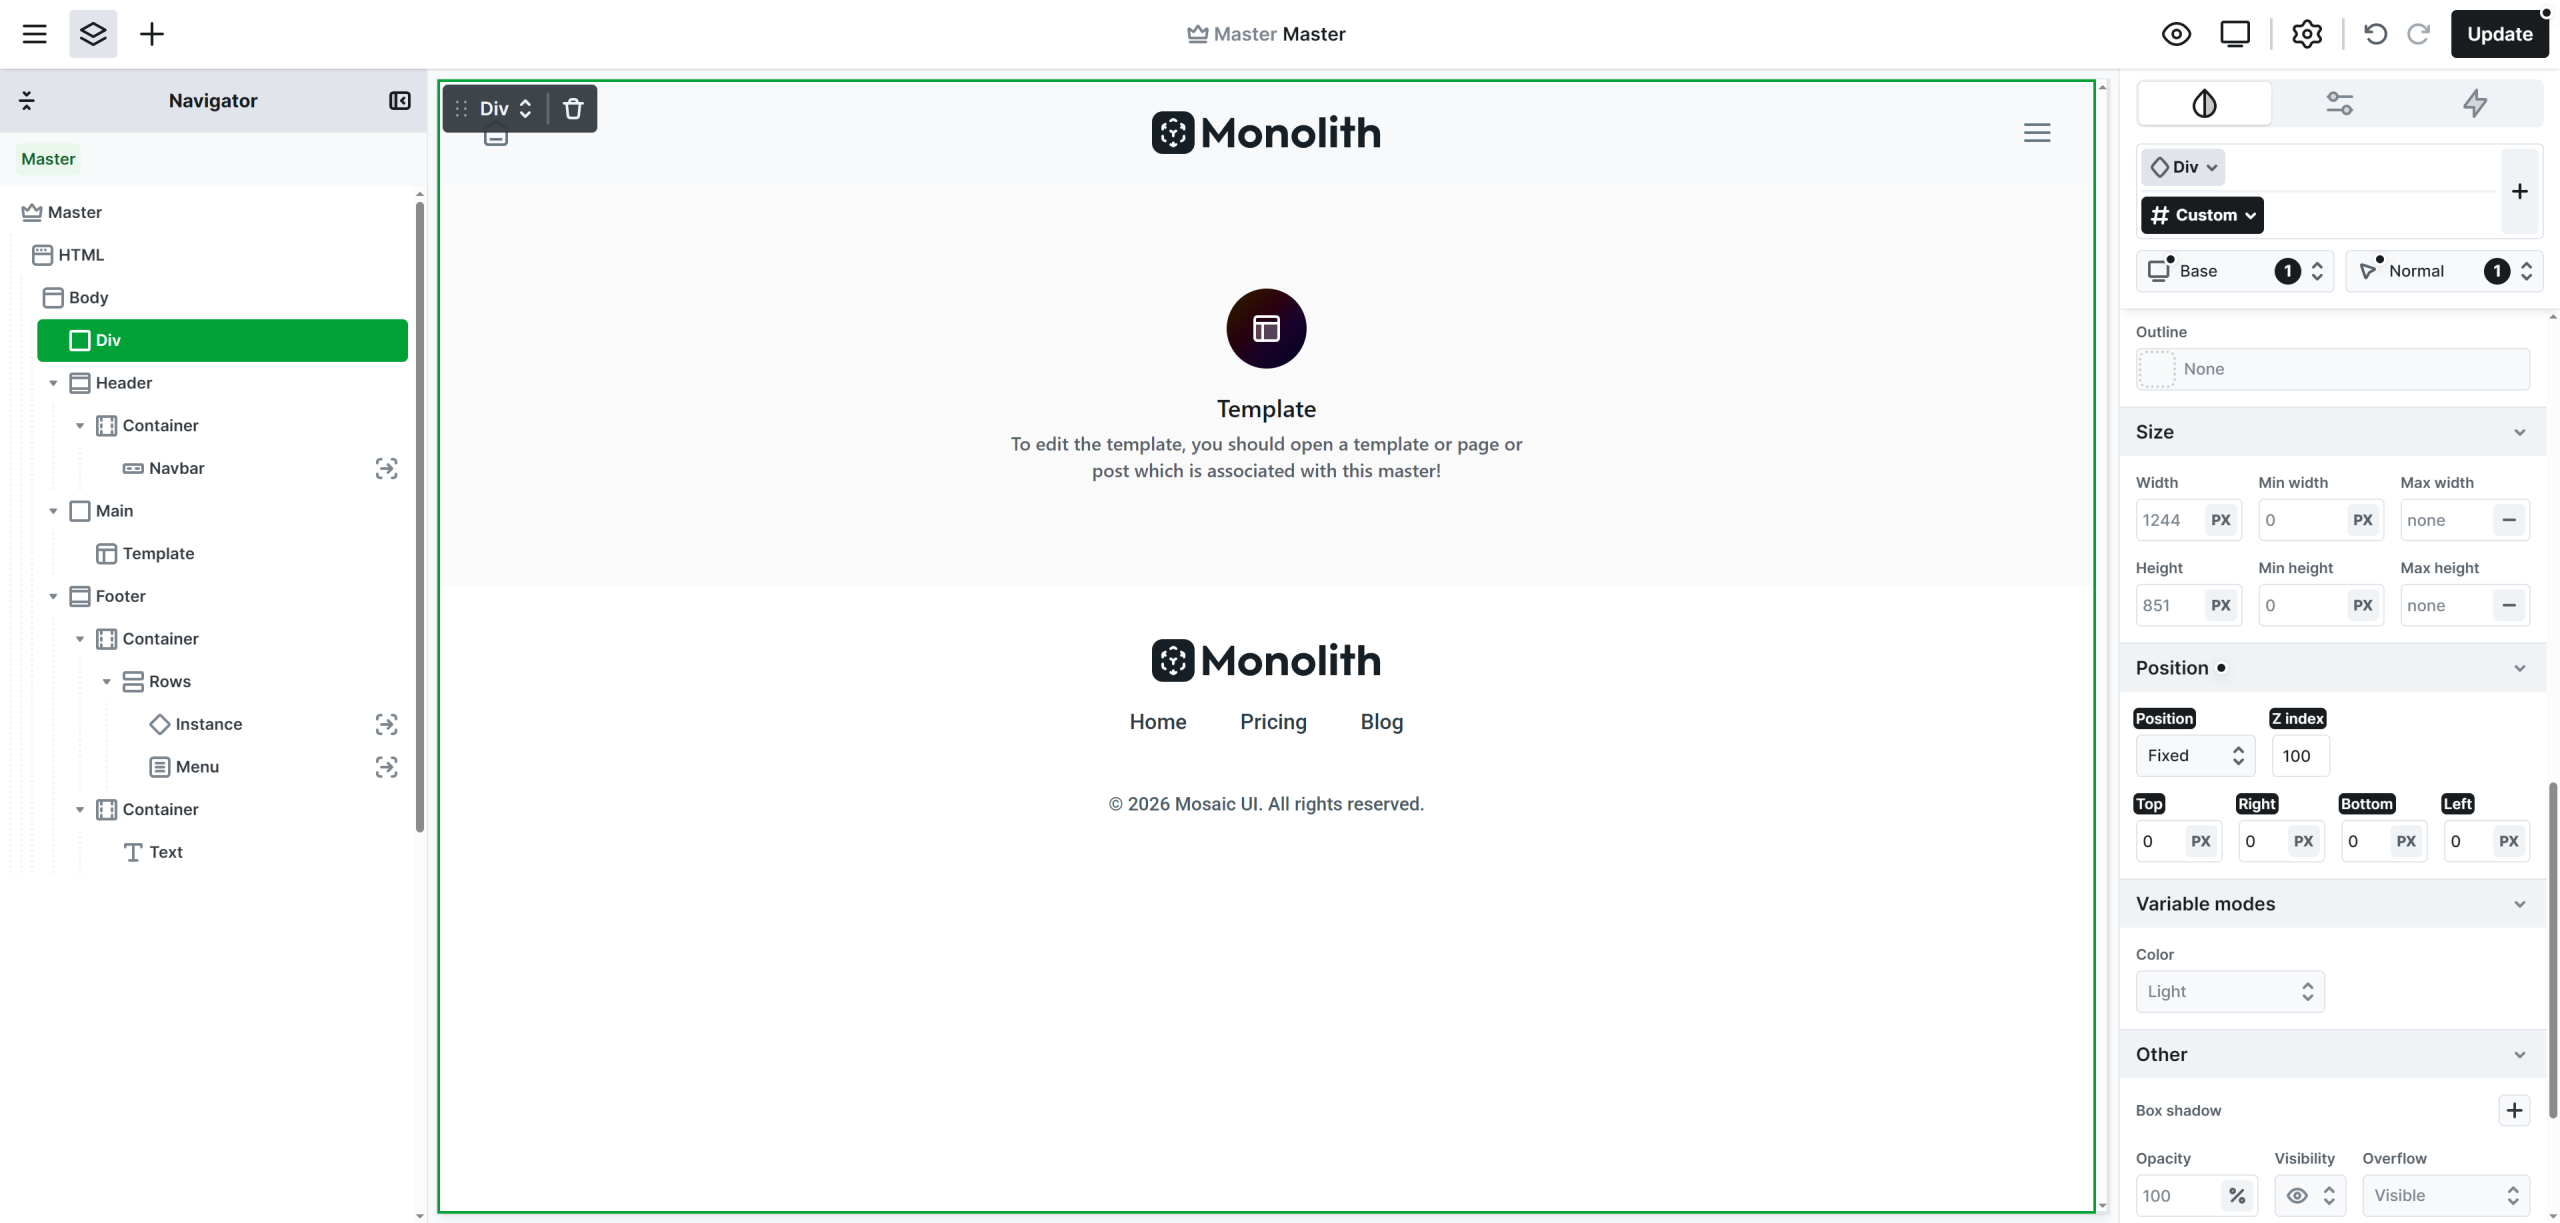
Using position:fixed together with all four sides set to 0px makes the element cover the entire page area.
The z-index value should be higher than the rest of your page elements so the loading screen always appears above the website content.
Step 2 – Create the loading screen design
Inside the overlay Div, create any loading design you would like to display.
Tip: avoid using Image element, and rather use Icon element with an SVG code for images/animations, because that loads quicker upon page load.
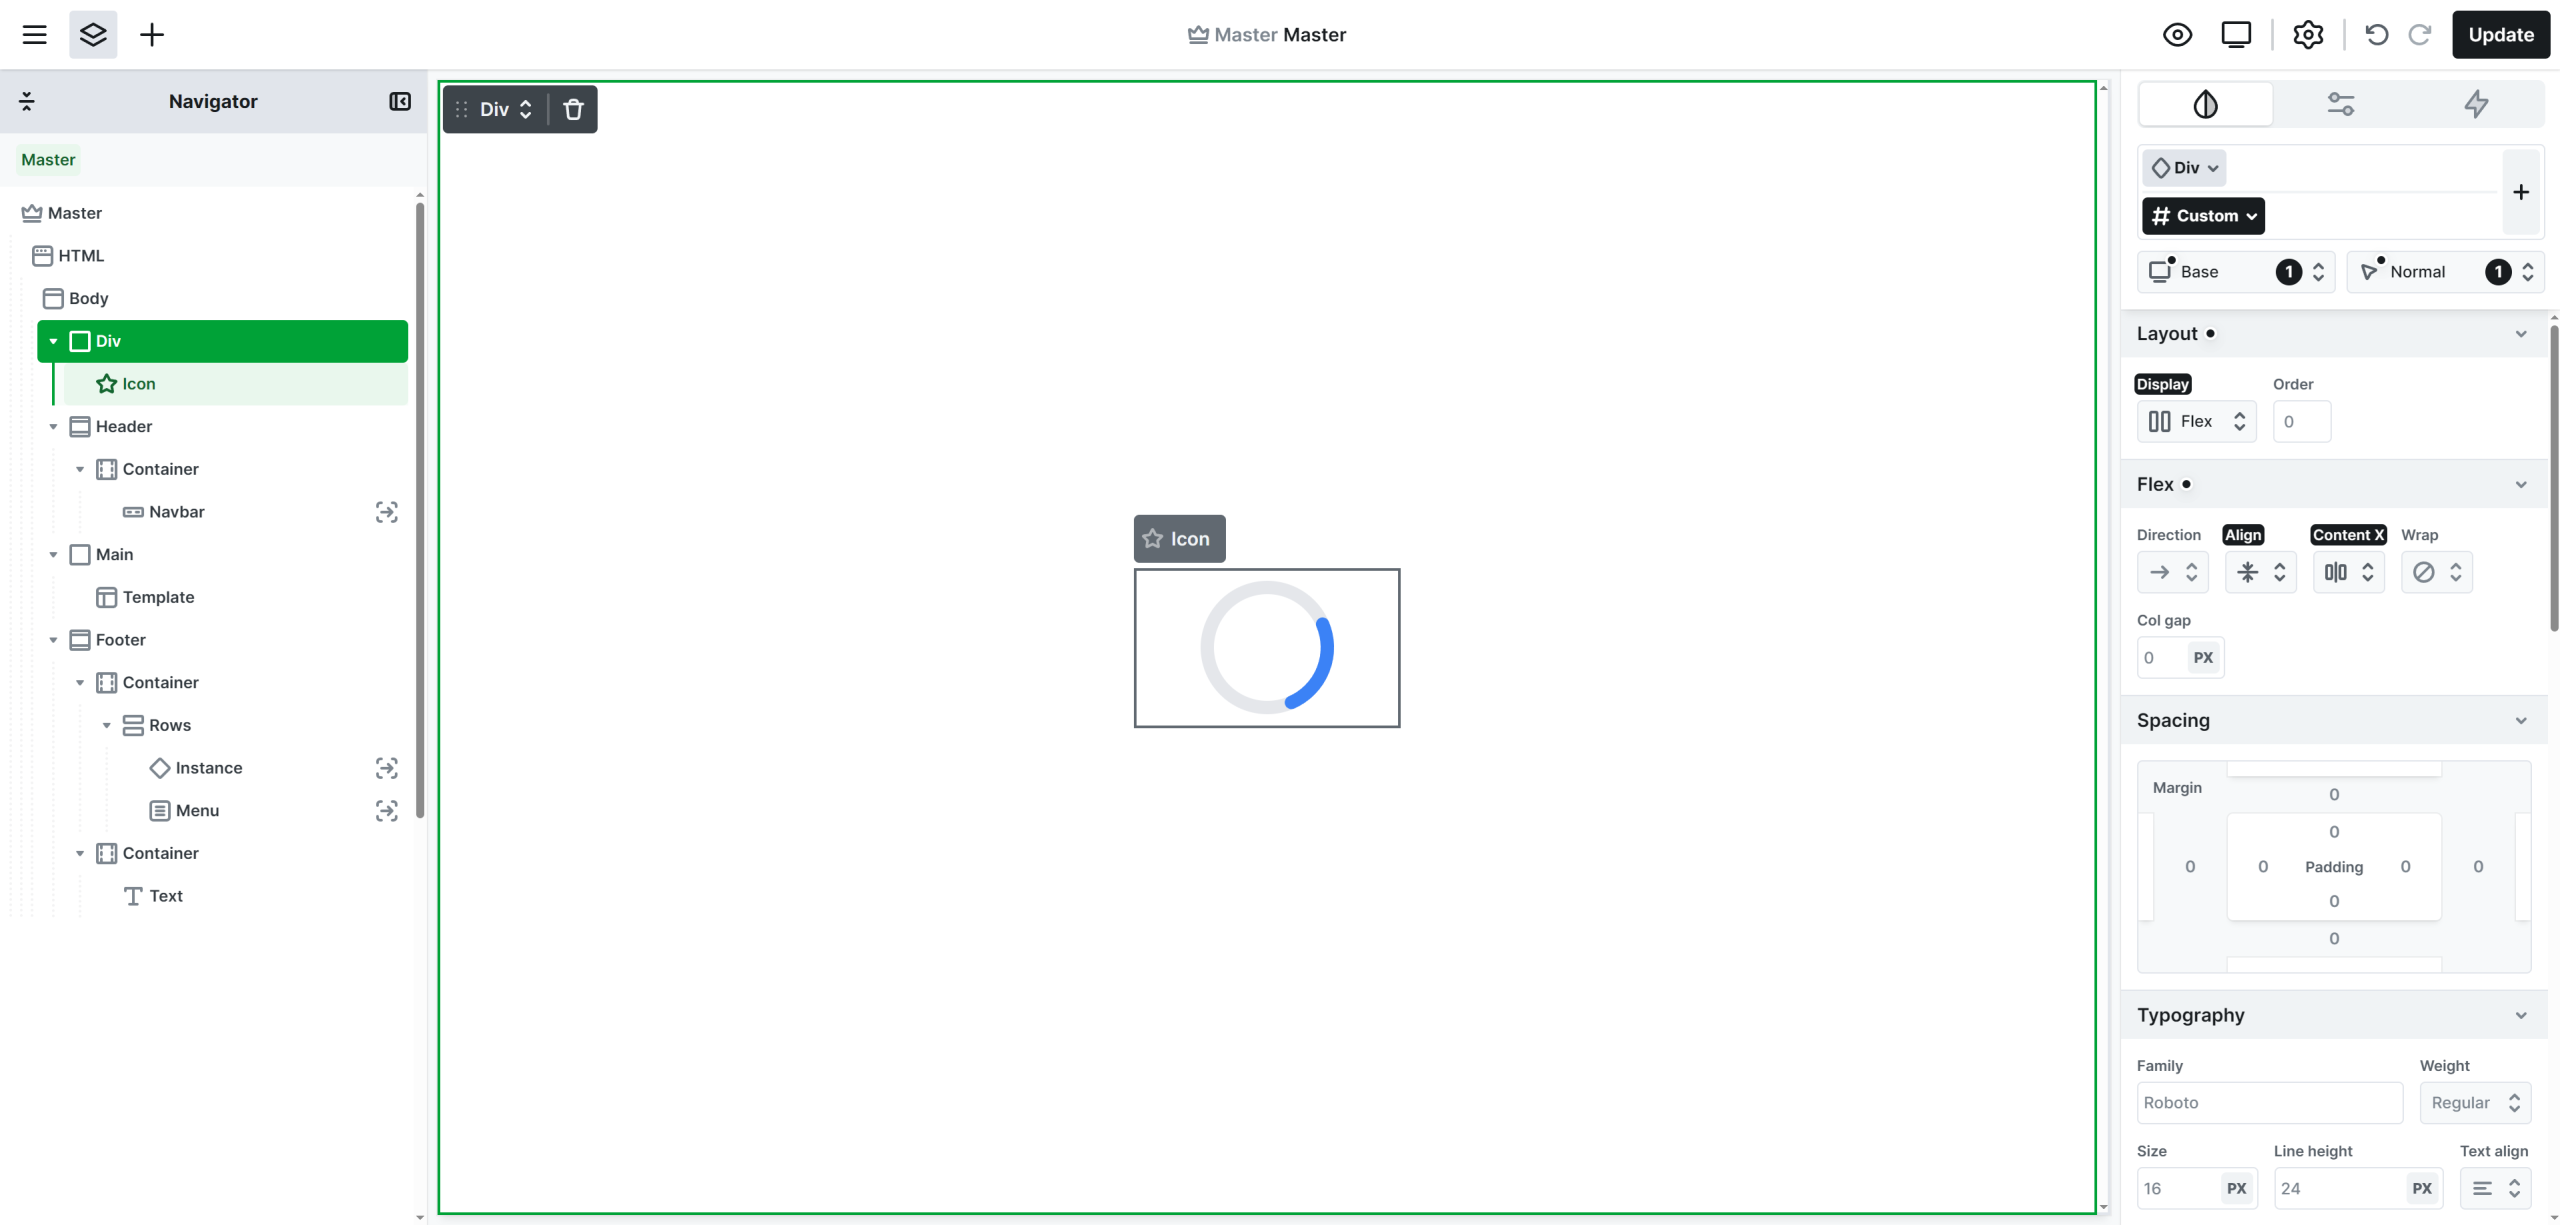
In this example, the Div uses a white background and contains a centered Icon element with a rotating SVG animation. The SVG code in my case is:
<svg width="120" height="120" viewBox="0 0 120 120" xmlns="http://www.w3.org/2000/svg">
  <circle cx="60" cy="60" r="45" stroke="#e5e7eb" stroke-width="10" fill="none" />
  <circle cx="60" cy="60" r="45" stroke="#3b82f6" stroke-width="10" fill="none" stroke-linecap="round" stroke-dasharray="70 220">
    <animateTransform attributeName="transform" type="rotate" from="0 60 60" to="360 60 60" dur="1s" repeatCount="indefinite"/>
  </circle>
</svg>
Of course, you can replace this example with your own custom loader, logo animation, or branding elements.
Step 3 – Add the page load interaction
Select the overlay Div and open the Interactions tab.
Create a new interaction using:Add interaction → Page load
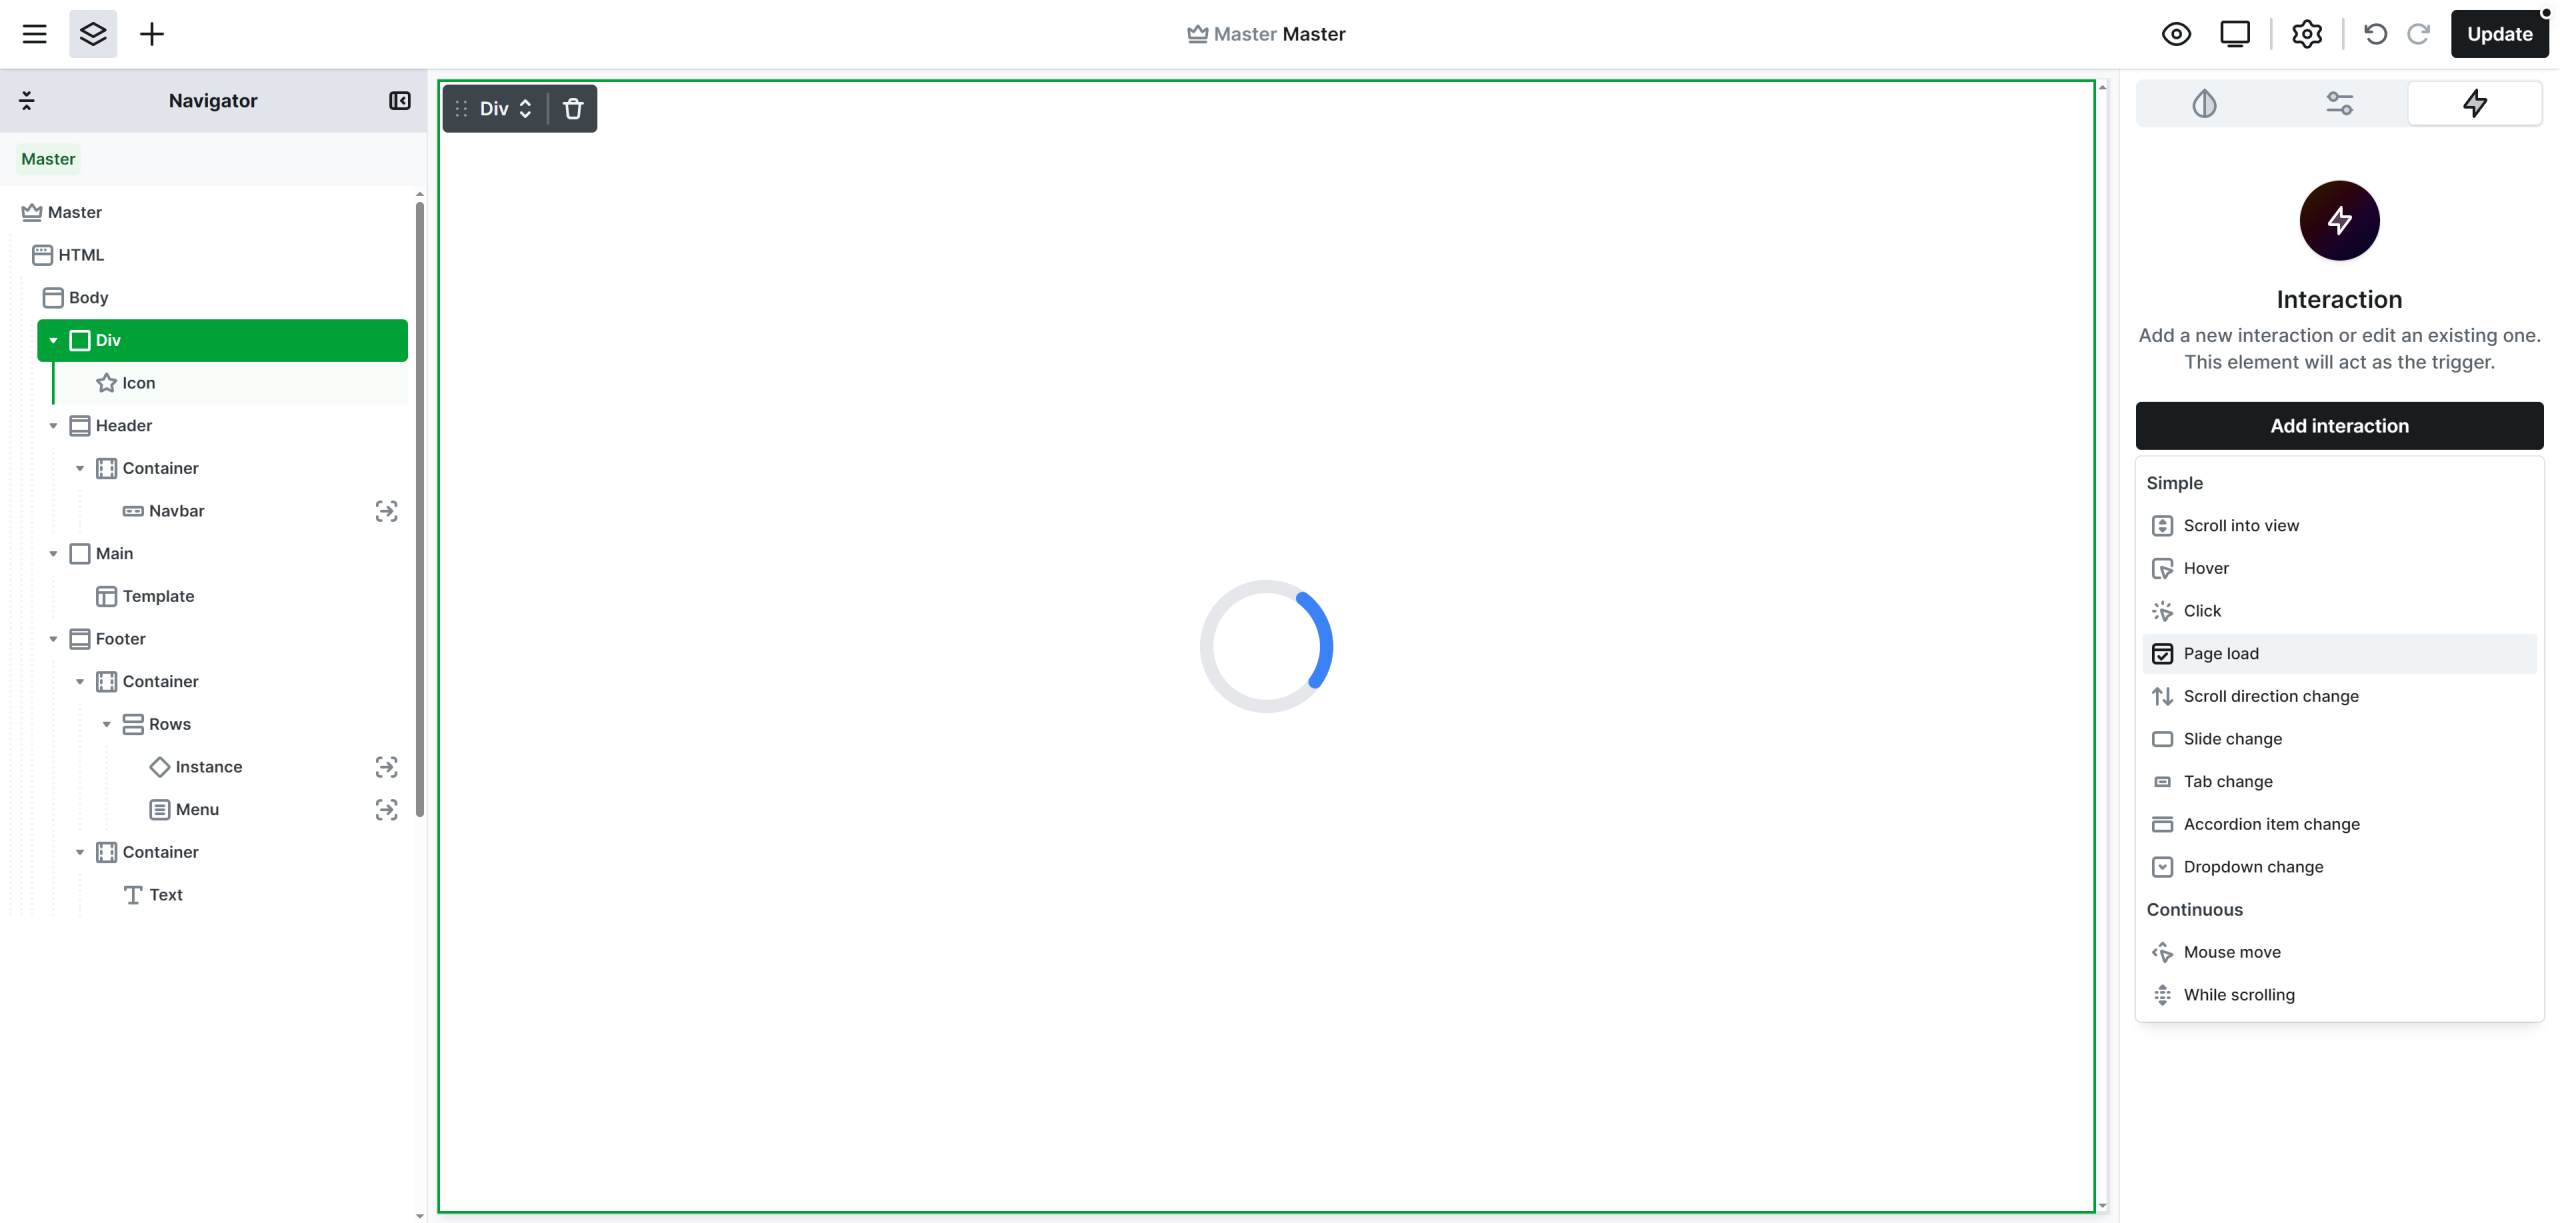
This interaction will automatically trigger once the page has finished loading.
Step 4 – Animate the overlay out
Inside the Page Load interaction, add an Opacity action and animate the overlay to 0%.
After that, add a Display action as well and set:End of timeline: None
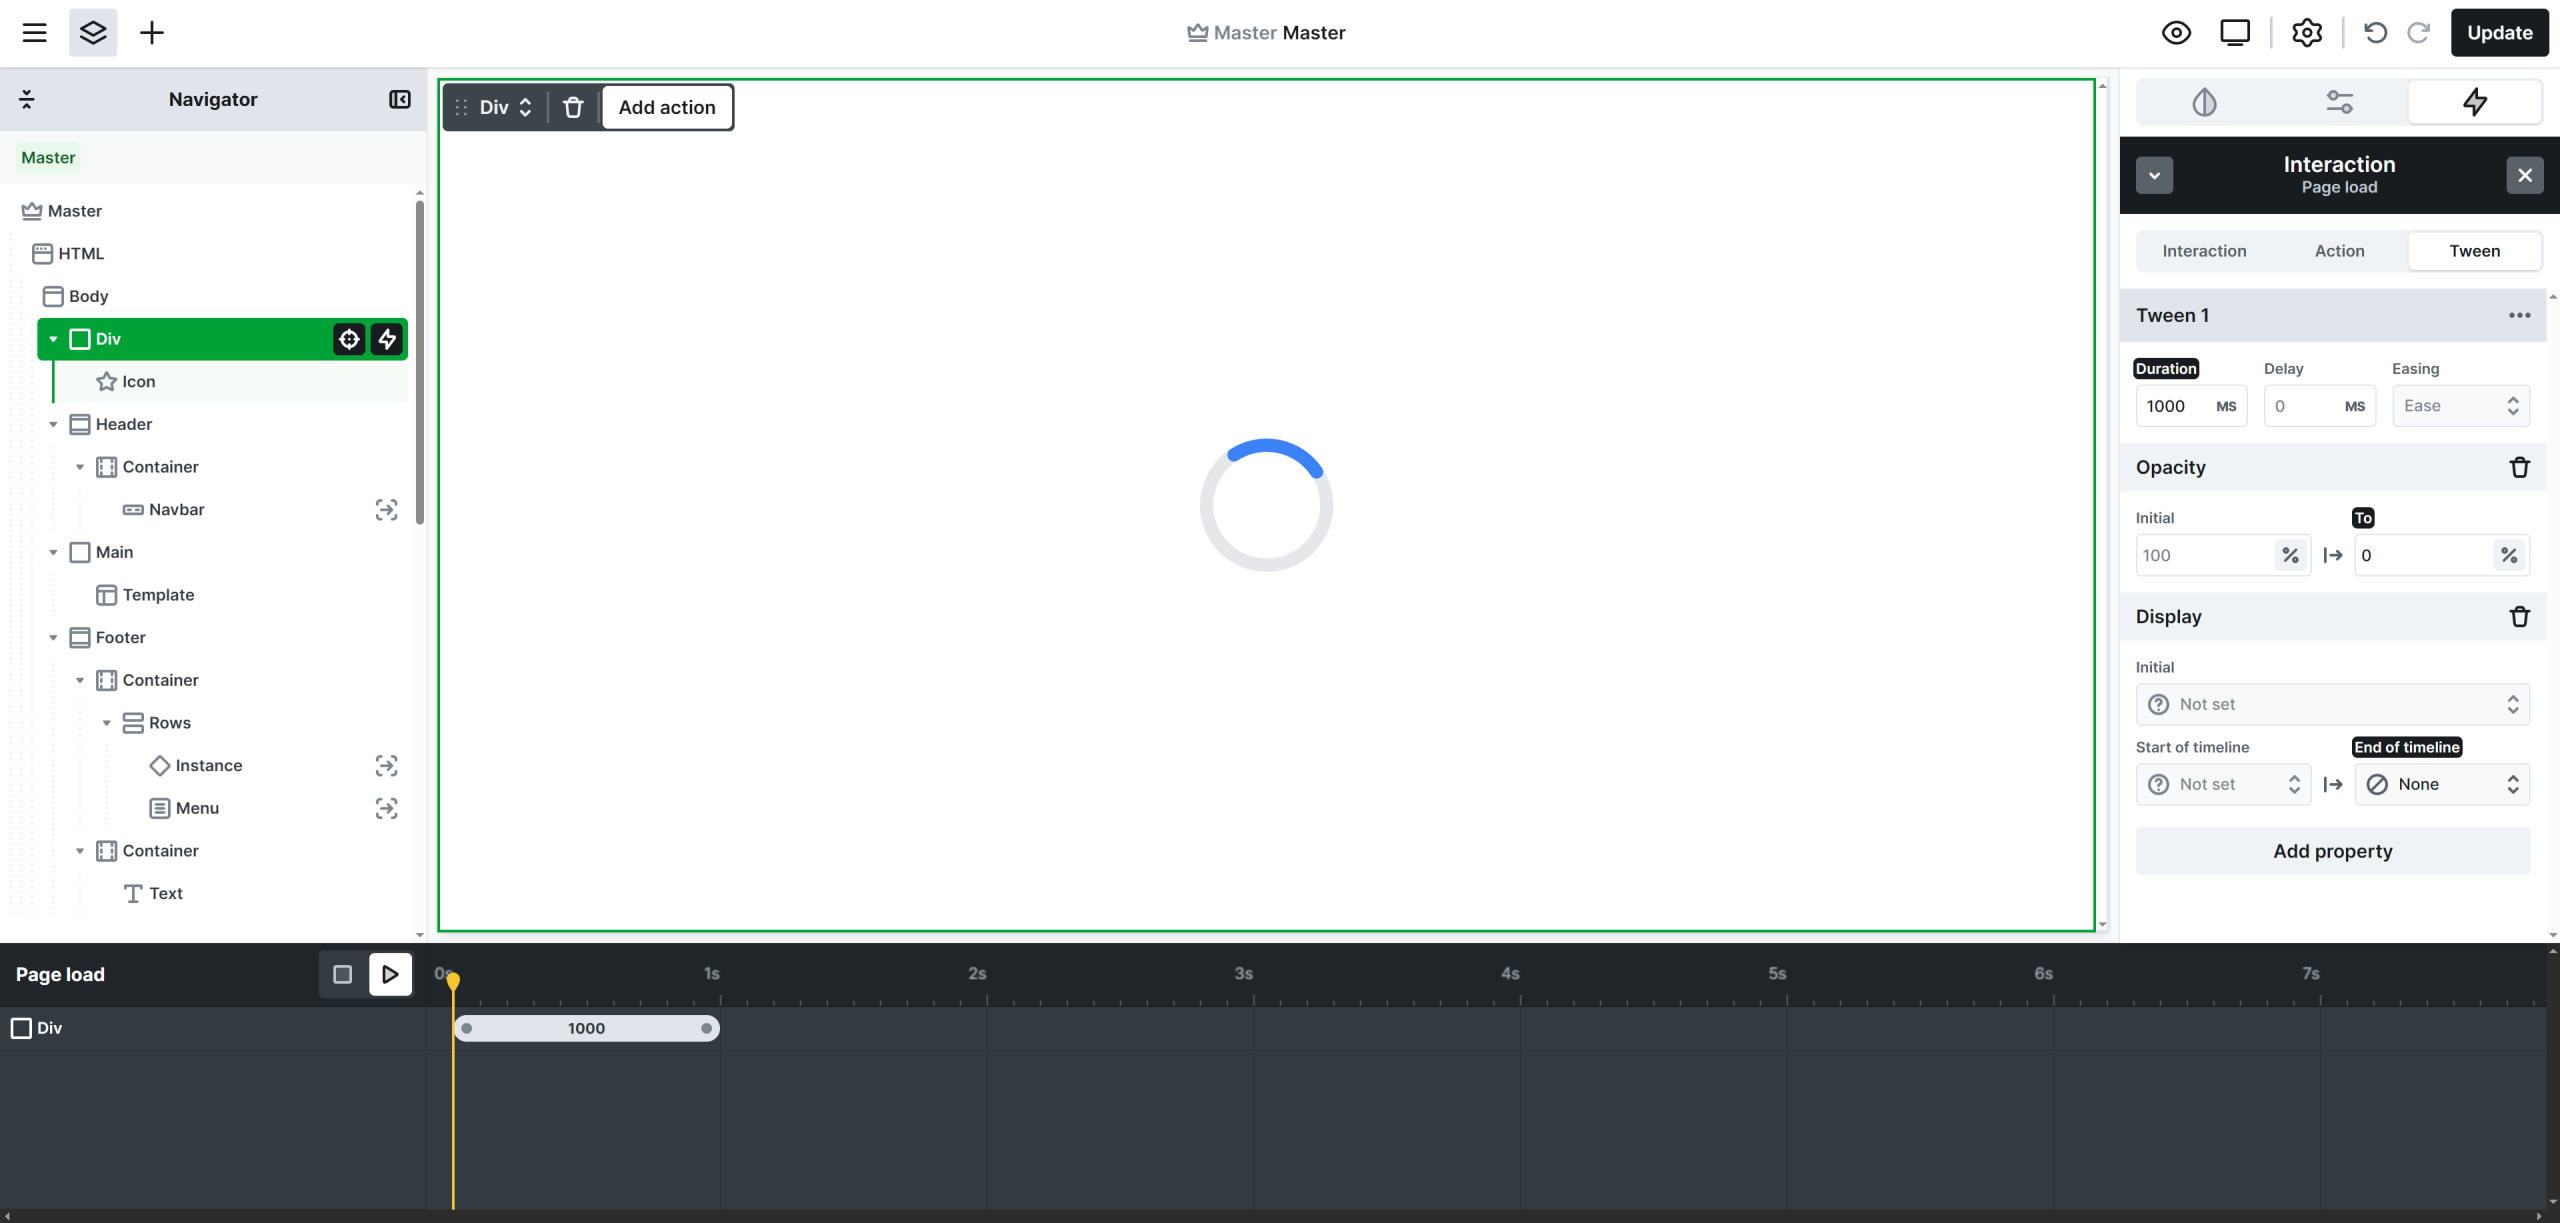
The Display action is required, because even though the overlay becomes visually transparent through the Opacity animation, the Div would still remain above the page and continue blocking clicks and interactions. Setting the element to display:none completely removes it from the page after the animation finishes, allowing users to interact with the website normally.
Step 5 – Hide the overlay while editing
Because the loading overlay covers the entire page, it makes the editing impossible inside the builder.
To prevent this, go to the Navigator, right click the overlay Div, and select:Hide in editor
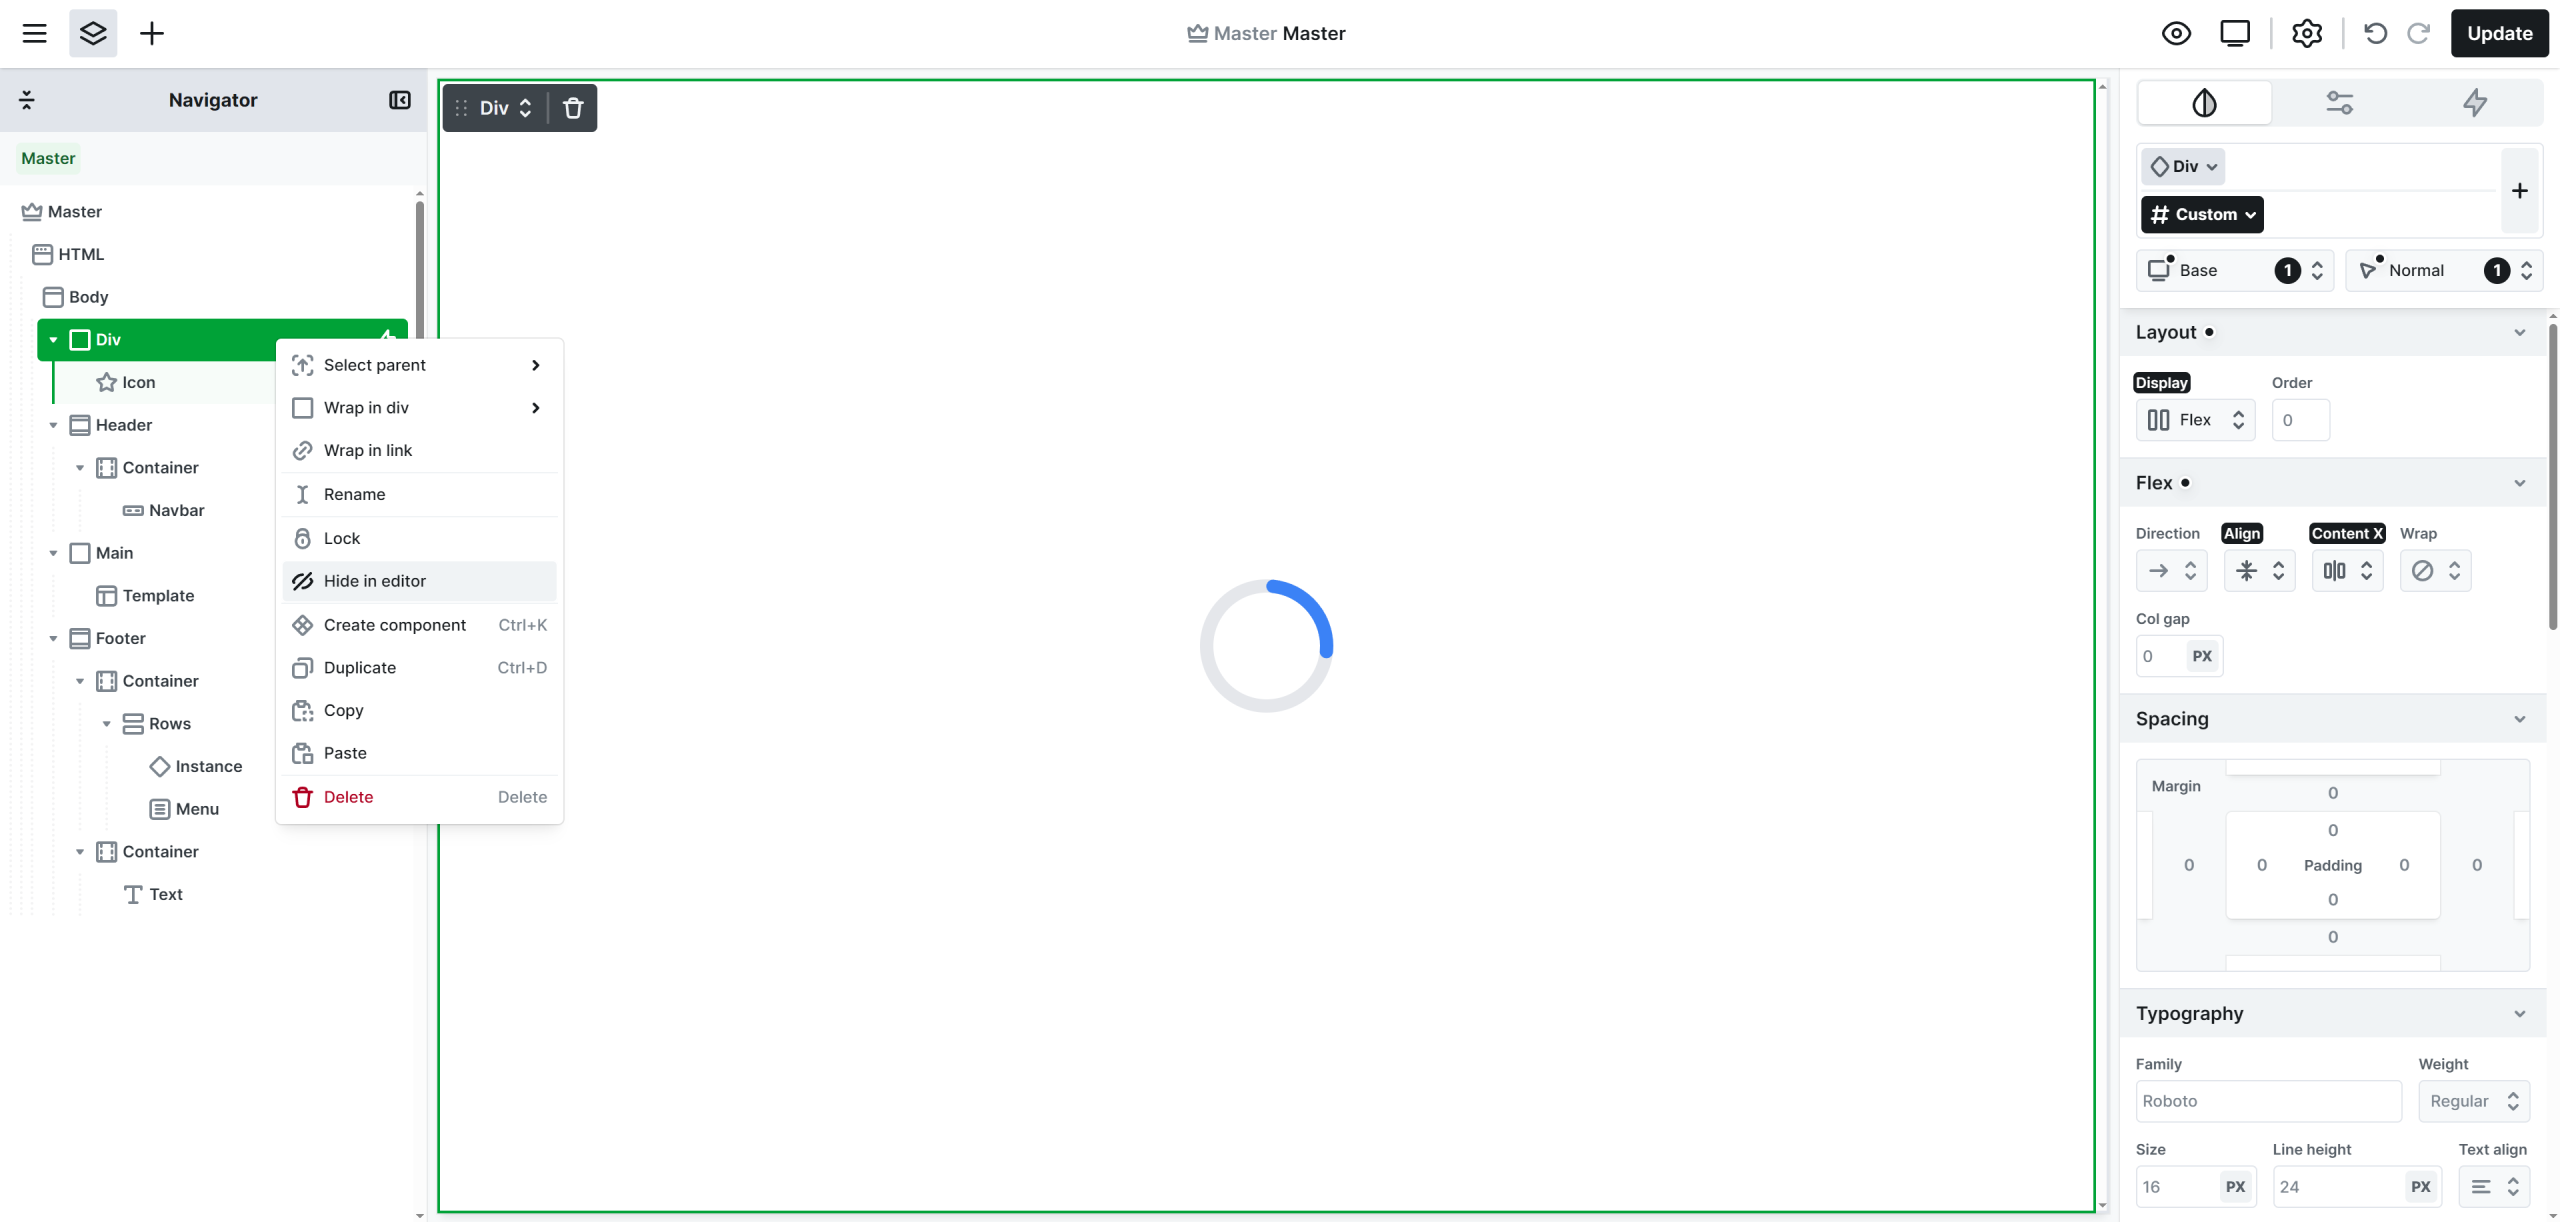
This will hide the loading overlay only inside the editor, while still keeping it fully functional on the live website.
You can now continue editing your pages normally without the overlay blocking your view.