Translating Mosaic pages
Mosaic currently does not support translation for frontend pages. But there are some plugins, which partially seem to offer solutions:
TranslatePress
To translate Mosaic, we suggest using TranslatePress, as that seems to work well with our system.
The Free version of TranslatePress has a limitation, that you can only have two languages, including the base language.
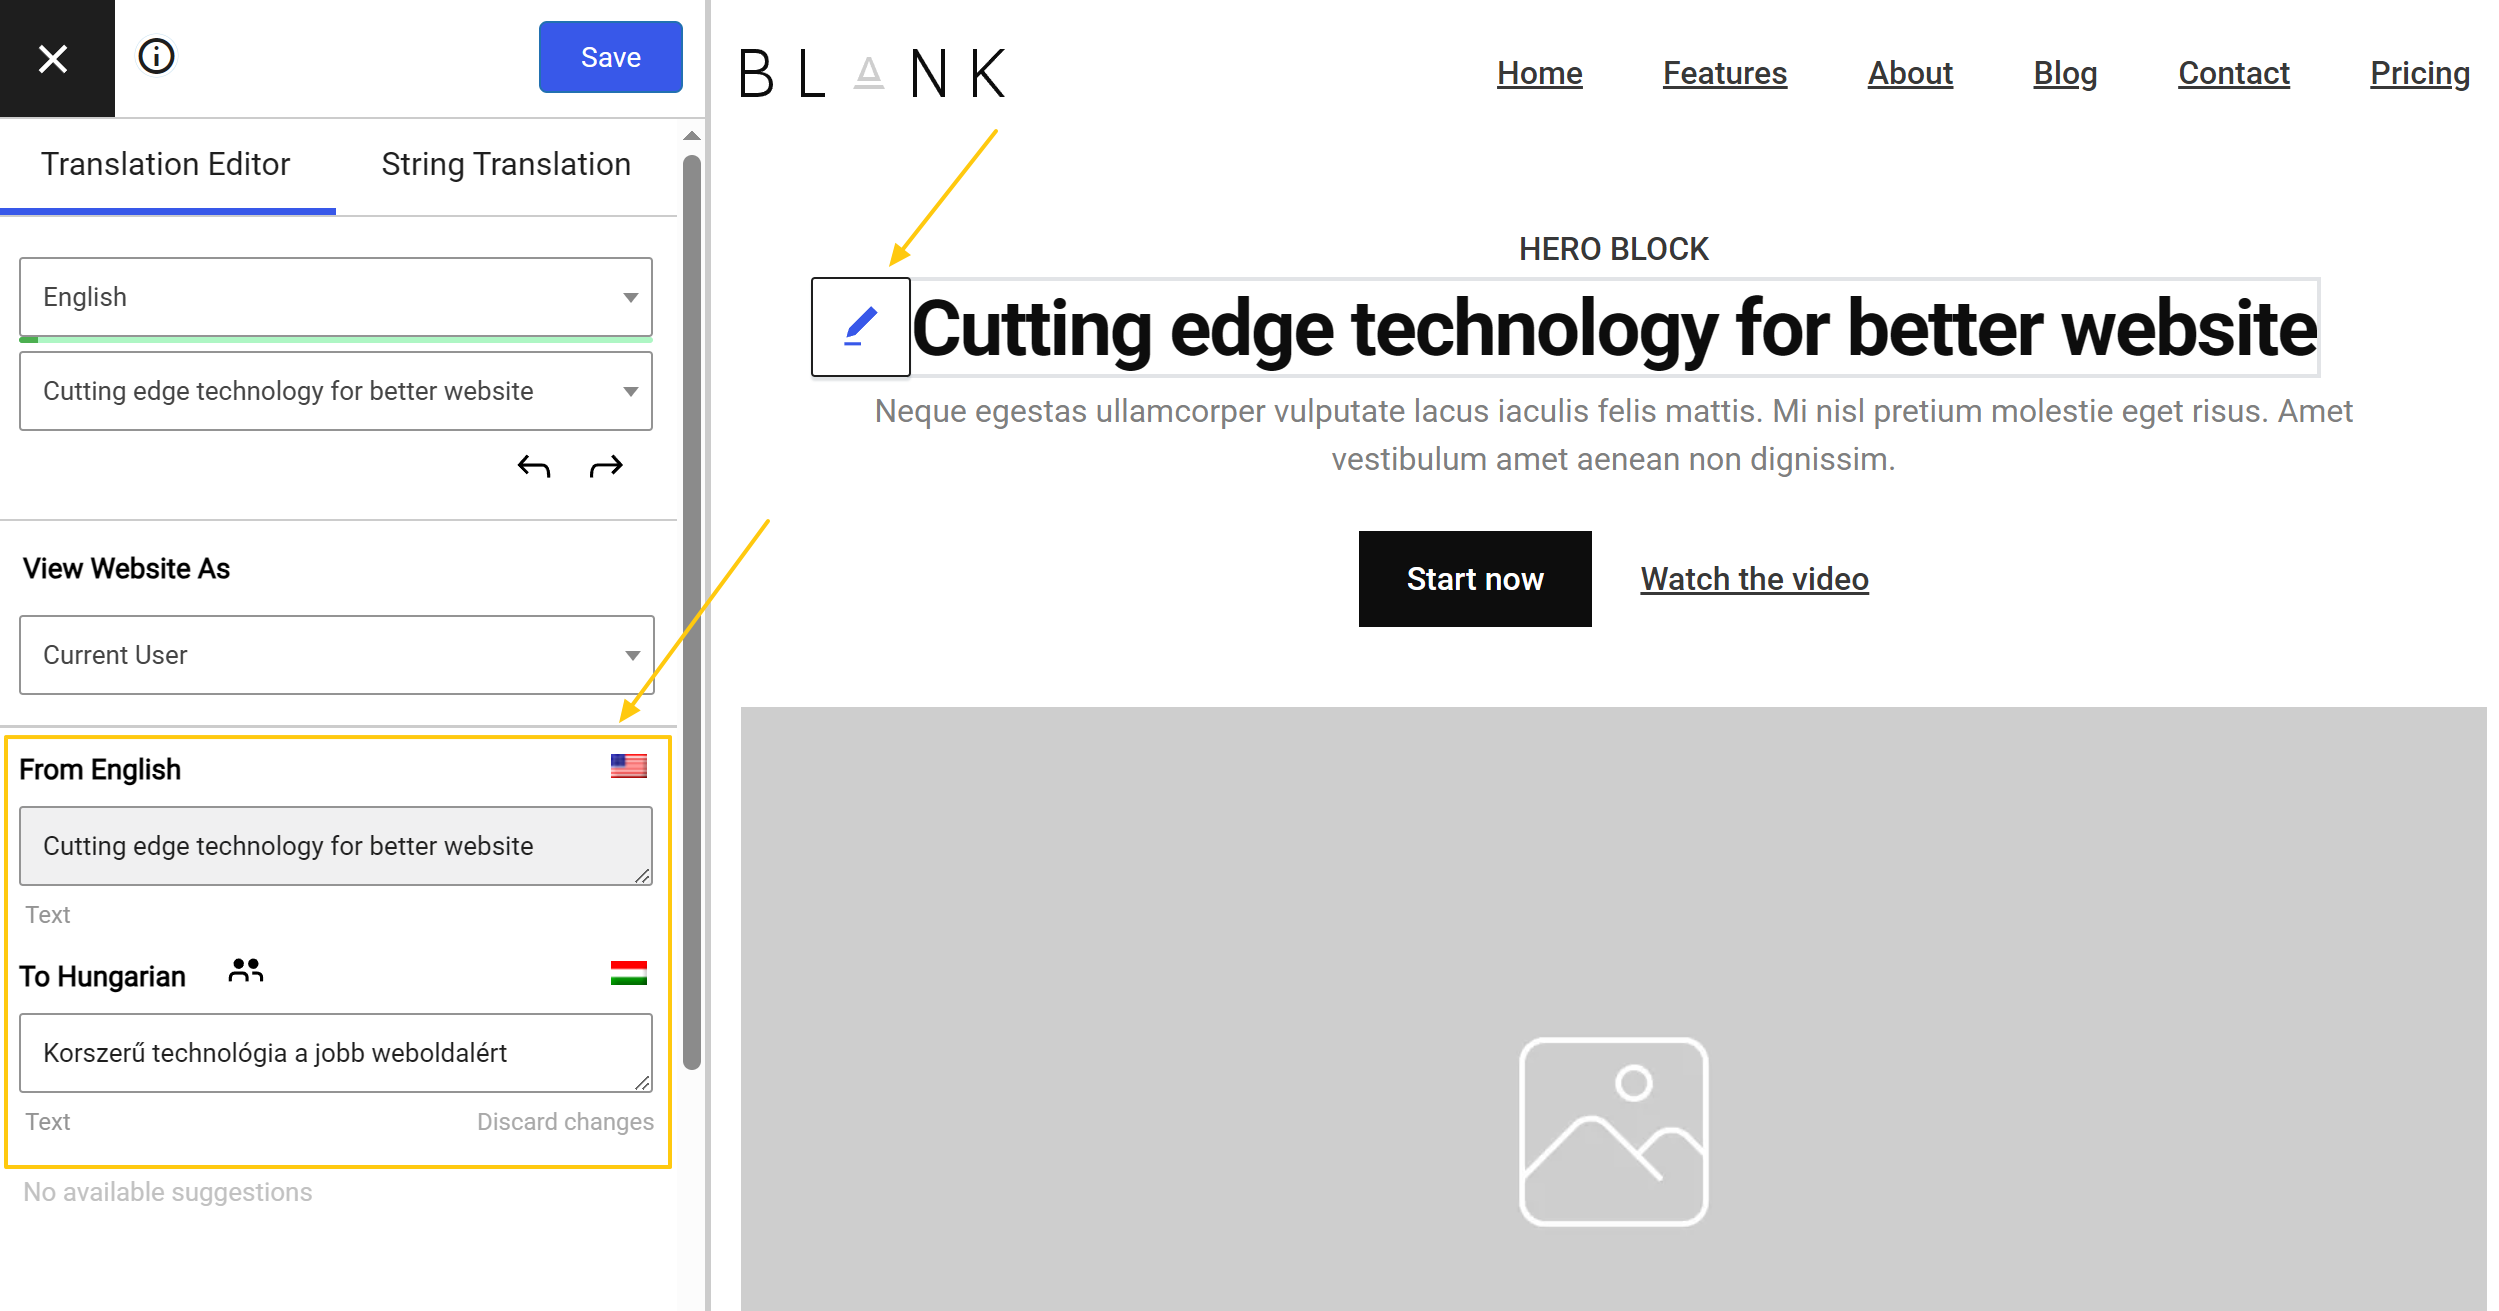
Upon installing TranslatePress, or later at its settings you can set up the languages of the website.
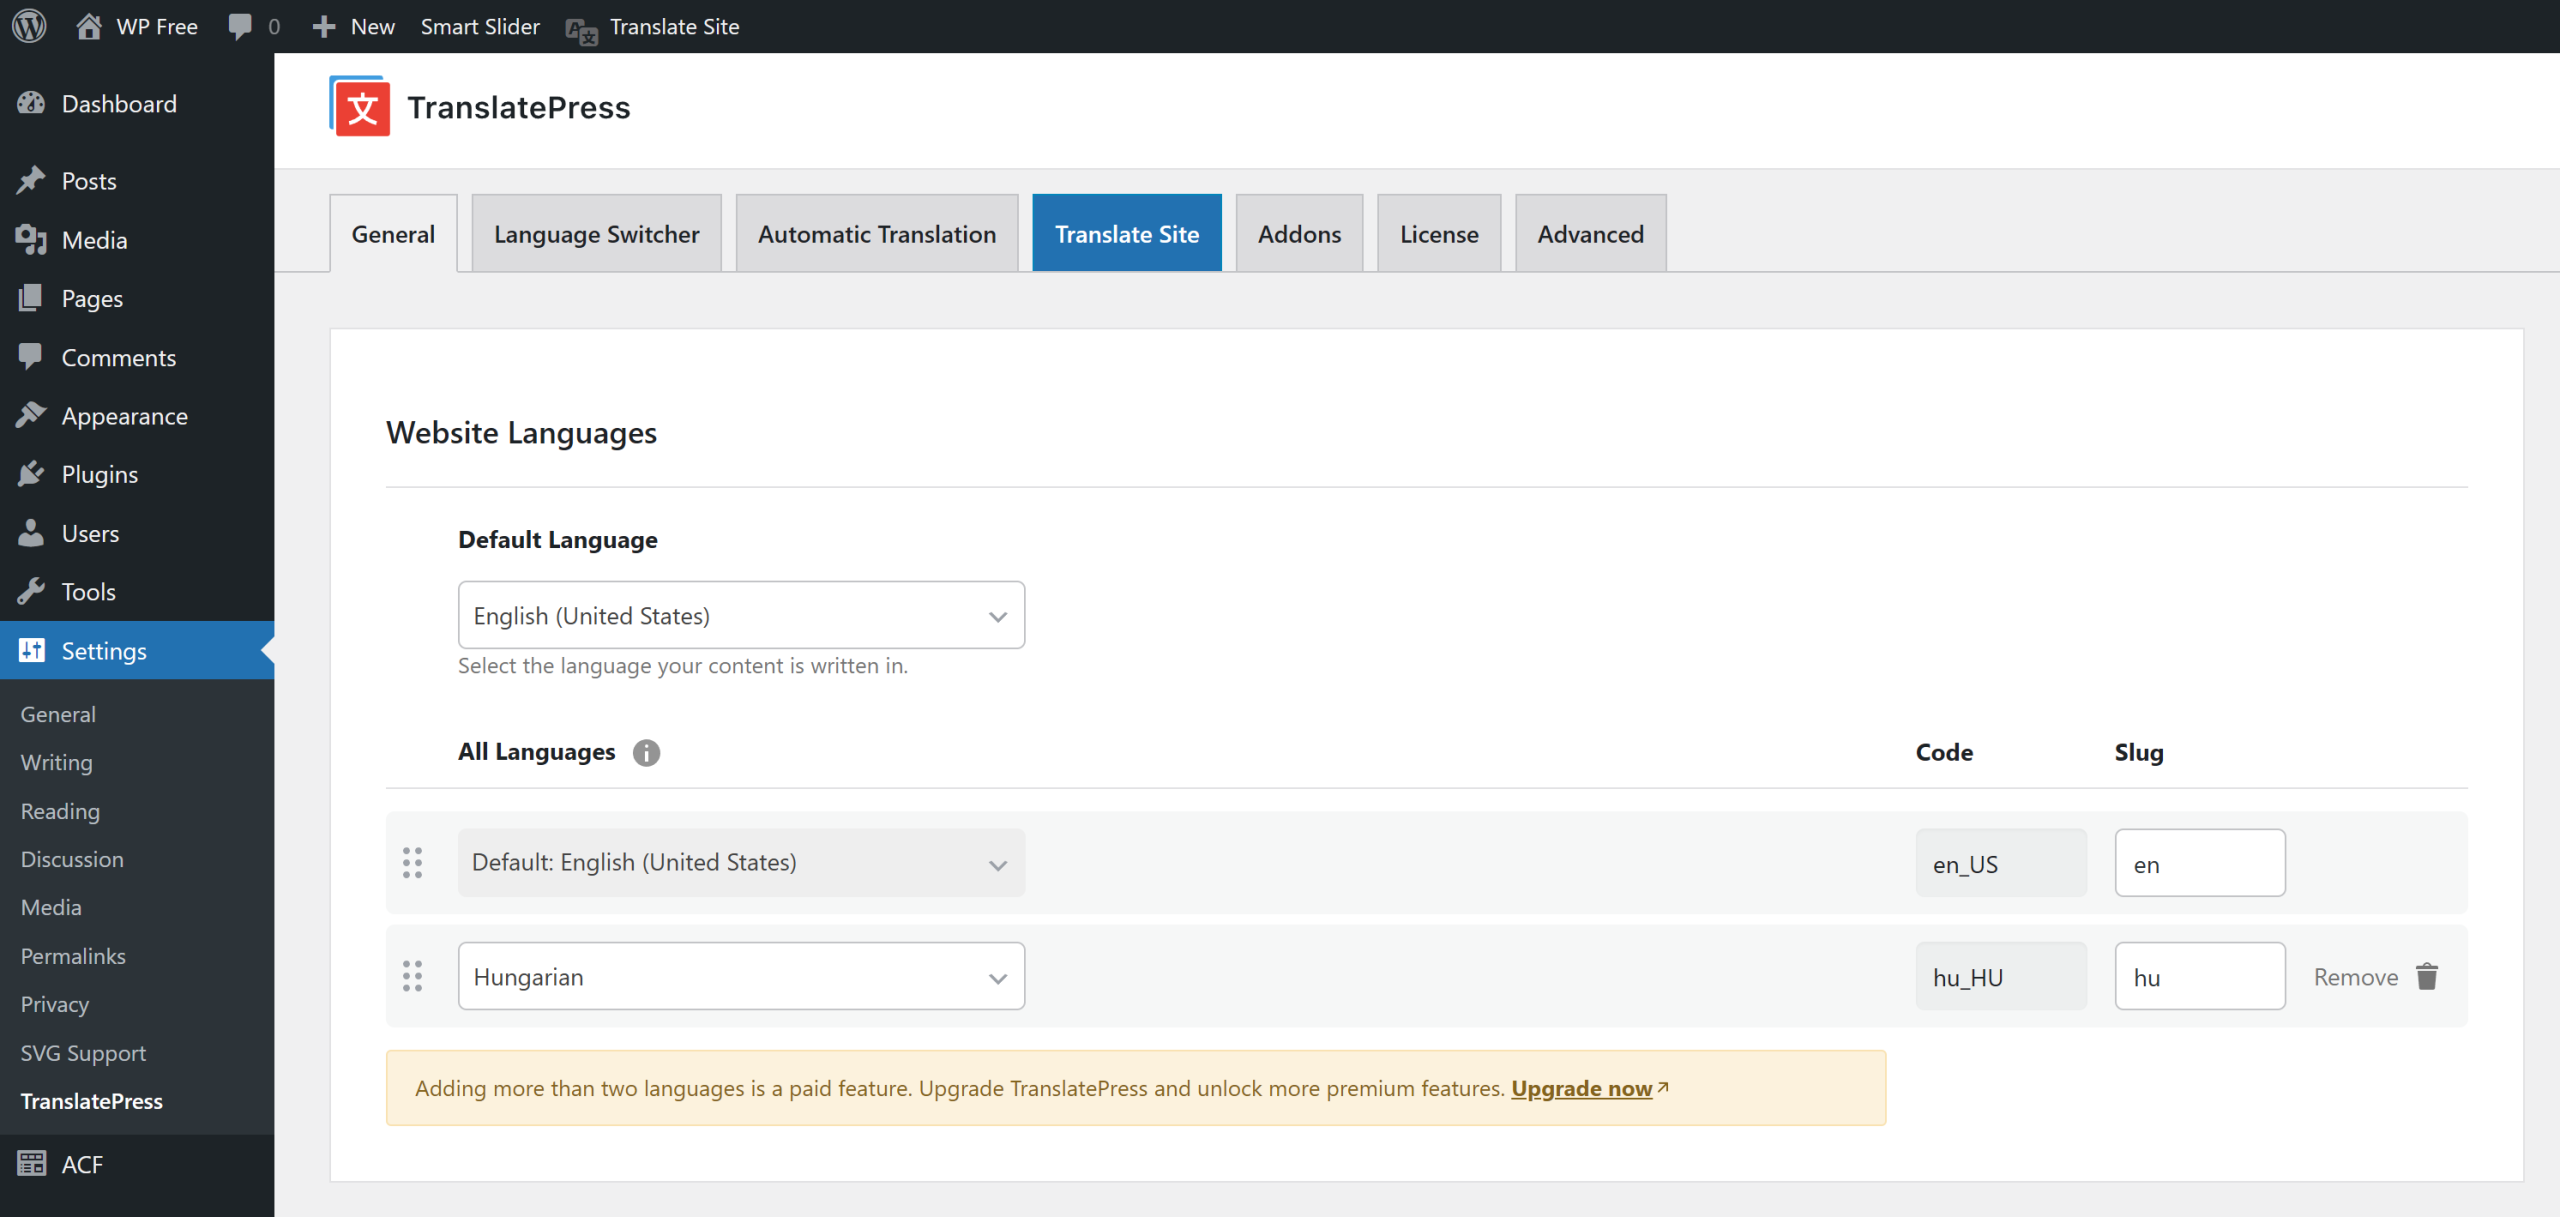
After that, go to the frontend of the page you would like to translate. On the top admin bar, press Translate Page.
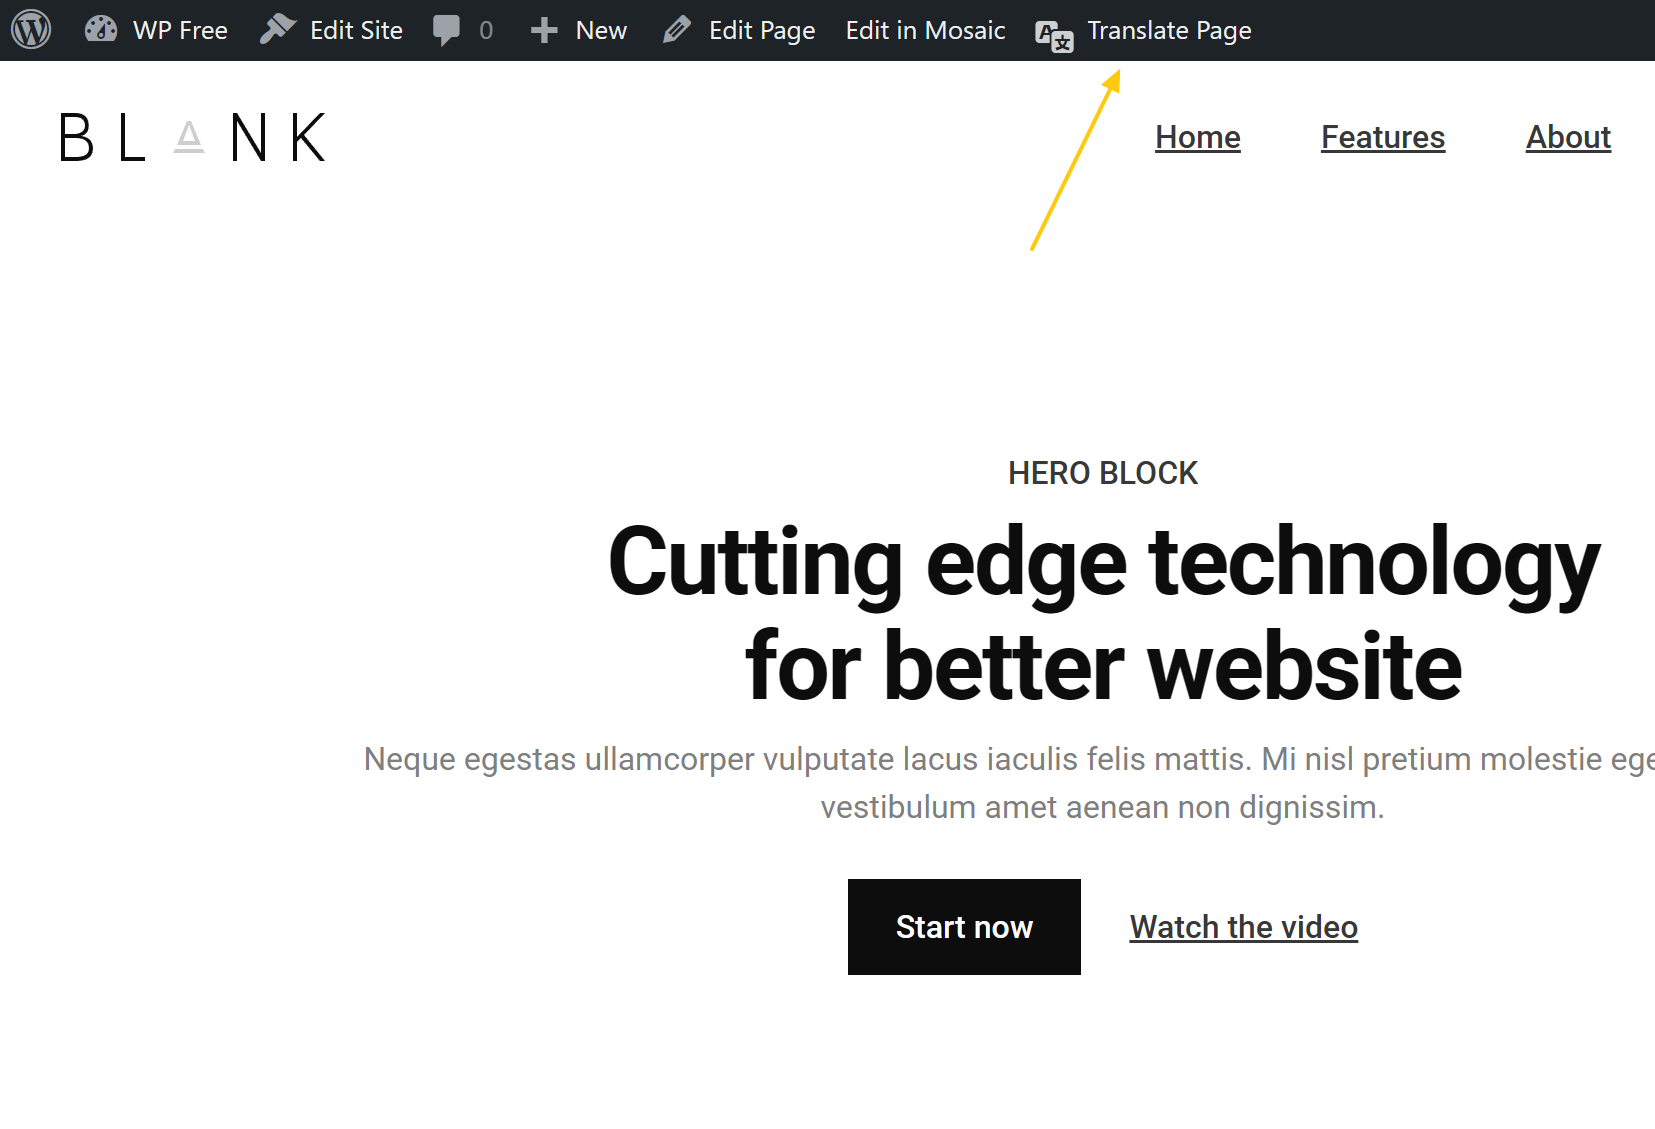
Click the pen icon at any text, image or video, and on the left side you will be able to give different text/url to it for the given language.
Google translate
Certain plugins are offering automatic Google translation created texts. You could use these plugins as well, for example:
Weglot
Weglot plugin uses AI translation tools, to automatically translate all your text. After a text gets translated, you are able to modify the translations on Weglot’s website.
While the result seems really good, Weglot’s Free version is only available as a 14-day trial.
Polylang
At the WordPress admin menu under Pages or Posts, Polylang provides options to translate your website’s pages and posts into different languages.
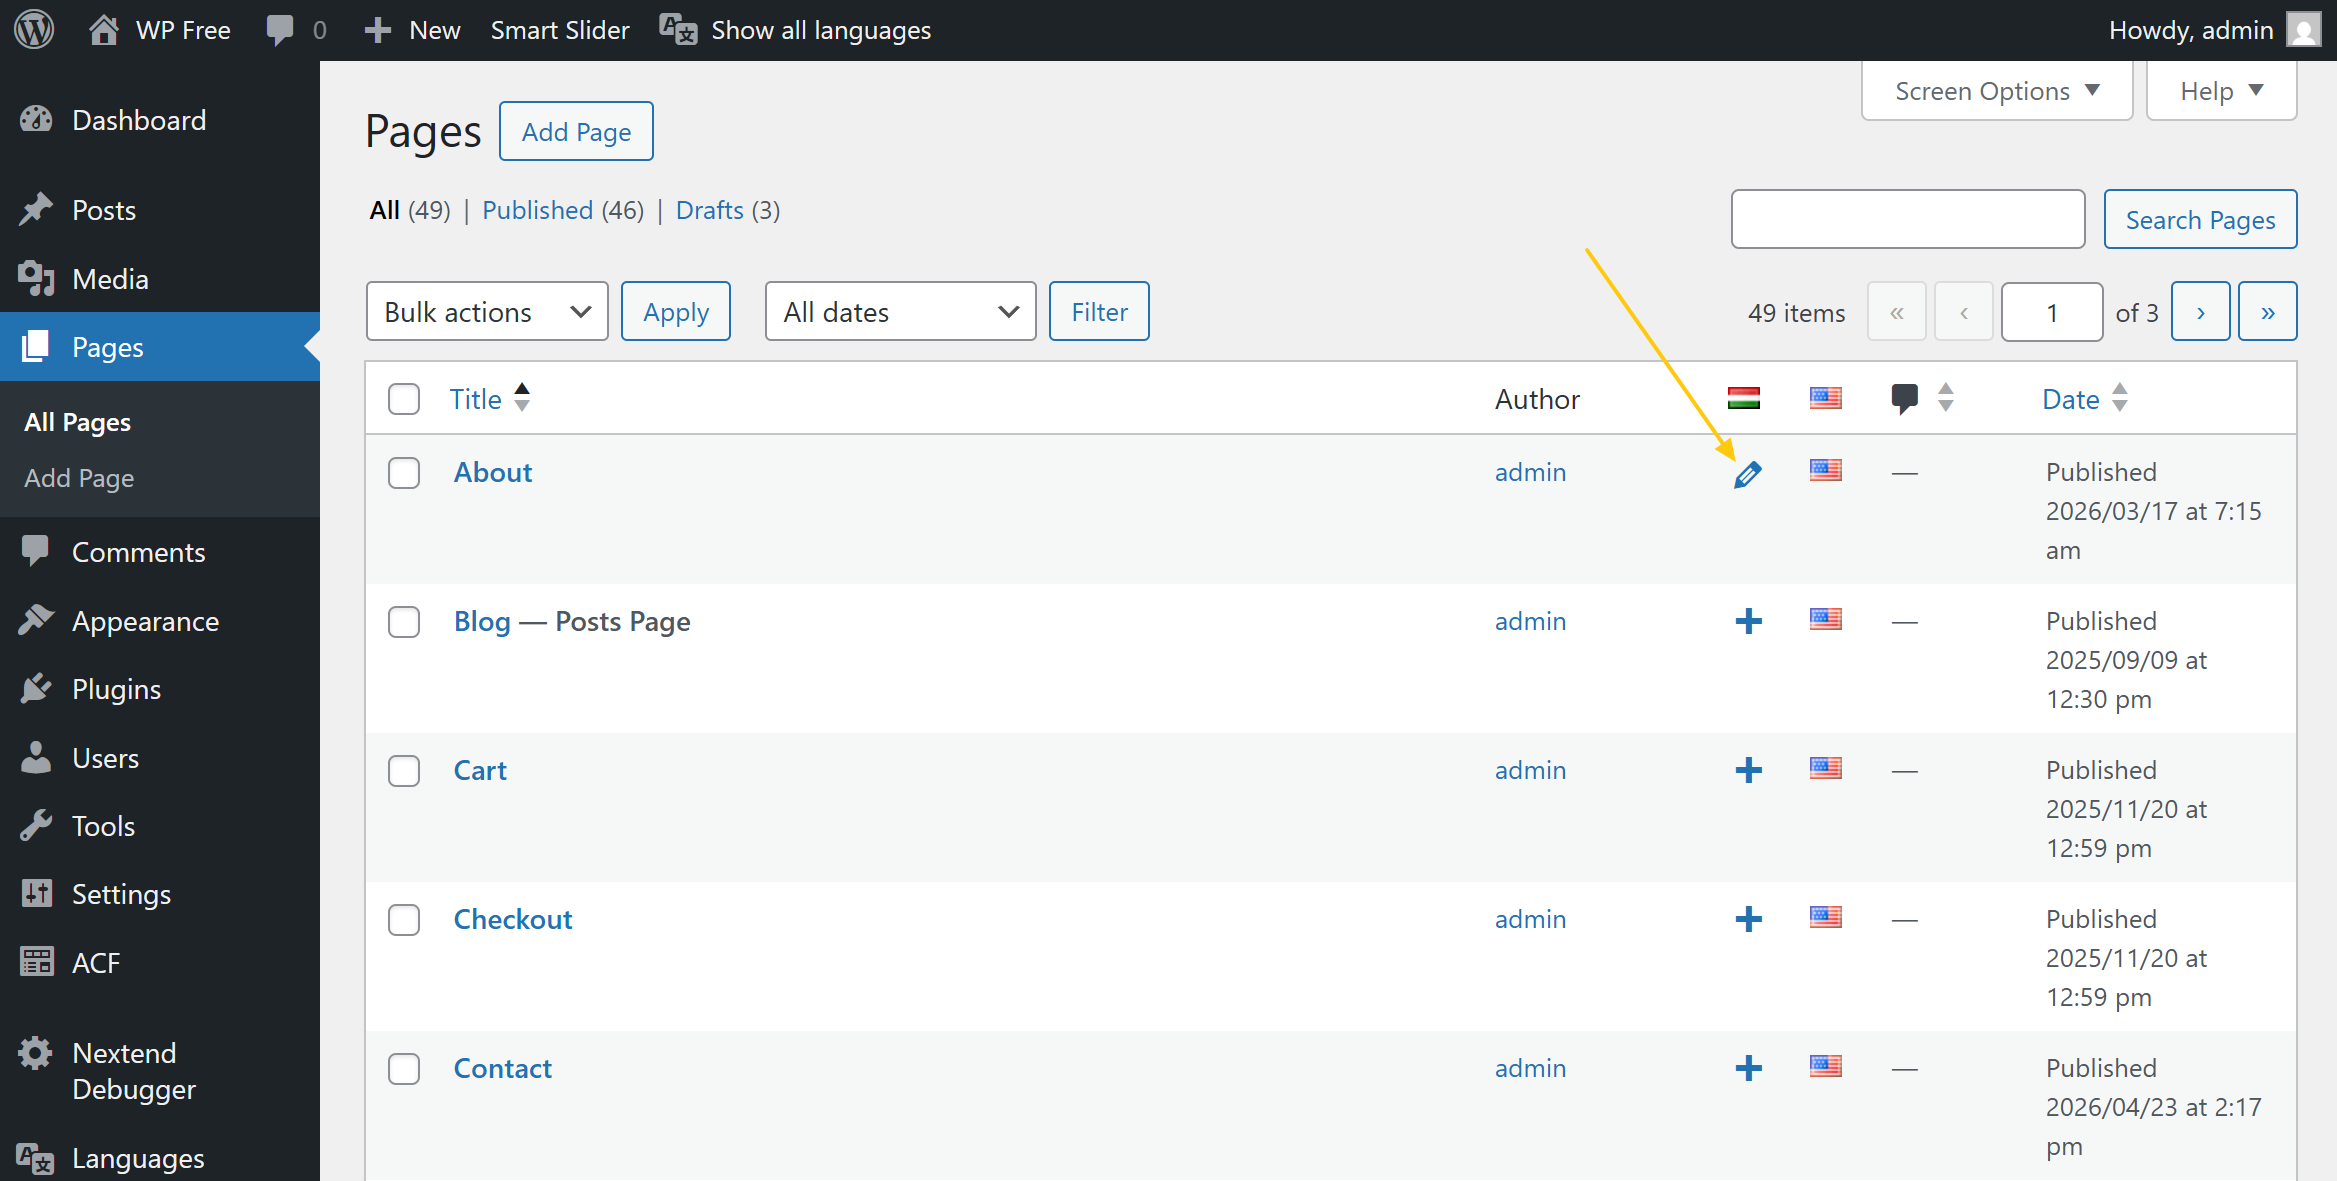
For each translated page, you can select a different Mosaic template. You could duplicate the existing Mosaic template of the original page and then modify its texts and any content for the translated version.
So this is not a very optimal usage, because each of your pages would have multiple templates, and any modifications you want to do, would have to be done on all those templates. And you would need to have multiple masters as well, for the different languages.
Also, there is one major issue: Polylang does not provide a shortcode for displaying a language switcher. So because of this, we don’t suggest using Polylang, unless you are a developer, in which case you could write a plugin (for example with the help of https://chatgpt.com/) to create a language switcher shortcode. Then you could use that in the Shortcode element.
WPML
WPML works with Mosaic in a similar way to Polylang. You translate your pages by selecting a different Mosaic template for them.
Translating template texts
For text you added directly to a Mosaic template, create a translated copy of the template:
- Create the translated version of your page with WPML.
- Duplicate the Mosaic template of the original page.
- Open the translated page in the WordPress editor, and select the duplicated template for it.
- Edit the duplicated template with Mosaic, and translate its texts.
If your header or footer has text to translate, duplicate its master too, and use it for the translated templates.
Text inside Mosaic templates doesn’t appear in WPML String Translation, so translated template copies are the way to go for now. Templates applied automatically, like the blog or archive templates, are shared by all languages.
Language switcher
Unlike Polylang, WPML comes with a shortcode for the language switcher, so no extra coding is needed. Add the following shortcode to a Shortcode element wherever you’d like the switcher to appear:
[wpml_language_switcher]WPML can also add a language switcher to your site’s footer automatically. You can set it up at WPML → Settings → Language Switchers.
Translating post content
The Post Content element displays the content you write in the WordPress editor. WPML translates this content just like on any other WordPress site, so a translated page shows its translated content inside the same Mosaic template.
This means if you keep the text of a page in the WordPress editor, and use the Mosaic template only for the design around it, you don’t need a separate template for each language.
Post lists
Lists of posts, for example the ones you build with the Loop element, automatically show only the posts of the language the visitor is viewing. For example, a blog page in Hungarian lists only the Hungarian posts.
By default, posts without a translation don’t appear in the other languages. If you’d like them to show up in their original language instead, go to WPML → Settings → Post Types Translation, and choose the use translation if available or fallback to default language option for that post type.
Loco translate
The Loco Translate plugin was created to translate hardcoded texts, such as theme, plugin, or admin interface strings, rather than page or post content. Because of this, it cannot be used to translate Mosaic templates.
It also will not work for translating the Mosaic admin area, as that requires a special translation environment.
Translating admin area
Mosaic includes a Translation Builder tool that helps you create and compile translation files for the admin pages of Mosaic. It takes the base template file, mosaic.pot, and turns your translated files into the compiled .mo files WordPress needs.
You open the base template mosaic.pot in Poedit, create your translation file, and then compile it using Node.js commands.
Requirements
Before you begin, make sure you have the following installed and set up:
- Latest Node.js
Download and install from: https://nodejs.org/en/download
- Poedit (for editing translations)
Download and install from: https://poedit.net/download
- Basic command line knowledge
You should know how to handle the Command Prompt (Windows) or Terminal (Mac).
- Mosaic
You can either work directly inside your local WordPress site at: wp-content/plugins/mosaic/Languages/, or extract the Mosaic plugin installer ZIP and work inside: mosaic/Languages/.
Project structure
.
├── src/ # Source files (do not edit)
├── dist/ # Generated translation files
├── mosaic.pot # Base translation template
├── package.json
└── README.md
Usage
1. Create your translation file
- Open the mosaic/Languages/mosaic.pot file in Poedit.
- Choose “Create new translation”.
- Select your desired language (for example, Hungarian).
- Save the file with a name like: mosaic/Languages/mosaic-hu_HU.po
- Now you can translate all the text directly in Poedit. When finished, save your work, the .po file will contain your translations.
2. Open the command line
You’ll need to run the build commands inside mosaic/Languages.
On Windows:
- Click the Start menu, type cmd, and press Enter.
- Use the cd command to navigate to the Languages folder: cd [PATH-TO-WORKING_DIR]\mosaic\Languages
On Linux:
- Open Terminal (press Ctrl + Alt + T, or search for “Terminal” in your application menu).
- Use the cd command to navigate to the Languages folder: cd [PATH-TO-WORKING_DIR]/mosaic/Languages
On Linux/macOS:
- Open Terminal (you can find it via Spotlight with Cmd + Space, then type “Terminal”).
- Use the cd command to navigate to the Languages folder: cd [PATH-TO-WORKING_DIR]/mosaic/Languages
3. Install the dependencies
Once you’re inside the folder, run this command:
npm install
This will automatically download all necessary packages for the translation build process.
4. Build the translation files
After installation finishes, run:
npm run build
This command compiles all .mo translation files into the dist folder.
5. Upload your translation to the website
If you are working on a local WordPress site, you can skip to → 6. Test your translation.
If your site is hosted remotely, or you are not working directly inside your local WordPress installation, upload your compiled translation files to your server:
- Copy the contents of wp-content/plugins/mosaic/Languages/dist from your local environment
- Upload them to the same location on your site: wp-content/plugins/mosaic/Languages/dist
- Overwrite existing files if prompted.
6. Test your translation
You can test your translation by switching your site’s language:
- Go to WordPress Admin → Settings → General
- Change Site Language to the language you translated
- Save the settings and reload the page to see your translation in action
Your translation should now be active.
7. Share your translation with the community
If your translation is more than 80% complete, feel free to send it to us. With your permission, we’ll include your translation in future releases of the plugin and credit you in our documentation. You can contact us here: https://mosaicbuilder.com/support/
Do not edit anything inside the src folder. It contains internal build logic and will be replaced during updates.
Example output
After running npm run build, you’ll find the generated files in the dist/ directory.
License
This tool is distributed as part of the Mosaic project. See the main Mosaic repository for license and contribution details.