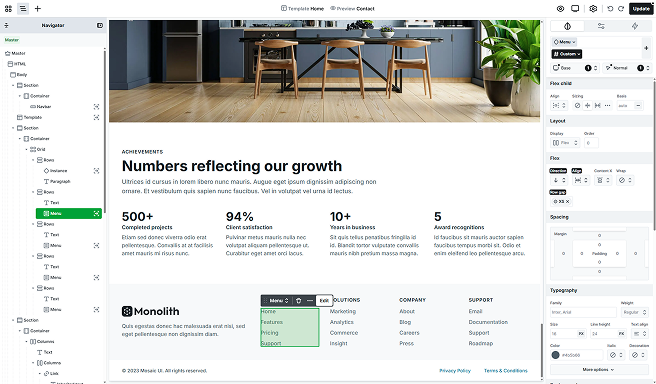
The Menu element is typically found in your website’s footer, located at the very bottom of the page. It’s designed to help visitors easily navigate your site, especially if they didn’t spot these links in the Navbar. They are great for including links to less frequently visited pages too, like terms and conditions and privacy policy.
Structure
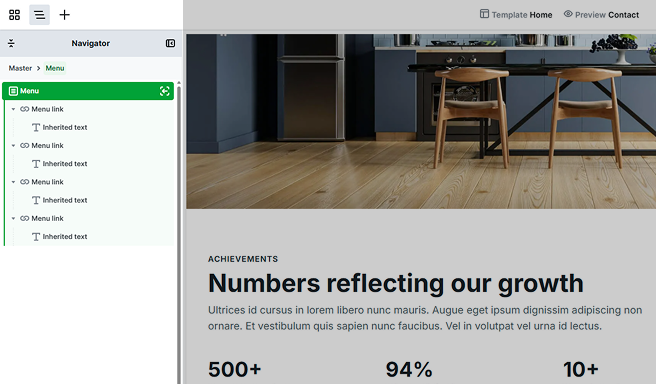
After entering the Menu’s scope, you’ll find that by default, it’s made up of one main element.
Menu link
By default, the Menu comes with two Menu links. These are your navigation links, which are typically text-based and direct users to different pages or sections of your website. You can also add these links via the Add panel.
Styling
You can customize all of its settings through the Style tab.
Additional elements
Additional states
Creating a Slide-in Menu
Mosaic doesn’t include a dedicated “slide-in menu” element by default, but you can build one using basic elements and interactions.
This method uses a fixed container and two separate buttons: one to open the menu and one to close it.
1. Create the Menu Container
First, go to your Master of your website.
Add a Div element to it, for example right under the Body element.
Apply the following styles to the Div:
- Position:
fixed - Z-index:
100 - Top:
0 - Bottom:
0 - Left:
-100% - Width:
100% - Background color: choose a color
This creates a full-screen container that is positioned outside of the viewport (to the left).
💡 While editing, you should temporarily remove left:-100% to make the menu visible.
2. Add the “Open Menu” Button
- Position:
fixed - Z-index:
90(lower than the menu container) - Top:
20px - Right:
20px
3. Add the “Close (X)” Button
Add another Button element inside the Div (this will be your close button).
Style it for example like:
- Position:
absolute - Z-index: 1
- Top:
20px - Right:
20px - Set the text of the Button to “X”
4. Add Interactions
Open Menu (Open Button)
Select the Open Menu button, then at its Interactions panel add a Click interaction:
- At Click → Action, press Add action
→Translate X - From → To:
0 → 100% - On the Action tab
→Target: Select the Div (menu container)
Close Menu (X Button)
Select the X button inside the Div, then at its Interactions panel add a Click interaction:
- At Click → Action, press Add action
→Translate X - To:
0%(enter it manually, even if you see it as the default value!) - On the Action tab
→Target: Select the Div (menu container)
5. Build Your Menu Content
As written at the 1st point’s notice, temporarily remove the Div’s left: -100% placement, so you could see your menu.
Now you can freely add any element inside the Div, to build your menu. It can be a Menu element, but you can also use just texts with links or anything else.
And that’s it, one button opens, another closes the menu! You can adjust this design to your needs, so you don’t necessarily need to use Button elements, but those could be any other elements too, Image element, Icon element, etc.. And you can adjust their placements to make them fit into your design.