In this tutorial, you’ll learn how to create the animation you see on our website with the continuous animation loop.

Structure
Step 1: Define element size and spacing
First, decide how tall your elements should be and how much space you want between them.
Example:
- Element height: 72px
- Spacing (margin): 16px
This means one element takes up a total of 88px (72px + 16px).
Step 2: Create the Rows element
This element will act as the visible area of the animation.

- It should display in this example 3 elements
- Calculate its height using:
(visible elements × element height) + (spacing count × spacing)
Example:
(3 × 72px) + (4 × 16px) = 280px
So the Style settings of the Rows element are:
- Height: 280px
overflow: hidden(important — this hides the elements outside the visible area)
Step 3: Add a Div wrapper
Place a Div element inside the Rows.
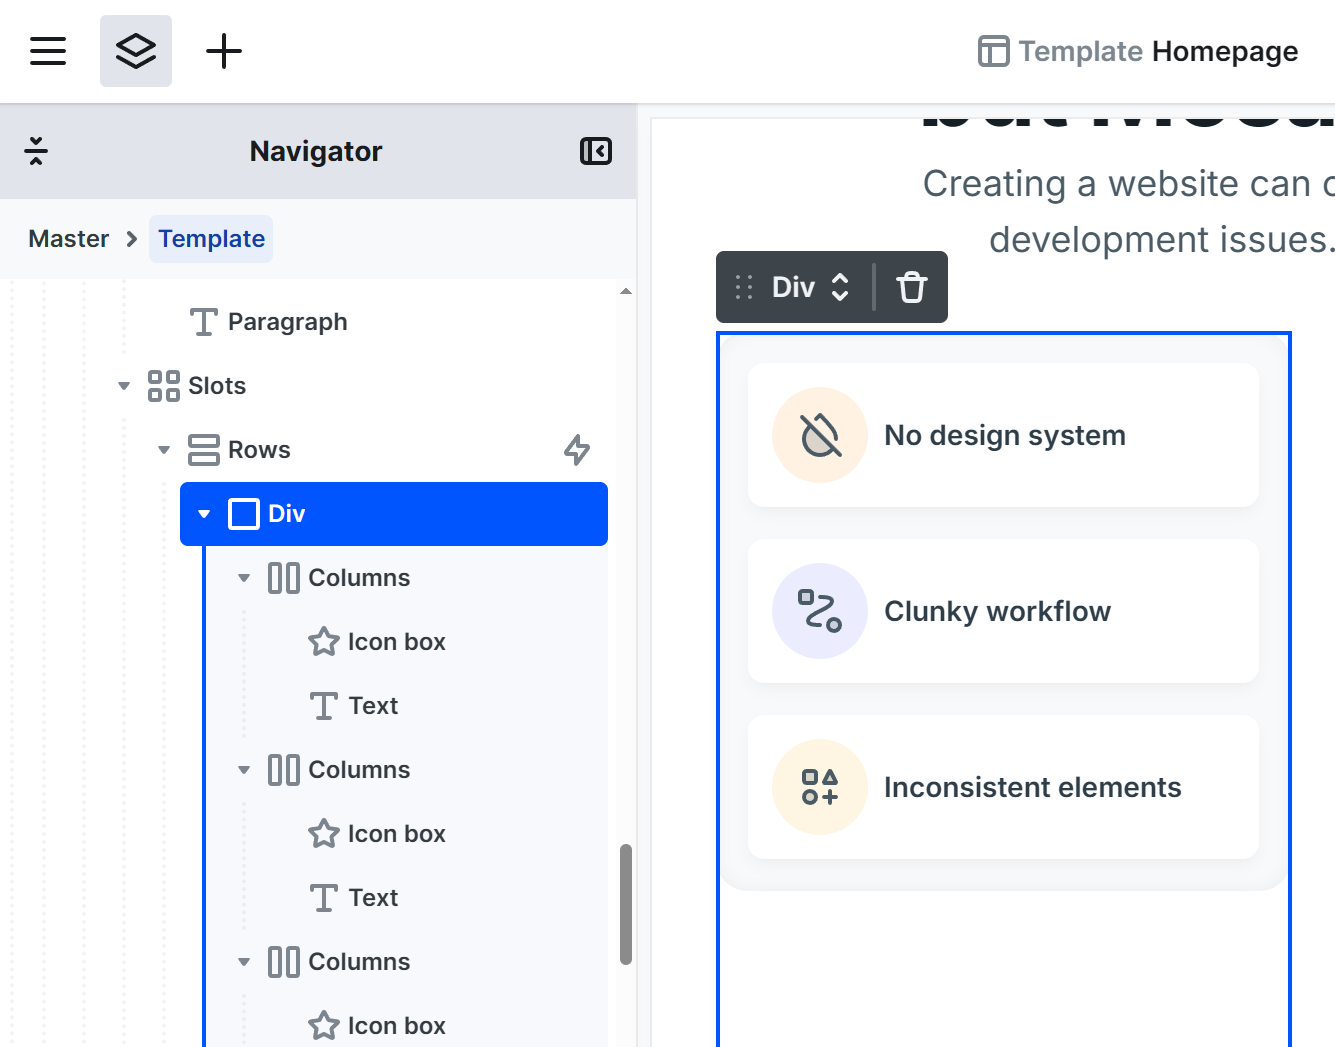
This will act as a container for the animated elements.
→ No additional settings are required.
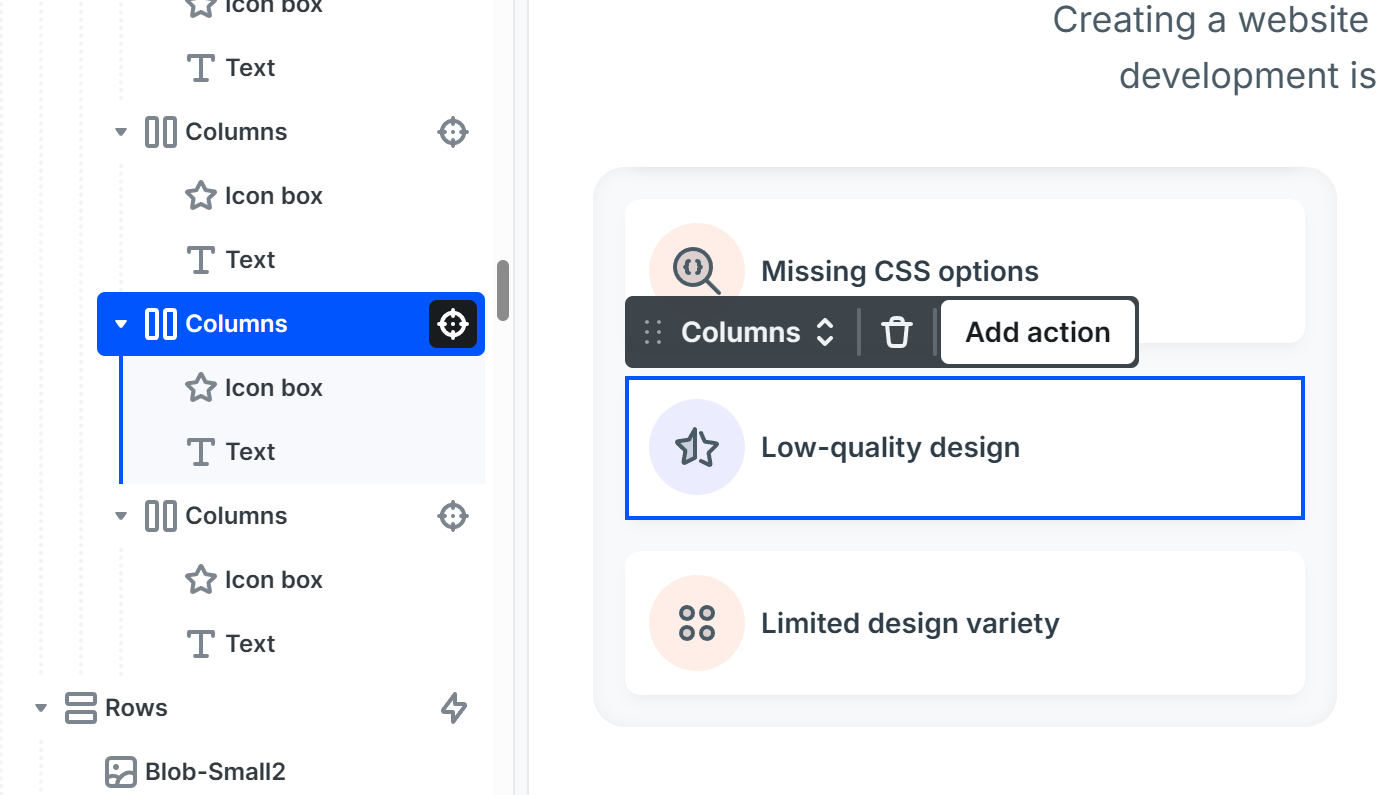
Step 4: Create the elements (Columns)
Add 6 Columns elements inside the Div.

Each element will be as decided the Step 1, so in my case:
- Height: 72px
- Margin-bottom: 16px
Each element’s total vertical space remains 88px.
Animation
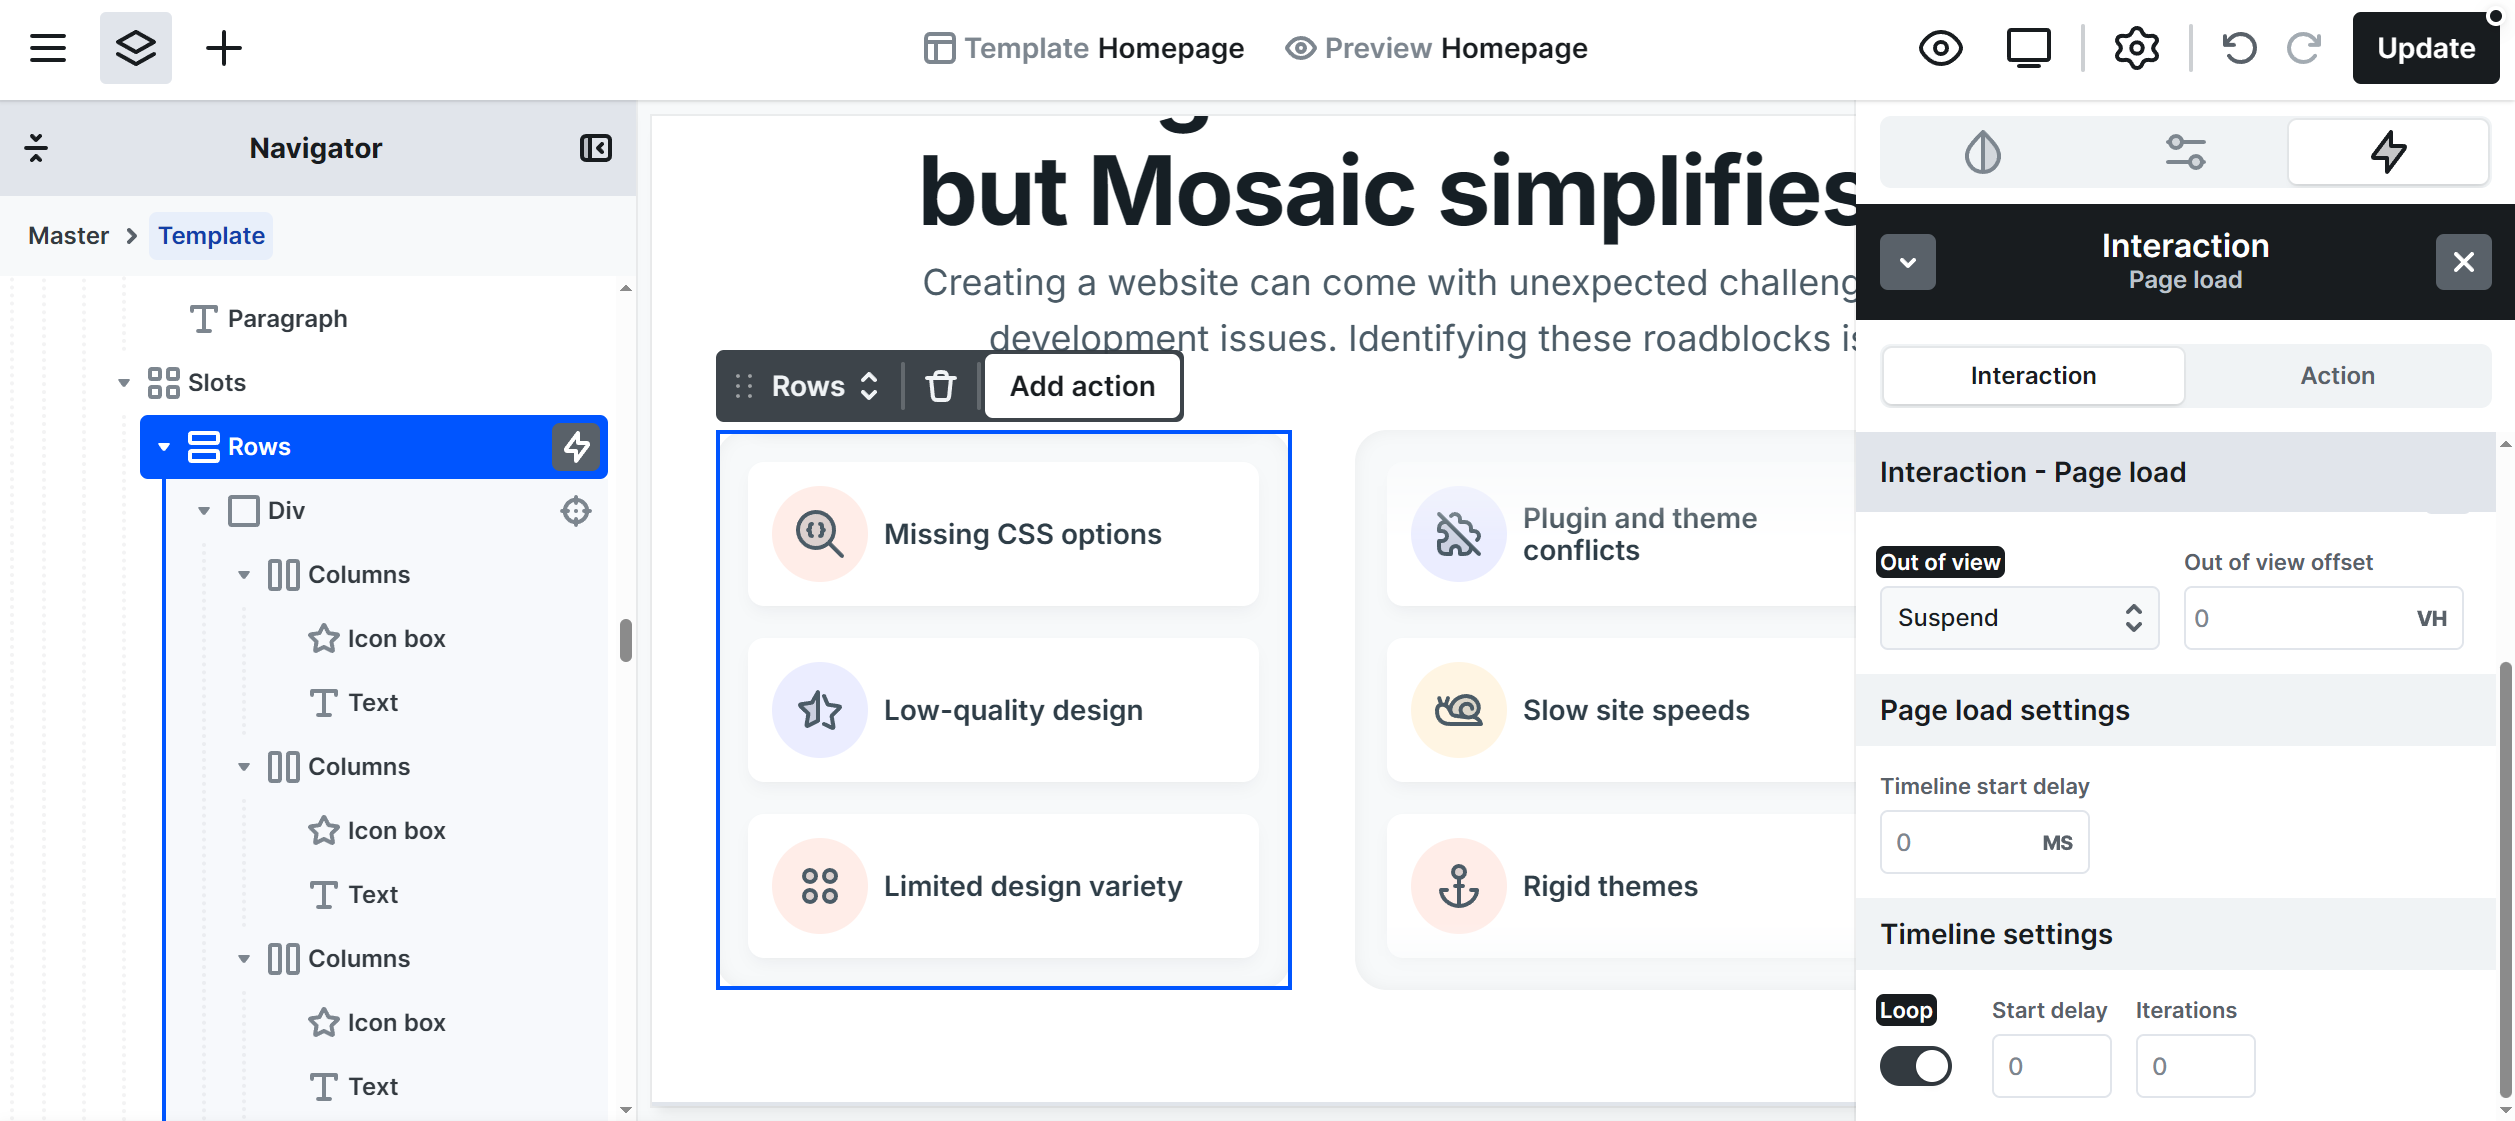
Step 5: Set up the main animation (Rows element)
Select the Rows element, then go to Interaction → Add interaction → Page load.
Choose the Div element → press Add action → Translate Y.
Settings:
- Duration: 10000ms
- Easing: Linear
Translate Y:
- Initial:
calc(-88px * 3) - To:
calc(-88px * 2)
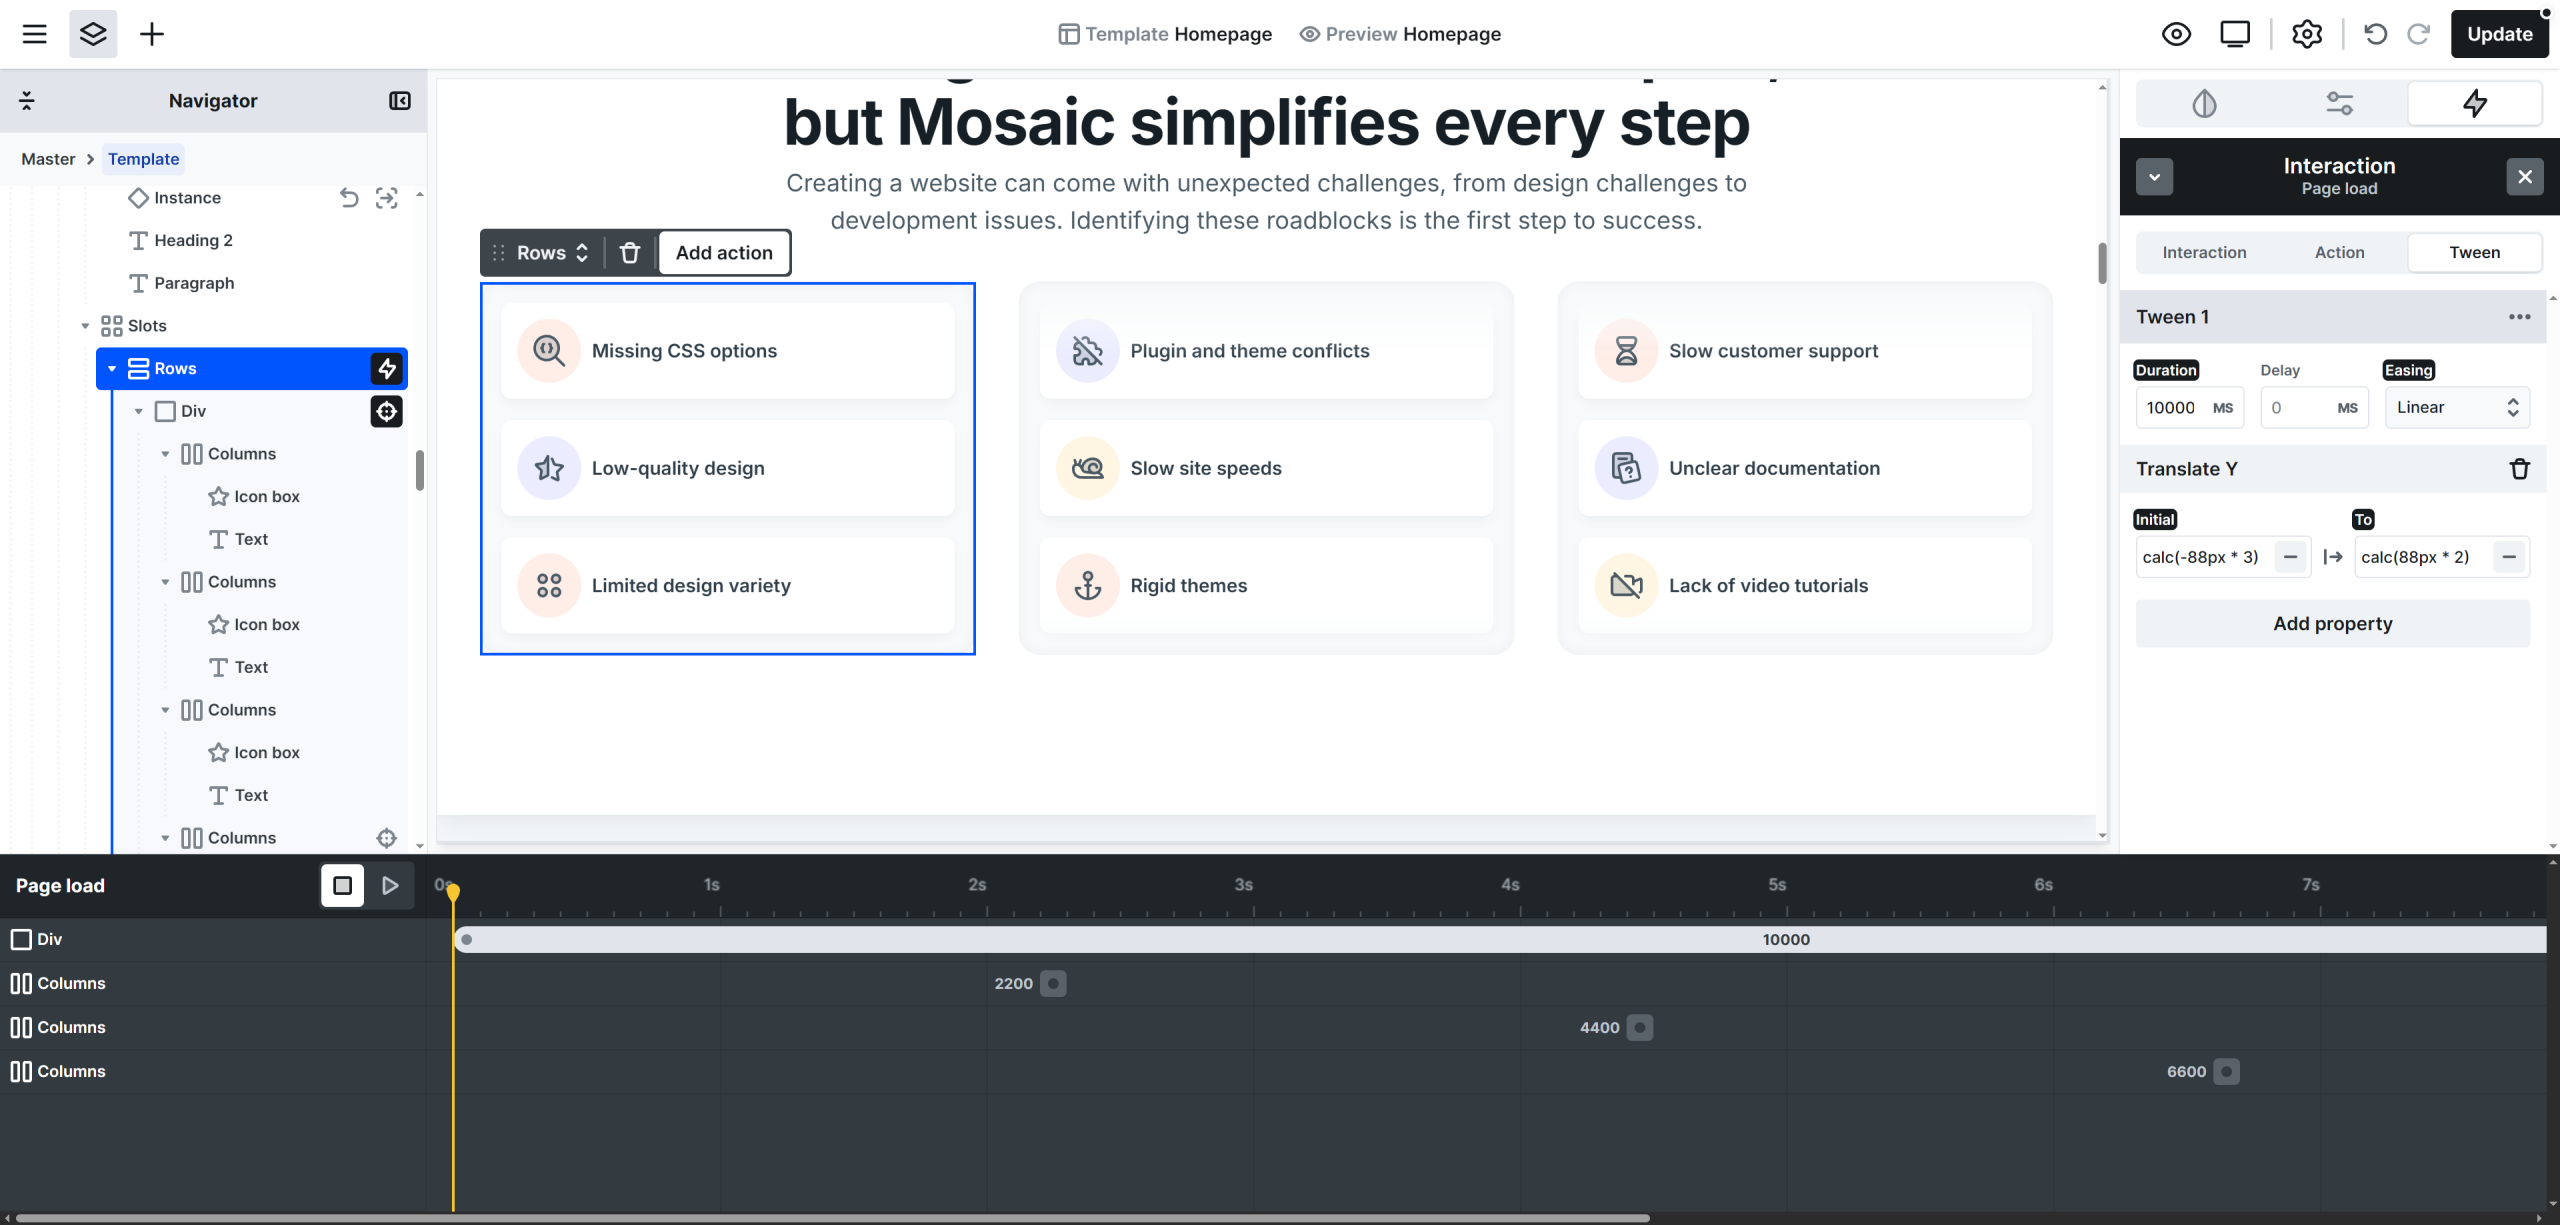
This creates the continuous upward movement.
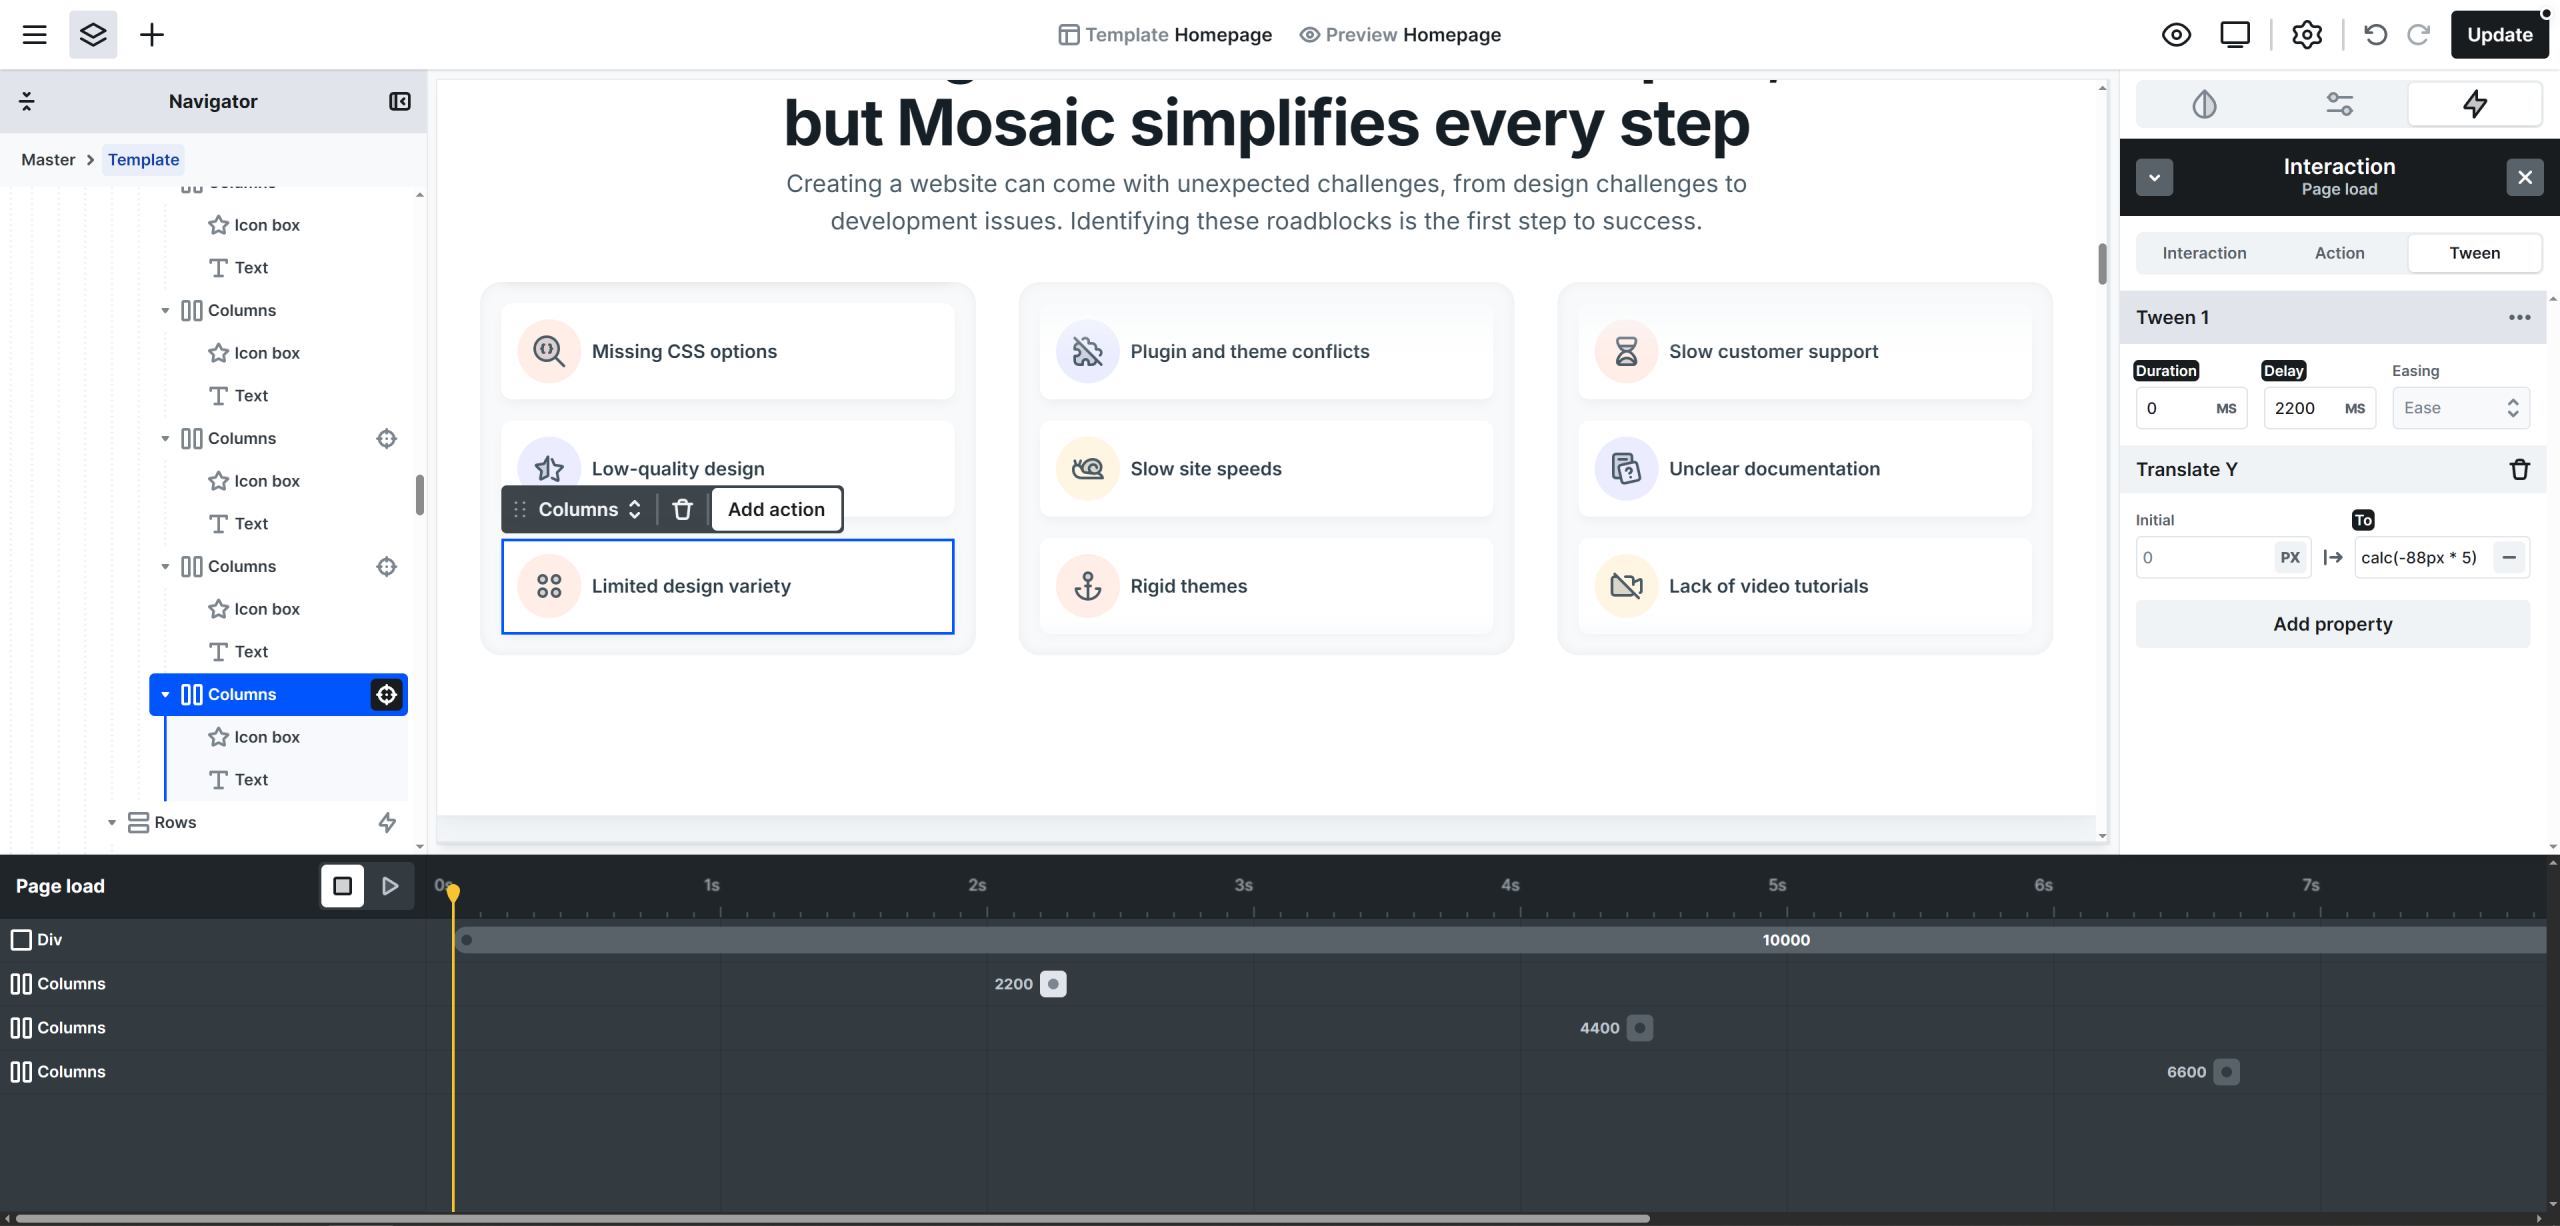
Step 6: Reposition the last element (6th Column)
While you are still within the Row’s page load interaction, select the the last (6th) Column → press Add action → Translate Y:
- Duration: 0ms
- Delay: 2200ms
- Translate Y → To:
calc(-88px * 5)
You should end up with the animations being on the same timeline.
Step 7: Reposition the 5th element
Similarly for the same timeline, select the 5th Column → press Add action → Translate Y:
- Duration: 0ms
- Delay: 4400ms
- Translate Y → To:
calc(-88px * 5)
Step 8: Reposition the 4th element
Once again for the same timeline, select the 4th Column → press Add action → Translate Y:
- Duration: 0ms
- Delay: 6600ms
- Translate Y → To:
calc(-88px * 5)
💡 What’s happening here?
As elements move out of view, these steps instantly move them back to the top. This creates the illusion of an infinite loop.
Step 9: Enable looping and optimize behavior
In the Interaction tab settings:
- Loop: ON → keeps the animation running continuously
- Out of view: Suspend → pauses the animation when it’s off-screen (better performance)
Optional: Pause animation on hover
Step 10: Assign an Interaction ID
Select the Rows element -> Page load interaction, go to the Interactions tab and set an ID.
Example:
- ID:
slot
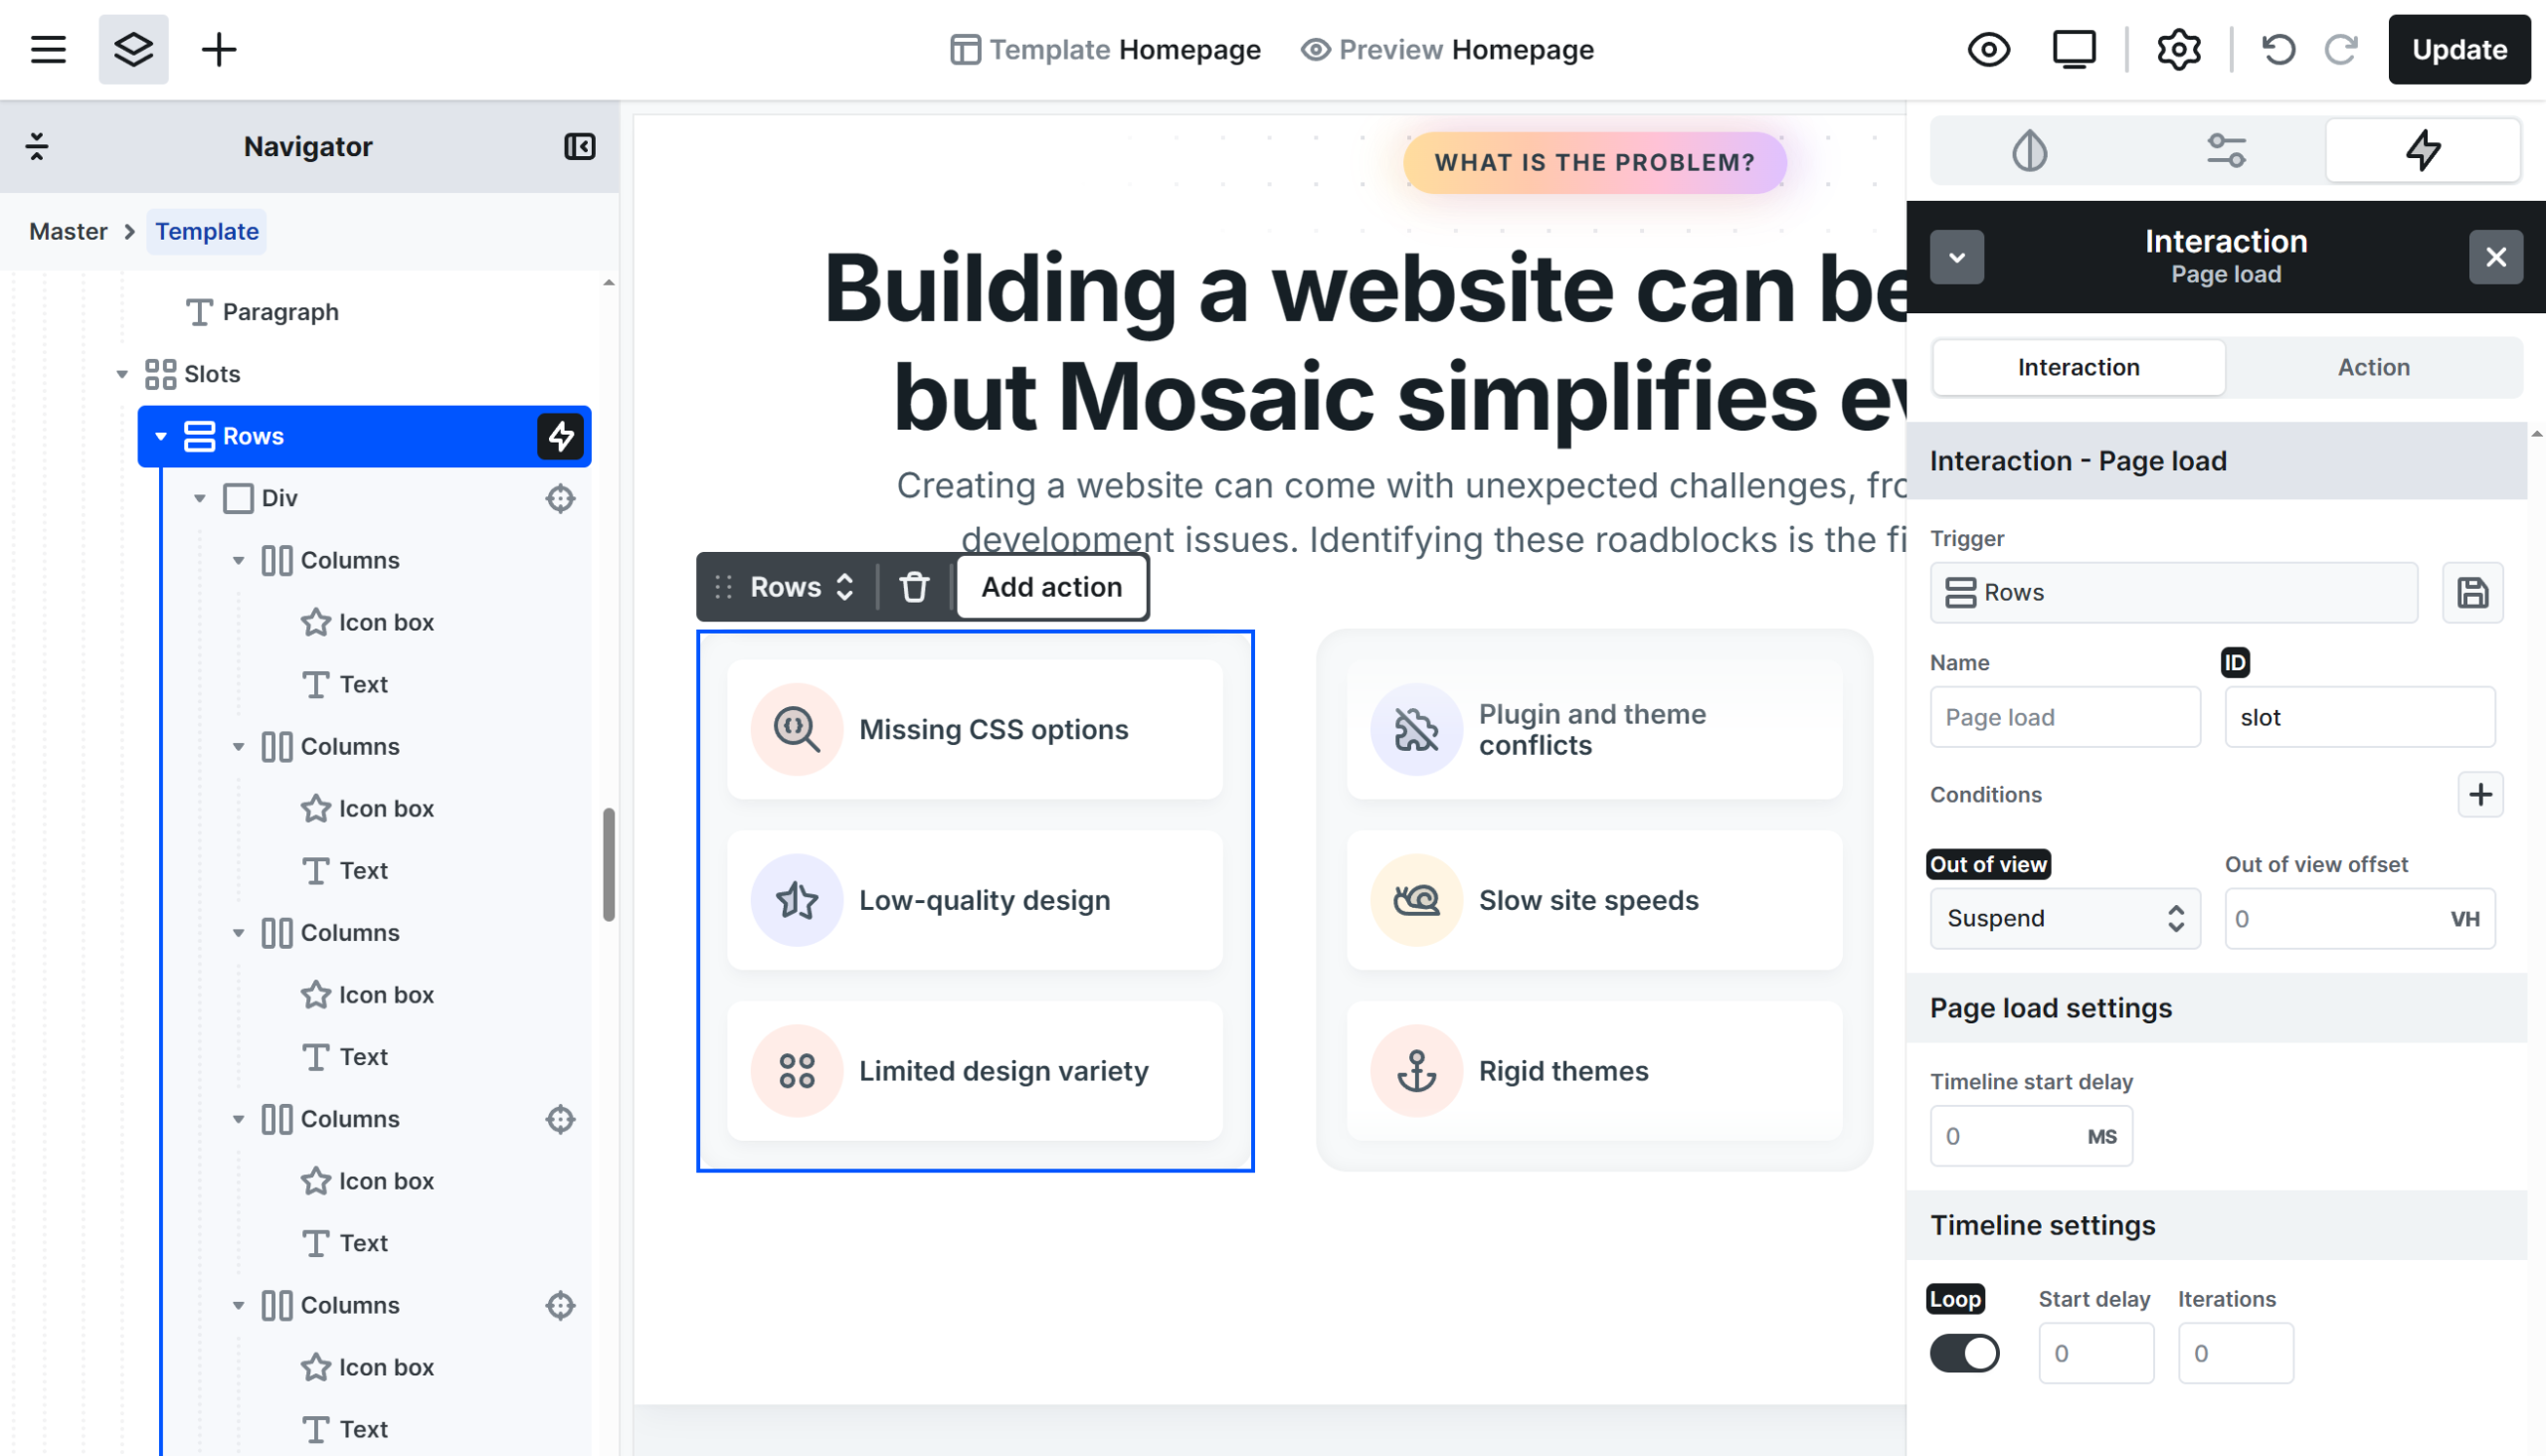
This ID will allow you to control the animation with other interactions.
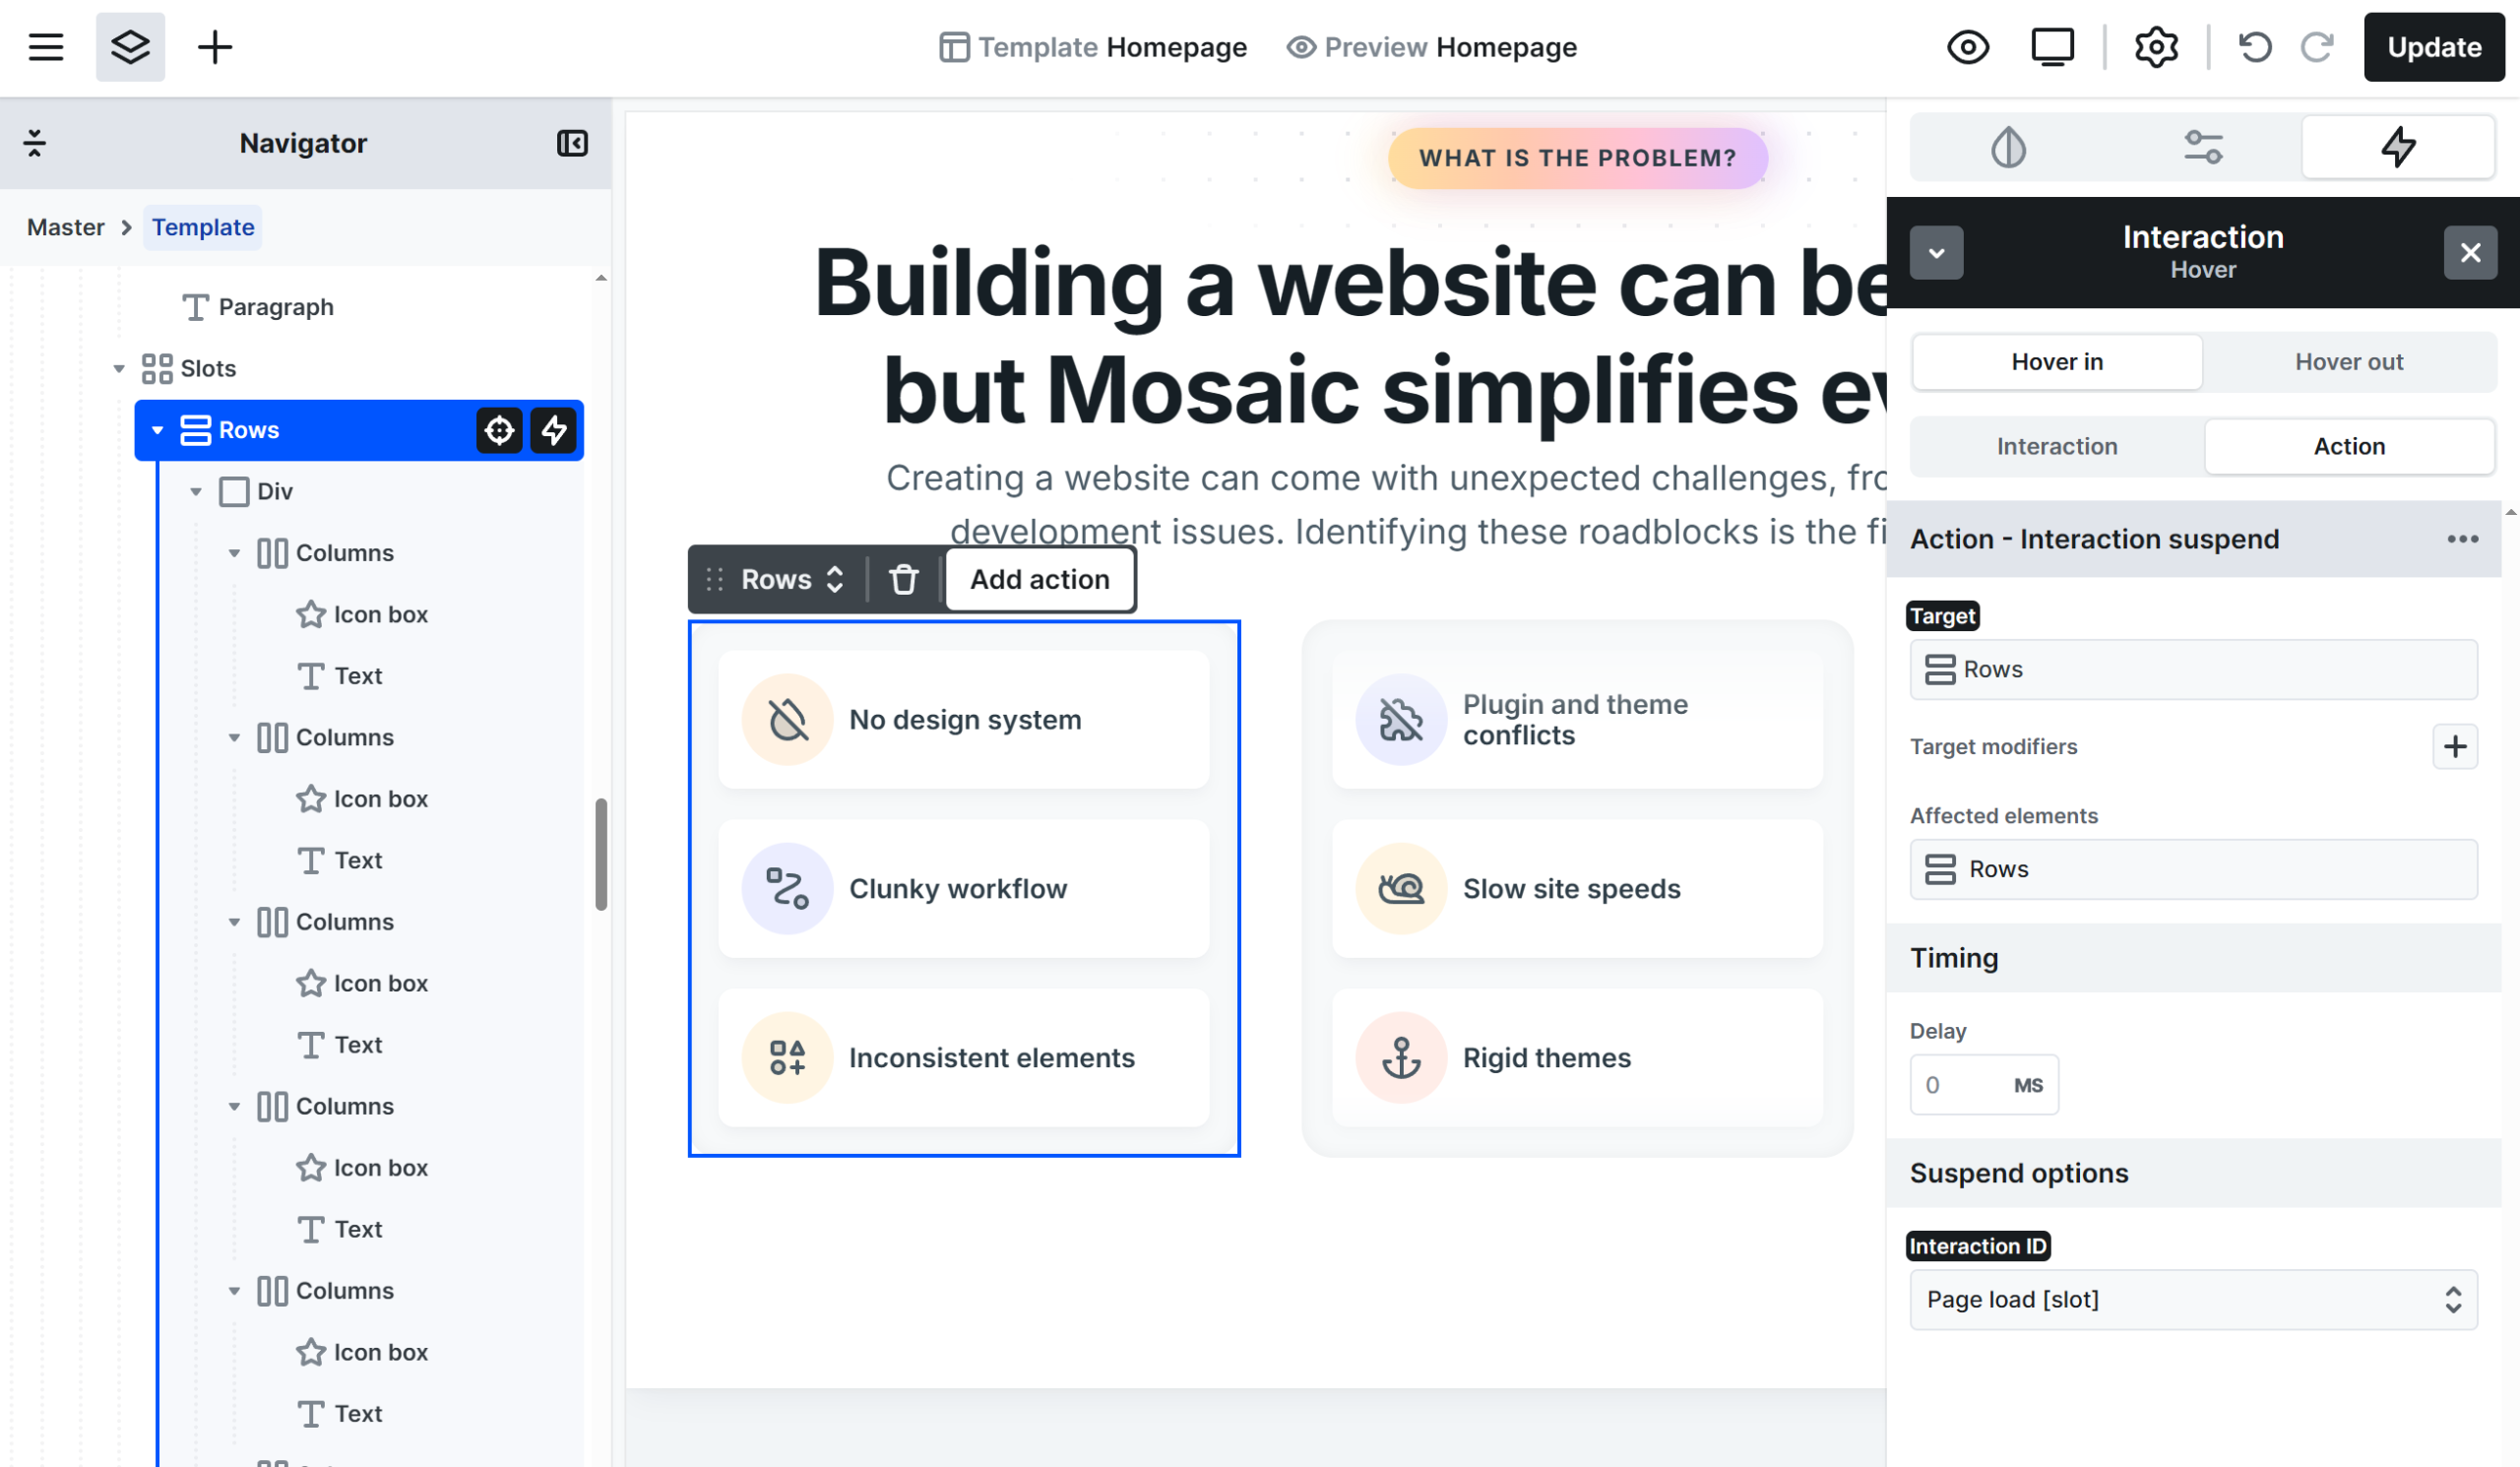
Step 11: Add hover interaction
Still on the Rows element, go back to the Interaction manager-> add a Hover interaction:
Settings:
- Hover in → Action tab:
- Suspend options →
- Interaction ID:
Page load [slot]
- Interaction ID:
- Suspend options →
- Hover out → Action tab:
- Resume options →
- Interaction ID:
Page load [slot]
- Interaction ID:
- Resume options →