The Email action sends a notification email each time the form is submitted. It is addressed to your site’s admin address by default, with a default subject, so the main thing you set up is the message you want to send.
Settings
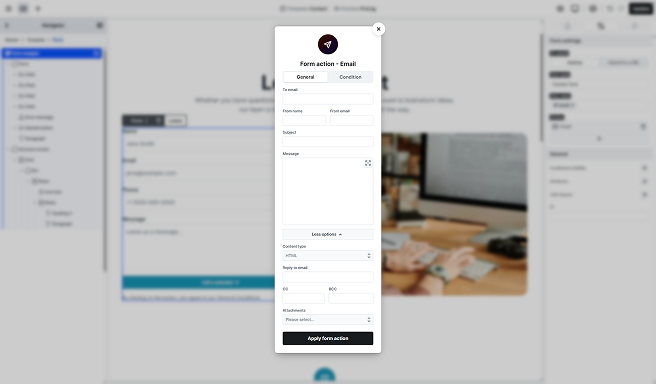
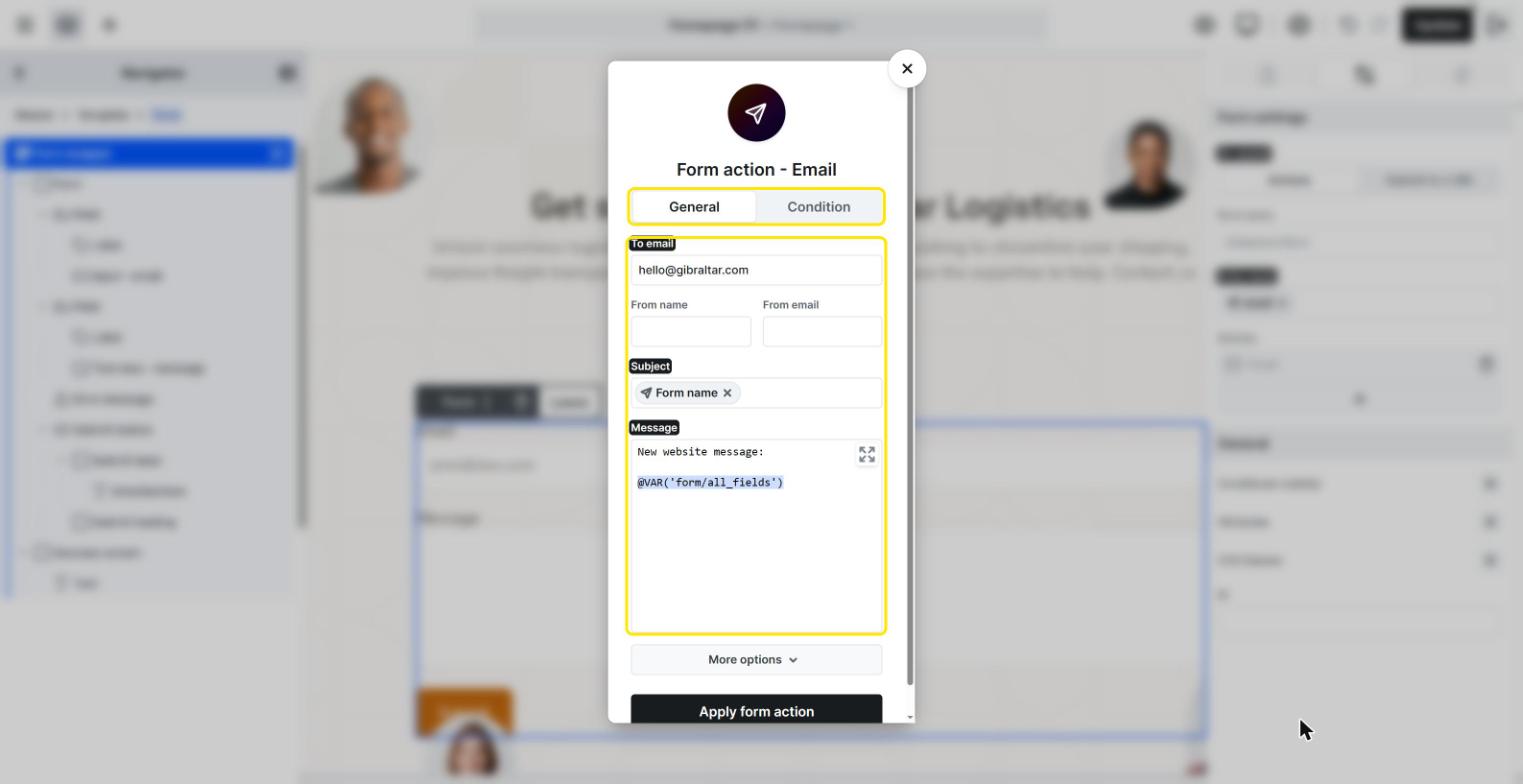
- To email: who receives the email. Defaults to your site’s admin address. You can send to several recipients by separating them with commas, and each entry can be a plain address or include a name, like Roland <roland@example.com>.
- From name: the name shown next to the From address. It only applies when you also set a From email; if you leave From email empty, WordPress’s own default sender and name are used instead.
- From email: the sender address. Leave it empty to use WordPress’s own default sender, which is usually the most reliable choice for delivery.
- Subject: the email subject line. Defaults to “New form submission on” followed by your site’s name.
- Message: the body of the email. It starts empty, so you write it with your own text and dynamic variables, for example the All fields variable to include everything the visitor submitted. See Filling actions with dynamic variables.
Select More options for the rest:
- Content type: whether the message is sent as HTML (so formatting and links display) or plain text. The default is HTML.
- Reply to email: the address a reply goes to. A common setup is to insert the visitor’s own email field here, so you can reply straight to them.
- CC and BCC: extra recipients, in the same format as To email.
- Attachments: attach the files from one or more File upload fields to the email. Only file fields appear in this list.
Setting up form emails
This guide walks you through setting up your form to email you every time someone submits it, one step at a time. By the end you’ll have a working contact form that sends a notification to your inbox, plus a short troubleshooting section in case an email doesn’t arrive.
Step 1: Add a Form element
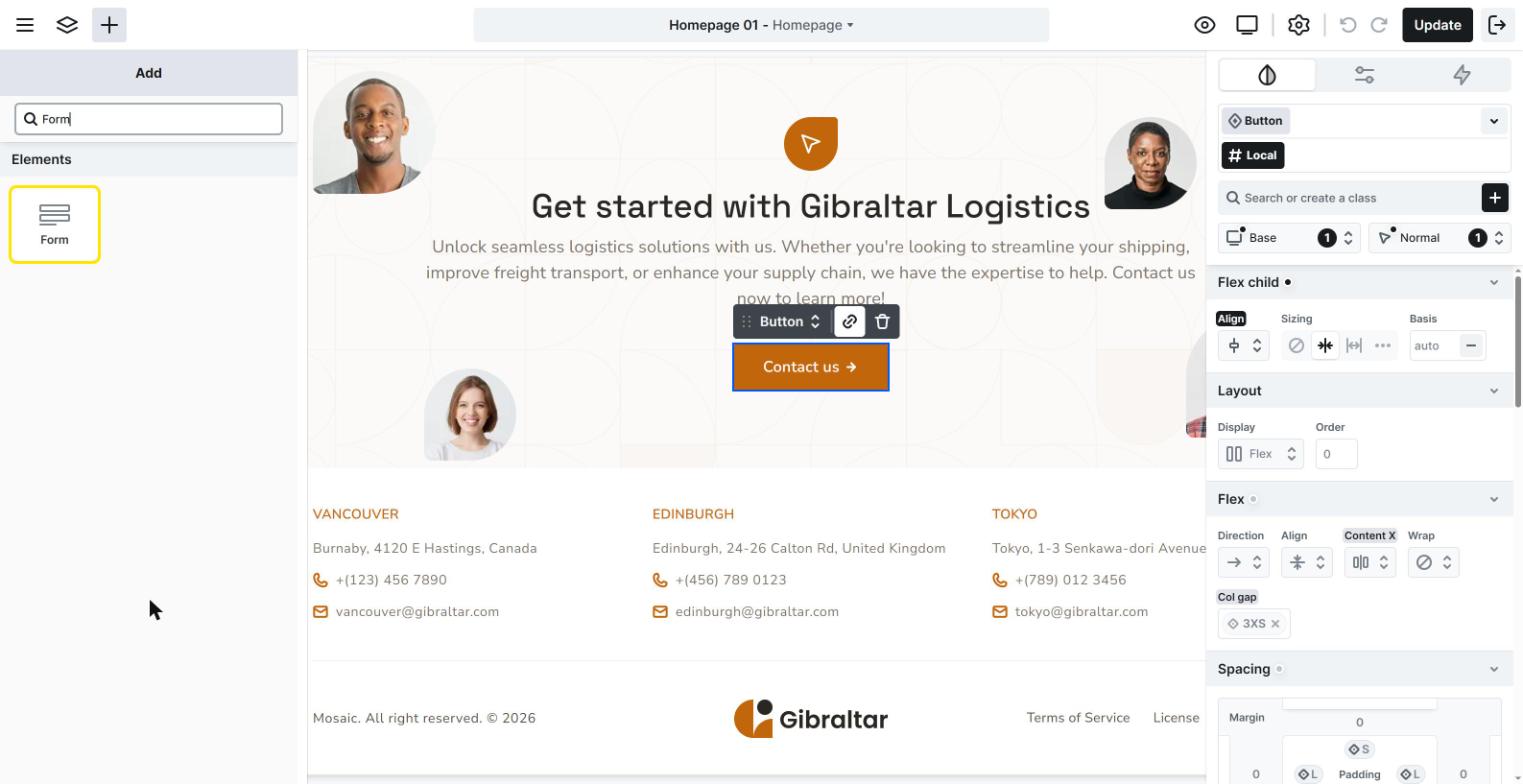
In the editor, add a Form element to your page the same way you add any other element. Mosaic drops in a ready-to-use contact form with an email field, a message field, and a submit button, so you have something working straight away. Add, remove, or rename fields until the form collects exactly what you need.
Step 2: Open the form’s actions
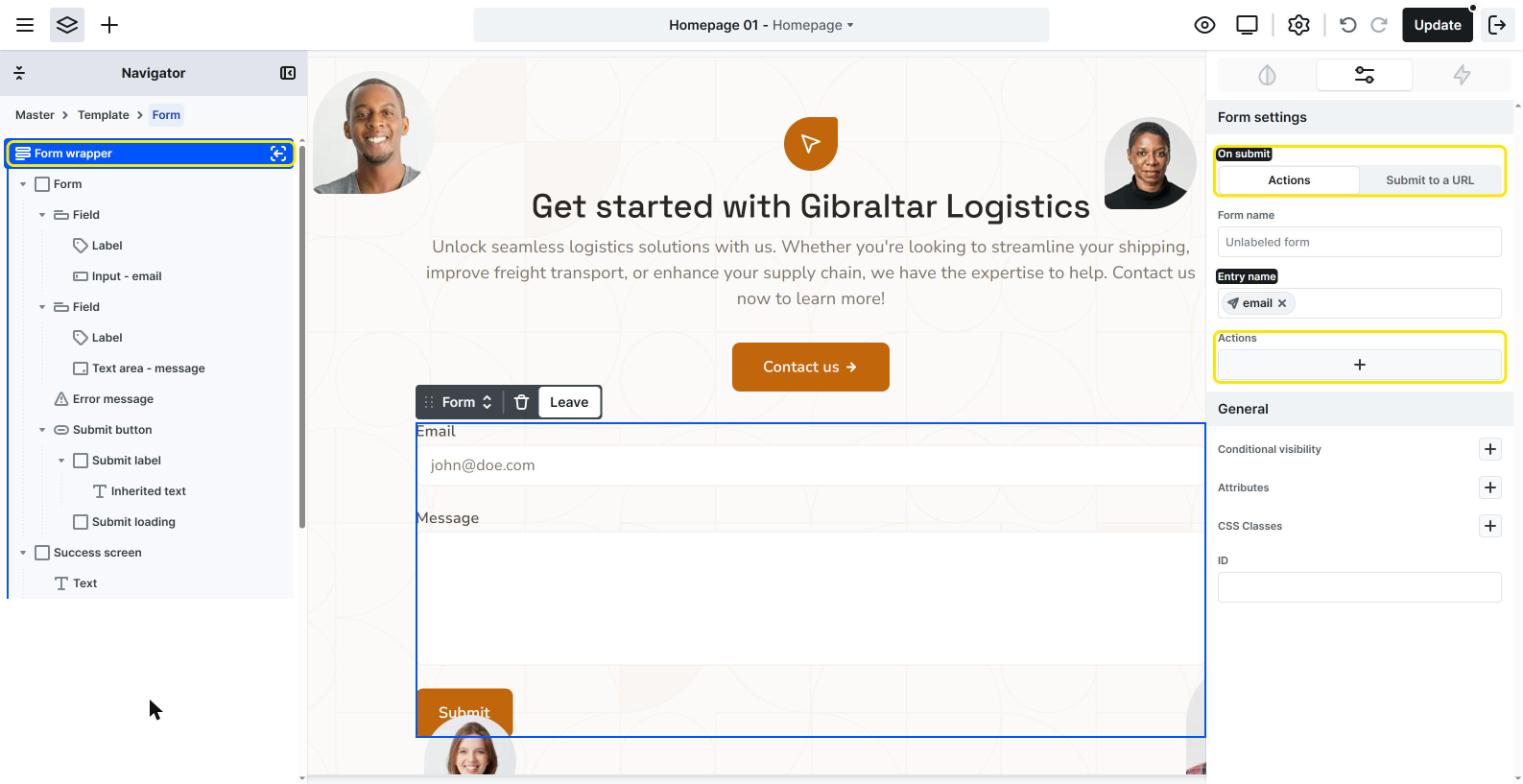
Select the Form wrapper in the Navigator to open its settings. Under On submit, make sure Actions is selected (this is the default). Actions are the things your form does when a submission succeeds.
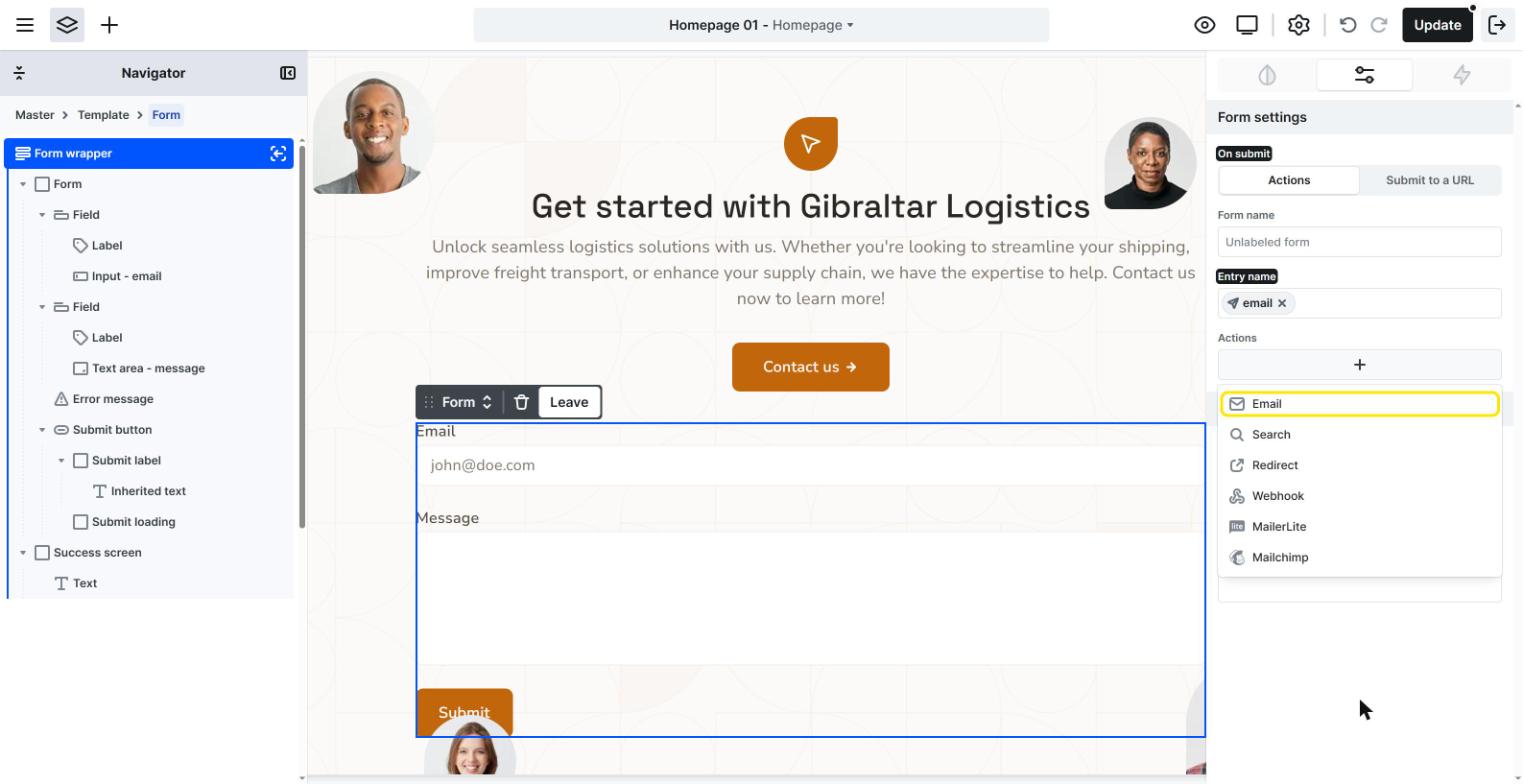
Under Actions, press the + button to add a new action, and choose Email from the list of action types:
The Email action opens in its own window with two tabs: General (the settings you fill in Steps 3 to 7) and Condition (optional, covered in Step 8).
Step 3: Set who receives the email (To email)
In To email, enter the address that should receive the notification. This defaults to your site’s admin address, so you can leave it as is or change it.
- To send to more than one person, separate the addresses with commas.
- Each entry can be a plain address (
you@example.com) or include a name (John Doe <johndoe@example.com>).
Step 4: Set the sender (From name and From email)
- From email: the safest choice is to leave this empty, so WordPress uses its own default sender. This is usually the most reliable option for delivery. If you do set an address, use one on your own domain, because mail providers reject email that claims to come from a domain that isn’t yours.
- From name: the name shown next to the sender. It only applies when you’ve also set a From email; if From email is empty, WordPress’s default name is used.
Step 5: Write the subject
In Subject, enter the subject line for the email. If you leave it empty, Mosaic uses “New form submission on” followed by your site’s name.
You can make the subject dynamic, for example by inserting the form name so you can tell at a glance which form was submitted.
Step 6: Write the message
In Message, write the body of the email. It starts empty, so this is where you decide what the notification says.
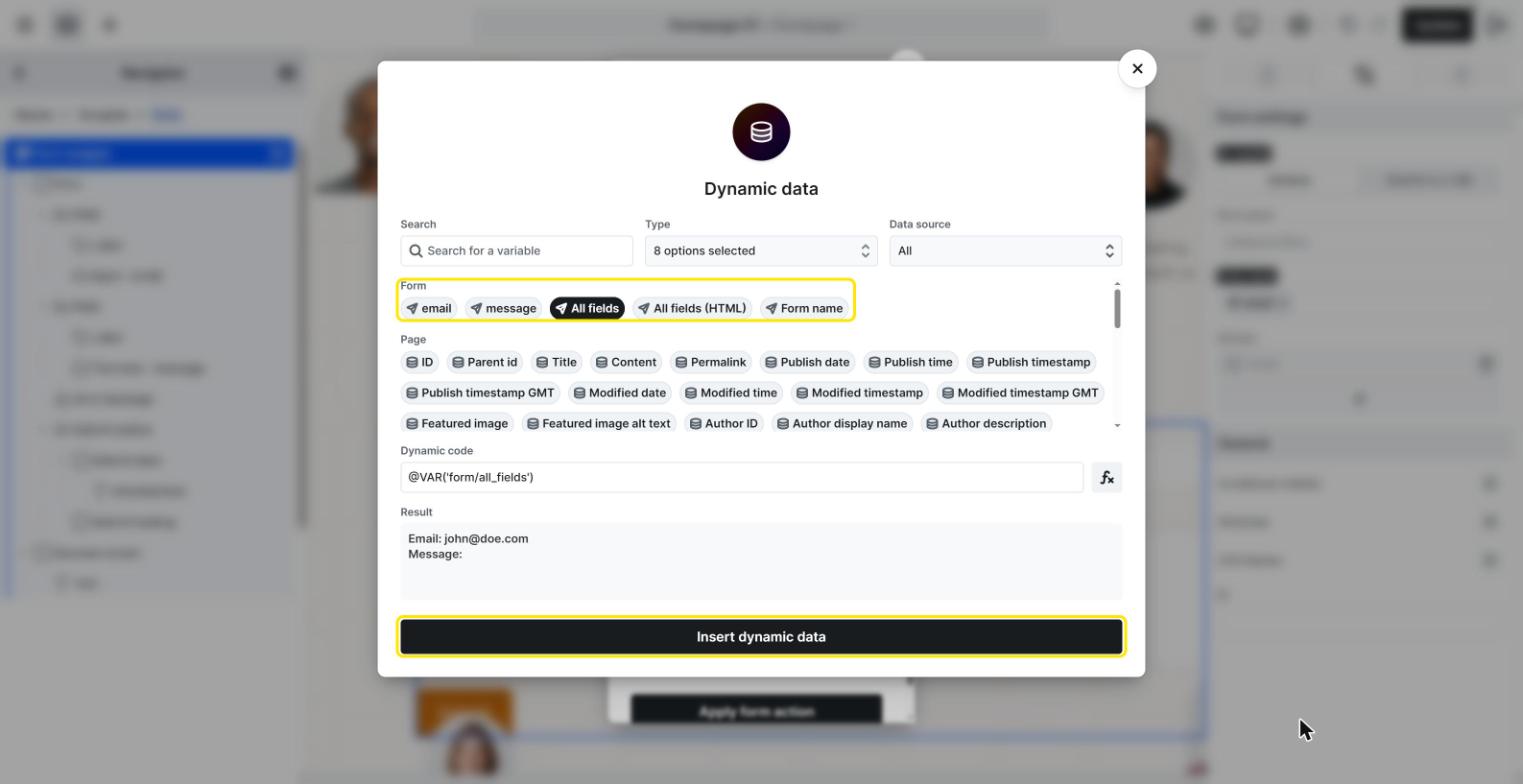
Use dynamic variables to include what the visitor actually submitted. Open the variable picker on the field and insert:
- Individual field values, referenced by field name.
- The All fields variable, which outputs every submitted field as a readable list, handy for including the whole submission at once.
- The form name, request details (such as the visitor’s IP or the page the form was on), and more.
To open the picker, click into the field and select the database icon that appears above it. Choose a variable, then select Insert dynamic data:
Anything a visitor typed is inserted as plain text, so submitted HTML or scripts show up as text rather than running. Your notifications are safe by default.
Step 7: Set the extra options (optional)
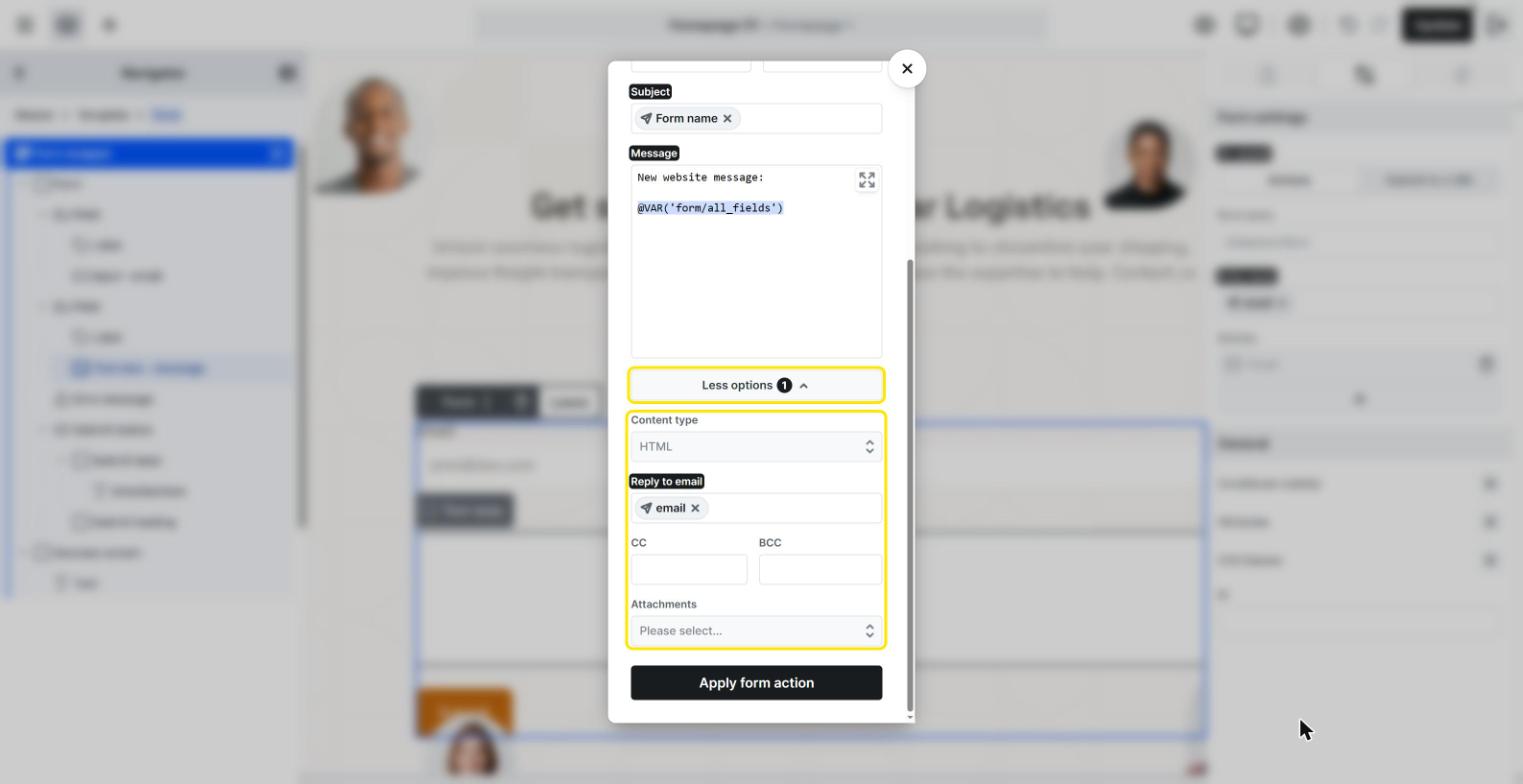
Select More options for the rest of the settings:
- Content type: send the message as HTML (the default, so links and formatting display) or Plain text.
- Reply to email: set this to the visitor’s email field so you can reply straight back to them.
- CC and BCC: extra recipients, in the same format as To email.
- Attachments: attach the files from one or more File upload fields to the email. Only file fields appear here.
Step 8: Add a condition (optional)
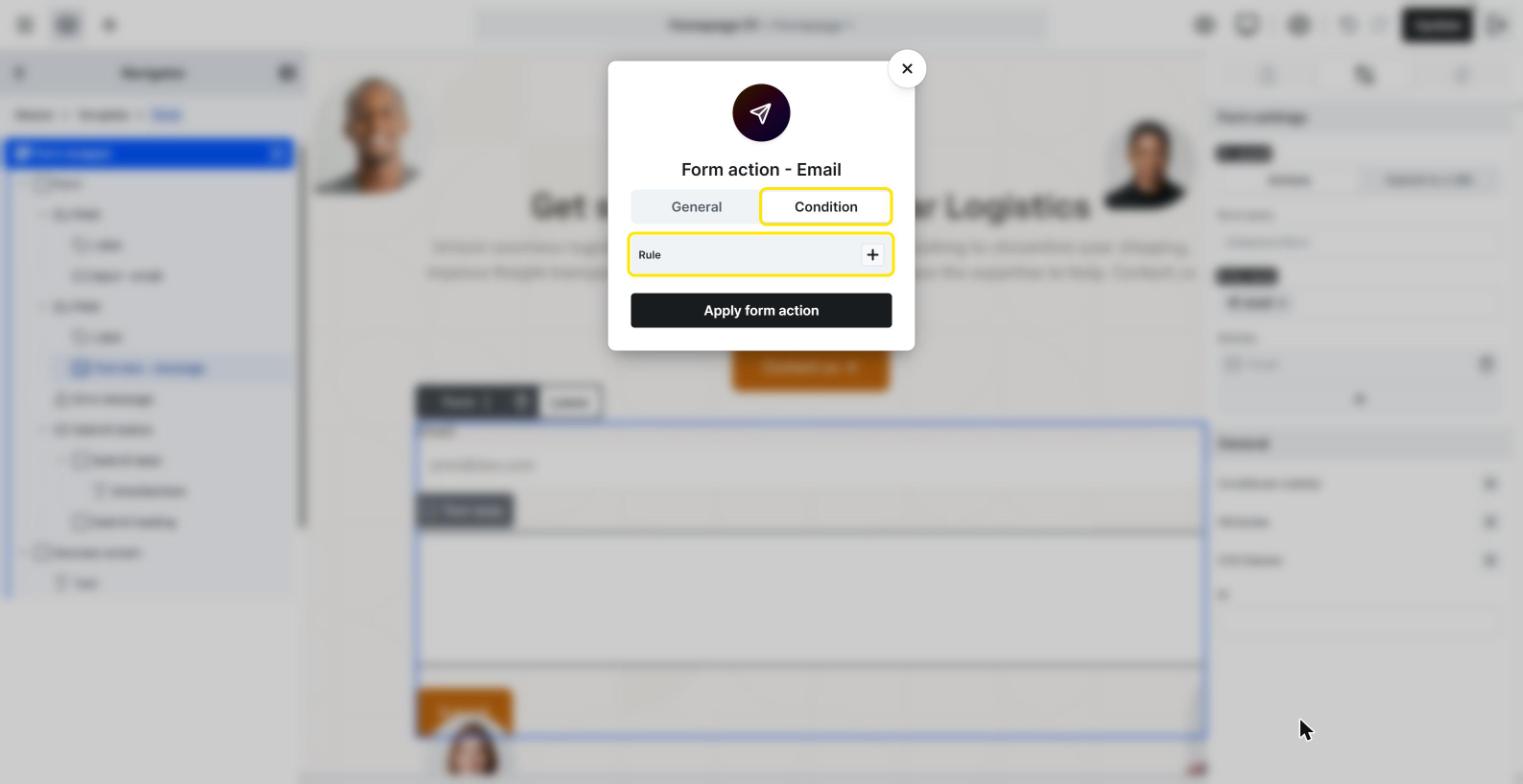
Switch to the Condition tab if you only want this email to send in certain cases, for example only when a checkbox is ticked or a particular option is chosen. Press the + button next to Rule to add one. Leave it empty and the action always runs. See Running an action only when a condition matches for the details.
Step 9: Save the action
Select Apply form action to save it. The action now appears in the Actions list of the form:
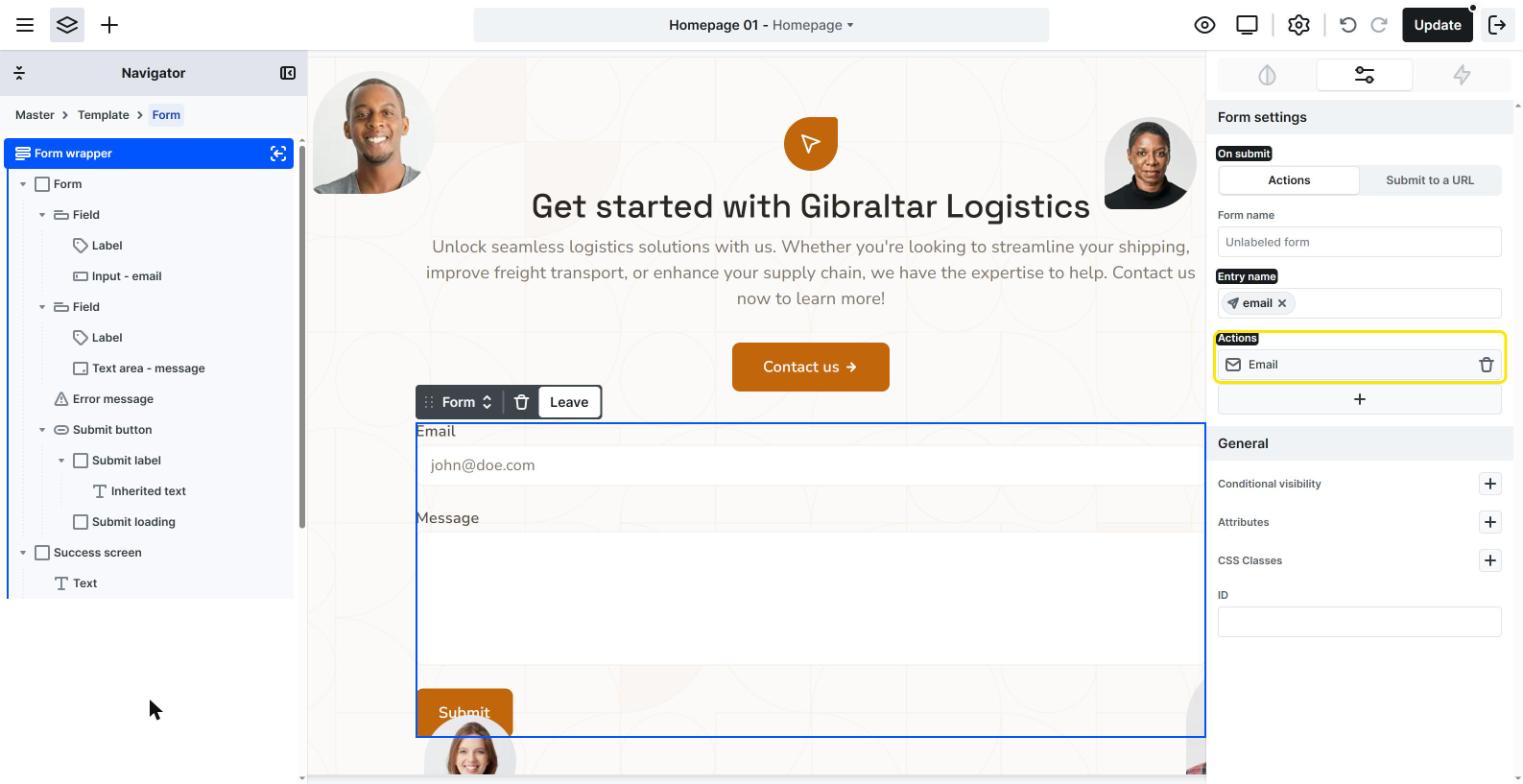
You can add more actions if you like, such as a Redirect to a thank-you page, and they run in the order they appear in your list.
Step 10: Set up an SMTP plugin so your emails deliver
Mosaic hands the email to WordPress, which sends it using your hosting’s mail setup. On many hosts, mail sent this way is unreliable: it can land in spam or not send at all. To make sure your form emails actually arrive, set up an SMTP plugin. You only do this once, and it fixes email for your whole site.
- Install a free SMTP plugin, such as WP Mail SMTP or FluentSMTP.
- Start the setup wizard. After activating, the plugin offers to walk you through the setup. Click the button to start it and follow the screens.
- Pick a mail service when it asks. The wizard shows a list of services it can send your mail through, such as Brevo, SendGrid, or Mailgun. If you’re not sure which to choose, Brevo is a good, beginner-friendly option. Pick one and click Continue.
- Connect your account. The wizard tells you exactly what to copy from the service (usually one key) and shows you where to paste it. Just follow its instructions on screen.
- Let the wizard finish. It may ask you to add a couple of settings to your website’s domain so mail providers trust your emails. The service shows you what these are. If this part looks technical, don’t worry: send those details to your hosting company and ask them to add them for you. It takes them a few minutes.
- Send a test email. The plugin has a Send a Test Email button. Send one to yourself, and when it arrives, you’re all set.
Step 11: Test your form
Open your published page, fill in the form, and submit it. You should see the success screen, and the notification should arrive in the inbox you set in Step 3. Your submission is also saved under Form submissions in the WordPress admin.
Test on the front end of your site, not in the editor. In the editor’s Preview, the form checks its fields and shows the success screen, but it doesn’t actually submit: no email is sent and nothing is saved in Form submissions. To test for real, open the published page in your browser.
Troubleshooting
If your form submits successfully but the email doesn’t arrive, work through these checks. In almost every case the form is fine and the issue is with how your site sends mail.
Is your submission being saved?
Check Form submissions in the WordPress admin. If your test submission is listed there, the form captured everything correctly and the only thing that failed is the email delivery. That points to your site’s mail setup, not the form.
Does your site send any email at all?
Trigger a password reset for your own account: on your login page, choose Lost your password? and enter your admin email.
- The reset email doesn’t arrive (check spam too): your site isn’t sending mail at all. This is a hosting issue. Set up an SMTP plugin (Step 10) to fix it.
- The reset email arrives but form emails don’t: your site can send mail, so check the Email action’s settings.
Common causes
- No SMTP plugin set up. This is the most common cause. Many hosts don’t send WordPress mail reliably on their own, which is why messages arrive only sometimes, or not at all. Setting up an SMTP plugin (Step 10) resolves this for the whole site.
- The email is in spam. Always check your spam or junk folder before assuming it was lost. An SMTP plugin with authenticated DNS records (SPF and DKIM) is what stops this.
- The From email is on a domain you don’t control. If you set a From address on a free provider (like a Gmail address) or a domain your SMTP setup isn’t authorized to send from, receiving servers reject it. Leave From email empty, or use an address on your own domain.
- No valid recipient. Make sure the To email in the action is a real address. If it was cleared, or filled from a dynamic variable that came back empty, the email has nowhere to go.
Retrying a failed email
Because each submission is saved before the email is sent, nothing is lost while you fix delivery. Once your mail is working, open Form submissions, find any submission flagged as not fully completed, and retry the email action. It re-sends using the same details it had at submission time.